Transform Your Home: 3 DIY Organization Projects for a Clutter-Free Space
Do you dream of a home that radiates peace, where everything has its place, and you don’t have to sift through mountains of clutter to find what you’re looking for? In the hustle of modern life, disorganization can silently creep into every corner, impacting not only how your house looks but also how you feel. That pile of things that accumulates doesn’t just take up space; it steals your energy, mental clarity, and the sense of calm we all crave.
This weekend, we invite you to take on a challenge that’s more of an invitation to happiness: dedicating a couple of days to transforming your home, not just with superficial cleaning, but by tackling the root of the problem with DIY organization projects that will leave you smiling from ear to ear. There’s magic in creating personalized solutions that not only declutter your space but also tell your story and fit your life perfectly. Forget complicated tools or spending a fortune; many of these projects can be done with items you already have at home or with highly affordable materials.
We’ve carefully selected three impactful DIY projects designed for those critical areas where clutter often thrives. Each idea focuses on ease of execution, the instant change you’ll notice, and the satisfaction of having created something functional and beautiful with your own hands. Get ready to turn your house into the serene, practical, and beautiful sanctuary you desire!
-
1. Optimize Your Pantry or Cabinets with Adjustable Shelving
Difficulty: Beginner | Timeframe: Quick Win (Half a day to a full day)
The kitchen, a hub of culinary magic, often becomes a magnet for chaos. Food, utensils, small appliances, and dishes compete for space in cabinets and pantries. An adjustable shelf organizer is a fantastic DIY solution to maximize every vertical and horizontal inch, transforming a “bottomless pit” into an organized paradise.
Most cabinets have fixed shelves that don’t adapt to what we store, leaving huge gaps above cans, spices, or cups, while the front overflows. With an adjustable organizer, you can eliminate wasted space by creating extra levels or dividing sections so everything fits perfectly. This is a quick win that can significantly improve daily kitchen flow.
Real-World Application:
Imagine your spice rack no longer a jumbled mess, or your canned goods neatly stacked with easy visibility. This project is ideal for narrow gaps or deep cabinets that currently waste vertical space, making it easy to access items and preventing things from getting lost in the back.
Benefits & Outcome:
An adjustable shelf organizer not only gives you more space but also allows you to see everything at a glance, reduces the time spent searching, and provides a sense of calm every time you open your pantry. It’s a small change with a giant impact on your kitchen efficiency.
Materials You’ll Need:
- Plywood or MDF boards (6 to 12 mm thick, depending on weight)
- Hand or electric saw
- Medium and fine-grit sandpaper
- Drill and bits (if using screws)
- Small screws or wood glue (for assembly)
- Paint or varnish (optional, for aesthetics and protection)
- Tape measure and pencil
- Carpenter’s square (for straight cuts)
Practical Implementation Steps:
- Measure Precisely: Empty the cabinet completely. Measure the width, depth, and height with precision. Consider what you’ll store to determine the ideal size for your new shelves.
- Sketch Your Design: Draw a simple diagram. Do you want stackable shelves, inverted “U” shapes, or shelves with legs? For versatility, think of a modular design that allows you to move or stack pieces as needed.
- Cut the Boards: Cut the boards according to your measurements and design, ensuring cuts are straight. If making legs, cut four identical pieces. If an “U”, cut one top board and two side pieces of the same height.
- Sand Smooth: Sand all surfaces and edges to remove splinters and ensure a smooth finish for safety and aesthetics.
- Assemble (if your design requires it):
- Shelves with Legs: Join the legs to the top board with small screws (pre-drill to prevent wood splitting!) or strong glue. Ensure legs are centered for stability.
- “U” Shaped Shelves: Secure the side boards to the top board.
- Finishing Touch (Optional): Paint or varnish your organizers. This protects them from moisture and enhances their look. Let dry completely.
- Organize and Enjoy: Once dry, place your new organizers in the cabinet. Redistribute your items logically: daily-use items at the front, taller items at the back or on higher levels, and similar items grouped together.
Considerations & Tips:
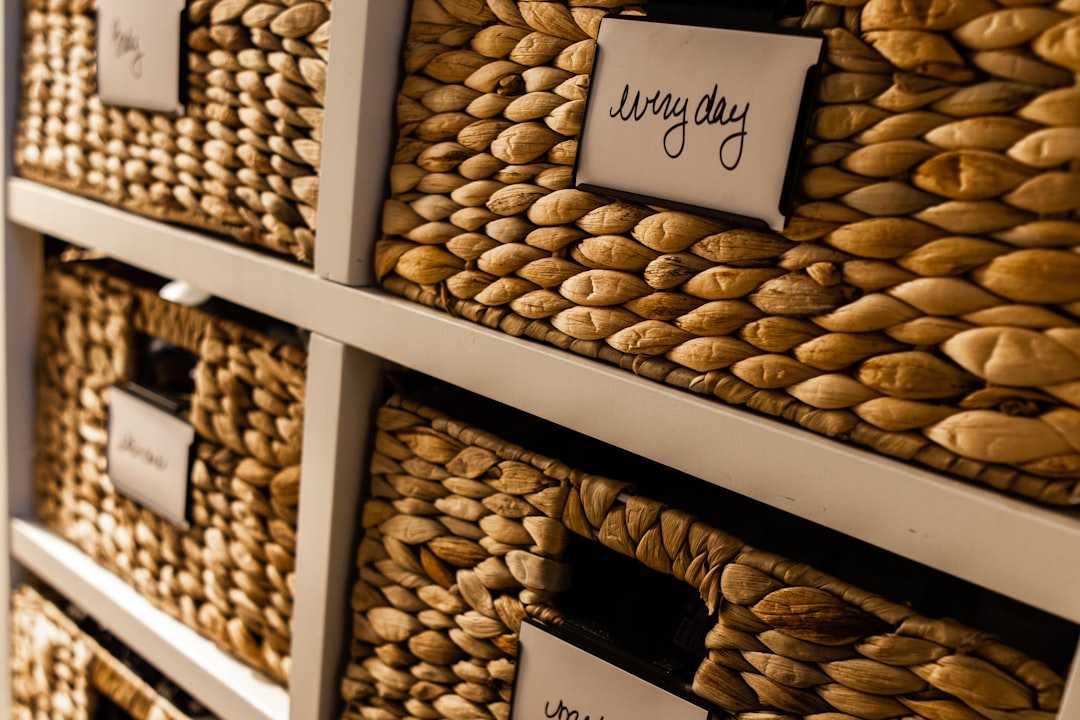
Think practically about placement; put frequently used items where they are easiest to grab. Labeling shelves or containers can be a game-changer for quick retrieval. Consider reusing old cutting boards or sturdy boxes as temporary bases if you prefer not to cut wood.
-
2. Implement Reusable Drawer Dividers for Clutter Control
Difficulty: Beginner | Timeframe: Quick Win (1-2 hours per drawer)
Drawers, often seen as magical storage solutions, quickly turn into “black holes” where everything piles up, gets tangled, and disappears. Whether it’s the sock drawer, the pen drawer, or the notorious “junk drawer,” a lack of divisions is the enemy. DIY drawer dividers are the key to transforming this chaos into an order you’ll love, customized to precisely what you need to store.
Without dividers, items inside a drawer move freely, mixing and creating an incomprehensible mess. This is particularly problematic for small items: unmatched socks, tangled underwear, intertwined jewelry, or lost pens. Dividers stop this migration, keeping everything in its designated spot, making this a quick and satisfying win for any cluttered drawer.
Real-World Application:
Transform your dresser drawers from a jumble of clothes into neat compartments for underwear, socks, or accessories. In your desk, separate pens from paper clips and notepads. Even the infamous “miscellaneous” drawer can become functional with tailored sections.
Benefits & Outcome:
Drawer dividers are a complete game-changer for organization! They eliminate the frustration of searching for items, maximize every inch of space, and extend the life of your belongings by keeping them untangled and protected. An organized drawer is the first step towards a more organized mind.
Materials You’ll Need:
- Rigid cardboard or foam board (lightweight, easy to cut). For robustness, thin wood or MDF sheets.
- Utility knife or sturdy scissors
- Ruler or tape measure and pencil
- Strong glue or double-sided tape (optional, for securing dividers)
- Decorative paper, fabric, or paint (optional, for aesthetics)
Practical Implementation Steps:
- Empty and Clean: Remove everything from the drawer and clean it thoroughly to ensure a perfect base for measuring.
- Measure the Drawer: Measure the length, width, and depth of the drawer’s interior.
- Classify Your Items: Group everything you plan to store. This helps determine how many compartments you need and their ideal sizes. For example, in an underwear drawer, plan spaces for briefs, bras, socks.
- Design Your Pattern: Sketch a layout for how you’d like to divide the drawer. A simple grid? Or something more complex with varying compartment sizes? Decide on the height of the dividers; ideally, they should be slightly shorter than the drawer’s depth for easy access.
- Cut Base Strips: Cut strips from your chosen material. You’ll need some for the drawer’s length and some for its width. The height of these strips will be the height of your dividers.
- Example: If your drawer is 40 cm long and 30 cm wide, and you want 8 cm high dividers: Cut strips of 40 cm x 8 cm and strips of 30 cm x 8 cm.
- The Slot Trick: This is the secret to a perfect fit.
- On the strips that will run widthwise (the shorter ones), mark and cut slots precisely halfway up their height (e.g., 4 cm if the strip is 8 cm high). These slots should be the width of your material.
- On the strips that will run lengthwise (the longer ones), make similar slots where you want the dividers to intersect.
- Important: Ensure the slots on one set of strips go from the top down, and on the other, from the bottom up, so they can slide and interlock.
- Assemble: Slide the slots of the horizontal strips into the slots of the vertical ones until they interlock. You’ll see a grid form!
- Add Personal Touch (Optional): If using cardboard or MDF, you can paint or cover the dividers with decorative paper or fabric.
- Place and Organize: Insert the assembled structure into the drawer, ensuring it fits snugly. Then, place your classified items into each compartment.
Considerations & Tips:
Precision is key for a perfect fit. If this is your first time, start with a basic grid design. Don’t hesitate to adjust compartment sizes as needed. If dividers are too tall and the drawer doesn’t close, simply trim them a bit.
-
3. Create a Vertical Wall Organizer for Supplies
Difficulty: Intermediate | Timeframe: Weekend Project
In modern homes, where every square meter is precious, walls are hidden treasures for storage and organization! A DIY vertical wall organizer is a brilliant idea to free up tables and countertops, keeping frequently used items handy—from craft supplies to entryway essentials.
Tables, countertops, and desks quickly fill up with items that lack a fixed home. Craft materials, small tools, keys, wallets, notes—this not only creates visual chaos but also hinders cleaning and productivity. A wall organizer clears these surfaces, displaying your items and making them accessible without taking up any floor space. This is a solid weekend project that offers long-term organizational benefits.
Real-World Application:
Perfect for a craft room to hold paints, brushes, and tools; a workshop for small hand tools; or even an entryway to manage keys, mail, and sunglasses. Its versatility makes it adaptable to almost any room needing decluttering and vertical storage.
Benefits & Outcome:
This wall organizer is a true space-saver. It not only clears surfaces and makes your items easy to find but can also become a functional decorative piece! It adds character and personality to your home. It’s a brilliant solution to transform clutter into an organized, efficient display.
Materials You’ll Need:
- Plywood or MDF board (the base, e.g., 60×90 cm, adjust to your space). Recycled pallet wood, an old door, or even pegboard can also work.
- Thin wooden slats or moldings (for compartments or hook supports)
- Small nails, screws, or construction adhesive (for joining slats to the base)
- Drill and bits (if using screws or for hanging holes)
- Hammer (for nails)
- Sandpaper, paint, or varnish (optional, for a beautiful finish)
- Tape measure, level, pencil
- Wall hanging supports (D-rings, keyhole system, or screws directly into wall studs)
- Small containers, glass jars, or recycled cups (optional, for small items)
Practical Implementation Steps:
- Choose Location and Measure: Decide where you want your organizer (entryway, workshop, studio, kitchen). Measure the available space and the ideal size for your baseboard.
- Cut and Prepare Base: Cut your baseboard. Sand the edges. If painting or varnishing, do it now and let dry.
- Design Your Compartments: Consider everything you’ll store. Sketch a layout for your board. You can include:
- Small Shelves: For jars, tape rolls, canisters.
- Hooks: For keys, scissors, light tools, headphones.
- Slots or Pockets: For mail, papers, notebooks.
- Small Cork or Chalkboard: For important notes.
- Cut and Secure Pieces:
- For Shelves: Cut small wood strips for supports (bottom part) and front edges (to prevent items from falling). Attach them to the base with nails or screws. Larger pieces can form open boxes or compartments.
- For Hooks: You can screw hooks directly to the base or to small slats that you then attach to the base.
- For Slots/Pockets: Create a simple pocket with an “L”-shaped piece of wood or use sturdy fabric secured with decorative nails.
- Add Extras (Optional): Install a corkboard for notes, a small chalkboard for reminders, or small containers you can screw on.
- Prepare for Hanging: Screw wall hanging supports to the back of your organizer. Ensure they are level and robust.
- Mount to Wall: Mark the wall where you’ll hang it. Use a level for perfect alignment. Drill if necessary and install appropriate screws or anchors. Hang your masterpiece!
- Organize Your Items: Once installed, place your tools, materials, keys, mail, and other items in their new homes.
Considerations & Tips:
Personalize it to the maximum, adapting compartment sizes to what you actually use. Prioritize safety by ensuring everything is securely fastened and can support the weight. Choose colors and finishes that complement your room’s decor. This project offers long-term benefits by maintaining order and efficiency in high-traffic or supply-heavy areas.

Conclusion
Taking on these DIY home organization projects is more than just an opportunity to make your spaces look nicer; it’s an invitation to transform your relationship with your environment! By building your own storage solutions, you gain not only a more organized home but also a profound sense of empowerment and connection with your space. You’ve taken control, invested your creativity and time, and the result is an environment that exudes order, functionality, and renewed calm.
From strategically optimizing your pantry to methodically compartmentalizing your drawers, and efficiently utilizing your wall space, each project is a conscious step towards a more serene and efficient home. These aren’t just “cleaning tricks,” but true structural improvements that solve common and recurrent clutter problems. The organization you’ve created will help you maintain a clearer mind and a less stressful life. Your home will thank you, and so will you!