Paint vs. Stain for Wood Projects: The Big Question Every DIYer Asks
Ah, wood! This noble, timeless material connects us with nature, serving as the heart of countless DIY projects. Once your special piece has taken shape, a crucial decision awaits that will define its look and longevity: do you paint it or stain it?
This isn’t a minor choice; it’s about selecting the right finish for your specific project. Your decision hinges on the type of wood, its intended environment, the level of protection required, and the final aesthetic you envision. This guide will unravel the mystery, providing you with all the tools to make the best decision!

Practical Tips for Flawless Wood Finishing
-
1. Make an Informed Choice: Paint or Stain, Aligning Finish with Your Vision
Your choice between paint and stain fundamentally impacts the final aesthetic and durability of your wood project. Paint acts as a complete disguise, covering the wood’s natural grain and imperfections with a vibrant, protective layer, while stain is like light makeup, enhancing the wood’s inherent beauty by penetrating its fibers and modifying its natural color without hiding the unique grain.
- Example: For a modern, uniform look on a pine bookshelf with visible knots, painting is ideal to conceal imperfections and introduce a bold color. Conversely, for a fine oak dining table, staining allows the rich, distinct grain to shine through, offering a more organic and classic appeal.
- Benefit/Outcome: Selecting the appropriate finish ensures your project achieves your desired aesthetic outcome and functional durability, preventing potential regret or the need for extensive rework.
- Warnings/Considerations: Avoid painting over precious woods like cherry or walnut if their natural beauty is your goal. Conversely, do not rely on stain alone for maximum protection against heavy wear or moisture; it almost always requires a durable clear topcoat.
- Target Audience: Best for beginners and intermediate DIYers embarking on a new wood project, helping them make foundational decisions.
- Difficulty Level: Beginner
- Implementation Timeframe: Quick win (under 1 hour for research and planning before starting the physical work).
-
2. The Foundation of Success: Master Meticulous Surface Preparation
Regardless of whether you choose paint or stain, the success and longevity of your finish hinge on thorough surface preparation. This critical stage, often cited as 80% of the overall success, involves comprehensive cleaning, sanding, and repairing, ensuring the wood is perfectly primed to receive its new finish.
- Example: For any project, begin by cleaning the wood thoroughly to remove dust, grease, and wax. Then, sand diligently in the direction of the grain, progressing from a medium grit (100-120) to a fine grit (180-220, or even 240 for a silky touch), ensuring all sanding marks are eliminated before applying stain. For paint, always use wood putty to fill holes or cracks, and apply a quality primer after sanding to seal the wood and prevent tannin bleed.
- Benefit/Outcome: Proper preparation guarantees optimal adhesion, uniform absorption of stain, and a flawless, durable finish that won’t peel, blotch, or show imperfections, ultimately elevating the professional appearance of your work.
- Warnings/Considerations: Skipping or rushing any preparation step is a recipe for disaster; dust is the enemy of a smooth finish. For stain, any lingering sanding marks will be accentuated. For paint, inadequate priming can lead to poor adhesion or wood tannins bleeding through the topcoat.
- Target Audience: Ideal for all DIY enthusiasts, from beginners learning best practices to intermediates refining their finishing skills.
- Difficulty Level: Intermediate
- Implementation Timeframe: Moderate effort (2-4 hours for most medium-sized projects, but critical to allocate sufficient time).
-
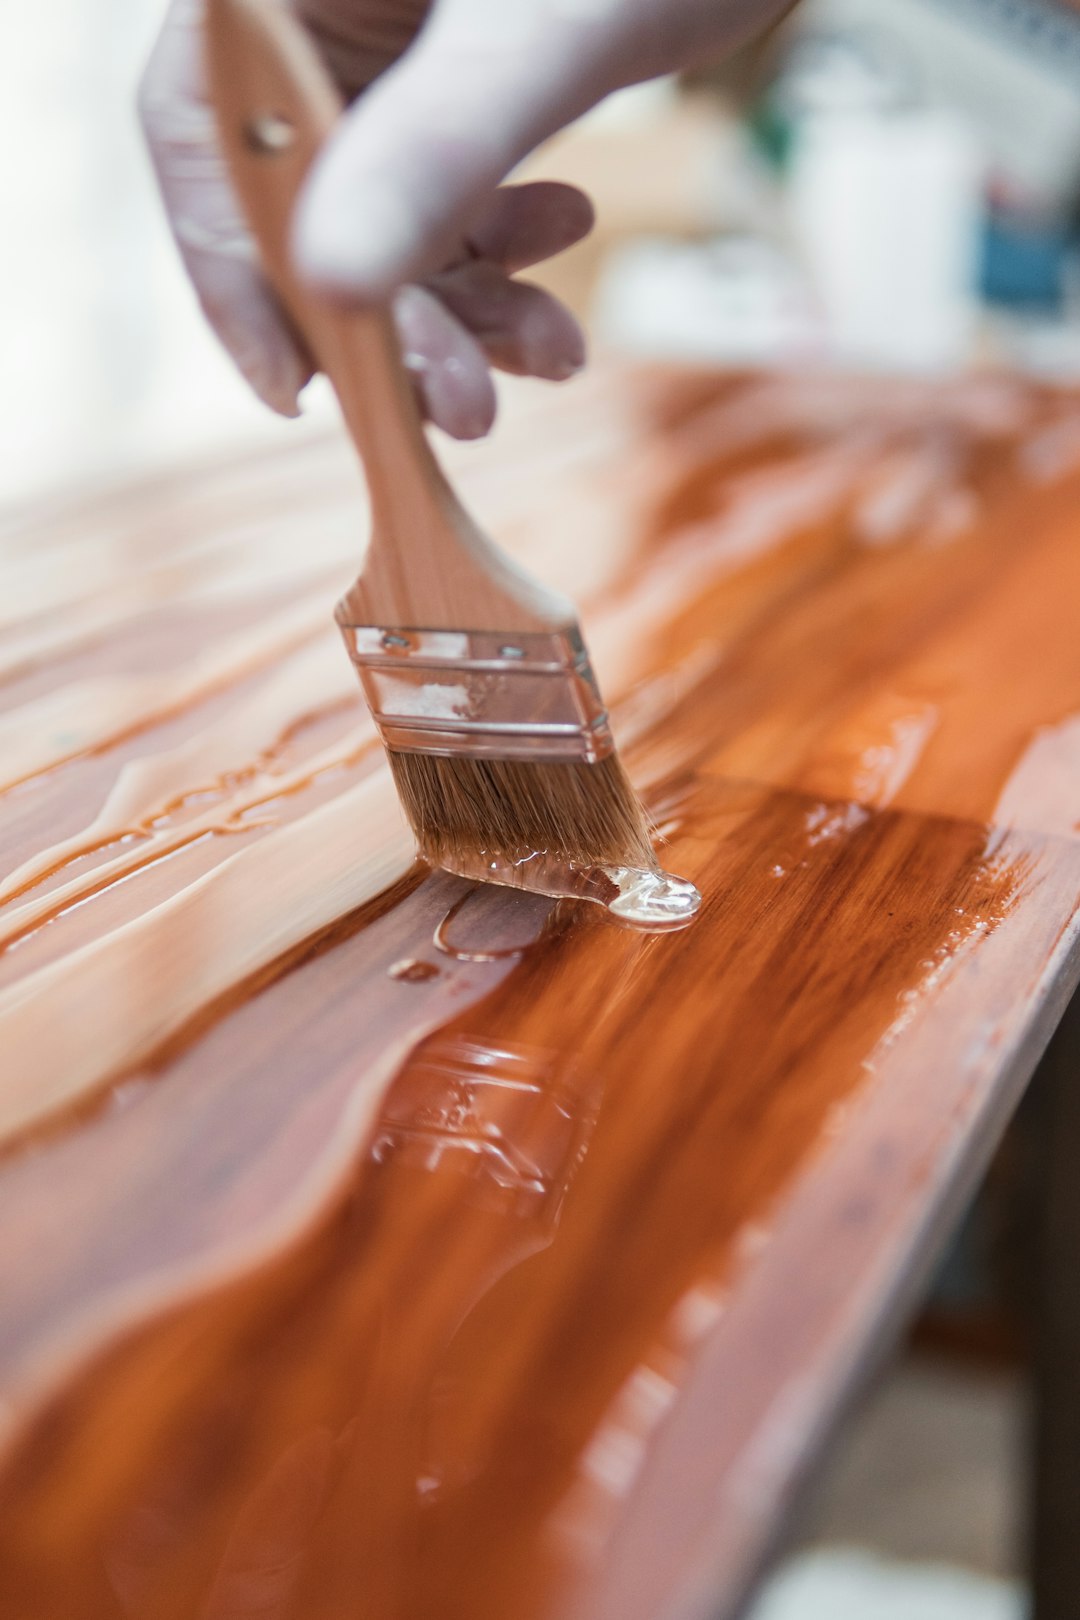
3. Apply with Precision and Protect for Lasting Beauty
Achieving a professional-looking and durable finish requires precise application techniques for your chosen product and a clear understanding of long-term protection. Paint demands uniform, thin layers with gentle sanding between coats, while stain application focuses on even penetration and meticulous excess removal, almost always followed by a robust clear topcoat to act as the true shield against wear and moisture.
- Example: When applying stain to porous woods like pine or maple, use a wood pre-conditioner first to ensure even absorption and prevent blotchiness. Apply stain generously, allow it to penetrate for a few minutes (testing an inconspicuous area for desired intensity), then wipe off all excess with a clean, lint-free cloth. For painted pieces destined for heavy use, like dining tables or exterior furniture, apply multiple thin coats of a high-quality enamel or exterior paint, sanding lightly between coats and allowing adequate cure time.
- Benefit/Outcome: Precise application ensures a smooth, even finish free of streaks, drips, or blotches. Combining this with the right protective topcoat maximizes the project’s resistance to scratches, moisture, and UV damage, significantly extending its lifespan and maintaining its aesthetic appeal.
- Warnings/Considerations: For stain, uneven application or failure to wipe off excess will result in sticky, blotchy patches. For paint, applying coats too thickly will lead to drips and a higher risk of peeling over time. Always allow sufficient drying time between coats and full curing time (days or weeks) before heavy use for maximum durability.
- Target Audience: Best for intermediate woodworkers and DIYers looking to achieve high-quality, long-lasting finishes on their projects.
- Difficulty Level: Intermediate
- Implementation Timeframe: Long-term project (multiple coats and necessary drying/curing times can span several days to weeks, depending on the product and environment).
The choice between painting and staining wood is a journey into transformation, each path offering distinct advantages tailored to different project needs and aesthetic desires. There’s no single “better” option, only the right one for your unique creation. By understanding the core characteristics of paint and stain, dedicating yourself to meticulous surface preparation, and mastering precise application techniques alongside proper protection, you empower yourself to achieve stunning, durable finishes. Embrace the process, test your choices on samples, and enjoy bringing your wooden visions to life with confidence and craftsmanship.