Transform Your Home: Infuse Your Soul with Everyday Materials
Have you ever walked into a house and felt like, in some way, you’ve seen it before? In a world filled with mass-produced items, where sometimes it seems every home follows the same mold, the longing for a space that truly shouts ‘This is me!’, a home that reflects every corner of your personality, your cherished memories, and the soul of those who live in it, feels stronger than ever. Decorating your home is much more than simply placing beautiful furniture; it’s like painting your own canvas, leaving your mark in every nook, creating that personal sanctuary where you truly feel at home. But let’s be honest, searching for those unique, story-filled pieces can often empty our wallets or, worse, leave us with that frustrating feeling of not finding “that” one thing we’re truly looking for. This is where the magic comes in, the magic I promise you’ll love! It’s the art of transforming your home with everyday materials. It’s an ingenious, incredibly affordable, and, I assure you, deeply gratifying solution.
So, get ready, because we’re about to immerse ourselves in a fascinating universe: that of DIY (Do It Yourself) home decor, using those items we sometimes discard without a second thought or simply don’t value in our daily lives. We won’t just discover how to turn these ‘worthless’ objects into eye-catching pieces; we’ll also understand the profound meaning and all the gifts this approach brings to our homes and our lives. Imagine: from helping the planet to sparking your creative genius, you’ll see how your home can transform into a personalized art gallery, full of stories and that unique charm only you can impart—all without spending a fortune! Dust off your imagination, look at your everyday objects with new eyes, and prepare to unleash the artist within.
Why Personalize Every Corner of Your Home with Everyday Items?
It goes beyond just looking pretty, you know? Personalizing your home is a way to enrich your life in a thousand ways, and when you use what you already have lying around, those benefits multiply!
1. Identity Expression: Your Home, Your Canvas
Your home, that’s your second self! Every decision you make when decorating it, no matter how small, loudly proclaims who you are, what you’re passionate about, what stories you’ve lived. When you create something with your own hands, you give your space an authenticity that, I assure you, no store can sell you. Each piece becomes a kind of signature of your creativity, a tangible mirror of your values. Imagine a photo frame decorated with shells you collected on that dream beach, or a cushion made from that shirt with a special story… Suddenly, a simple object transforms into an invaluable treasure, full of memories and feelings.
2. Comfort and Well-being: A Space That Embraces You
Ah, comfort! A home with your personal touch envelops you in an atmosphere of familiarity and warmth that caresses your soul. Those objects you’ve created or transformed with your own hands have a unique energy, a special vibe that embraces you. This space, so uniquely yours and filled with things that represent you, becomes your personal refuge, that place where you truly disconnect, feel at peace, and connected with yourself. It’s not just a house; it’s a place where you can flourish!
3. Sustainability and Awareness: Reuse, Reduce, Recycle
Today, talking about sustainability isn’t a trend; it’s an obligation! And decorating with your own hands using everyday items is a super powerful way to join this eco-friendly movement. Think of all those glass bottles, cans, fabric scraps, or cardboard that would otherwise end up in the trash. By giving them a second life, you not only reduce your carbon footprint but also say ‘no’ to mass production. This gesture isn’t just great for our planet; it also helps you see resources with new eyes and awaken your ingenuity, transforming what for many is ‘old’ into something ‘new’ and full of value.
4. Smart Savings: Luxury Decor Within Everyone’s Reach
Let’s be honest, decor can sometimes be a real headache for our wallets! Those unique ‘designer’ pieces often come with eye-watering prices. But here’s the good news! By personalizing with materials you already have, we completely erase that barrier. With minimal investment, sometimes just the cost of glue or paints, you can create things that not only look incredible but also hold immense sentimental value. It’s like having a secret: achieving that sophisticated style without unbalancing your finances. Because good taste and creativity don’t need a bulging wallet!
5. Sentimental Value: Every Piece Tells a Story
Handmade things are different. Very different! Unlike those soulless factory-produced items, each of your creations has its own story, its own process, its own reason. Imagine a vase made from the bottle of that special wine you celebrated, or a wall collage with concert tickets and old photos… They’re like little time capsules! They awaken memories and emotions every time you see them. These objects fill your home with anecdotes, turning it into an album of experiences you can proudly share and cherish every day.
6. Creative Therapy: The Process of Creation
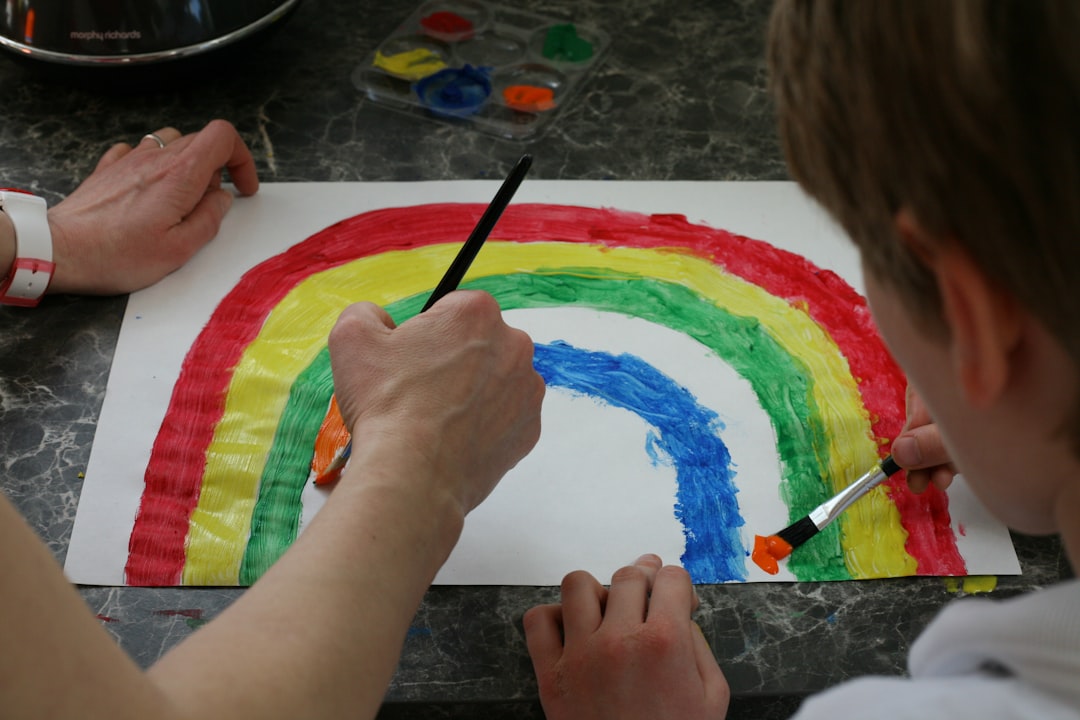
Believe me, creating is one of the best therapies there is. Getting fully immersed in a DIY project, whether painting, cutting, or joining pieces, is a wonderful way to say goodbye to stress, live in the present moment, and put your mind to work. It allows you to disconnect from daily life and reconnect with yourself through artistic expression. And that feeling… that incredible satisfaction of seeing an idea that was only in your head come to life in your own hands, that’s priceless! It goes far beyond the object you end up creating.
Everyday Materials: Your Creative Pantry
The key to personalized decoration is something magical: it’s learning to see the hidden potential in the most ordinary things. Your home, your neighborhood, everything around you is full of ‘treasures’ waiting for you to give them new life!
Categories of Materials and How to Collect Them:
- Paper and Cardboard:
- Useful Sources: Old magazines (those you’ve read a thousand times!), newspapers, catalogs, cereal boxes (yes, those very ones), shipping boxes, toilet paper or kitchen paper rolls, old maps, sheet music, books you no longer use.
- My Advice: Make sure they are clean and dry. Cardboard rolls are great for organizing cables or making small sculptures! And flat cardboard is a perfect base for pictures.
- Textiles and Fabrics:
- Useful Sources: Those old clothes you no longer wear (your torn jeans, favorite t-shirts, shirts, scarves, socks that lost their partner), old sheets and towels with history, scraps from other sewing projects, kitchen rags, old curtains.
- My Advice: Wash everything very well before starting. Separate by type and color. Jeans are super resistant, and cotton t-shirts are soft and easy to handle.
- Glass and Plastic:
- Useful Sources: Wine bottles (cheers!), soda bottles, jam or preserve jars, coffee jars, yogurt containers, detergent bottles, bottle caps, those old CDs/DVDs nobody uses anymore.
- My Advice: Wash them thoroughly and remove all labels. For glass, dry it really well. Plastic bottles, with care and good scissors or a utility knife, can become whatever you want!
- Wood and Branches:
- Useful Sources: Pallets you find around (be careful, these can sometimes be a challenge and need good treatment), wooden fruit crates, branches you find in the park (nature gives you gifts!), wine corks, small pieces of wood from other projects, clothespins.
- My Advice: If you use pallets or crates, sand, sand, and sand to avoid splinters and make sure there are no nails. Branches should be dry and bug-free, please.
- Metals and Hardware Elements:
- Useful Sources: Food cans, aluminum cans (soda), clips, nuts, washers, wire, metal bottle caps.
- My Advice: Wash and dry cans very well so they don’t rust or smell bad. Be careful with sharp edges! Some metals will need a coat of primer for the paint to stick well.
- Natural Elements:
- Useful Sources: Pretty river or beach stones, seashells, pinecones, dried leaves, dried flowers, large seeds, sand, pebbles.
- My Advice: Clean and disinfect them well. You can boil shells and stones for a while to remove any residue. And make sure leaves and flowers are very dry so they don’t get moldy.
- Others:
- Useful Sources: Buttons that fell off, loose zippers, beads, broken necklace beads, wool threads, ropes, container lids, small toys that are no longer used.
- My Advice: Organize these tiny treasures in transparent boxes. That way you’ll have them handy and know what you have.

As you collect, play around a bit: think about the shape, texture, color, and hidden potential of each item. It’s incredible how something that seems ugly can become beautiful with a bit of paint and a new way of looking at it! And remember, safety first: wear gloves, protective eyewear, and use the correct tools, especially if you’re handling things with sharp edges or that might release particles.
Basic Transformation and Embellishment Techniques
Once you have your ‘treasures’ in hand, it’s time to get your hands dirty and let your imagination soar! Mastering these basic techniques will open up a world of creative possibilities—get ready!
1. Painting and Color
Paint, oh, paint! It is, perhaps, the most powerful magic wand we have to transform anything.
- Simple Techniques:
- Brush: Ideal for details, creating lines, or achieving a smooth, perfect finish.
- Sponge: For textured, dotted effects, soft gradients, or a more rustic look.
- Spray: Quick and uniform coverage! Perfect for large or oddly shaped surfaces. Always use it in a well-ventilated area!
- Paint Types You’ll Love:
- Acrylic: The queen of versatility! Dries quickly, is water-based, and works great on wood, cardboard, fabric, glass, and plastic (with a primer first).
- Aerosol Paint: For metal, plastic, wood. Comes in many finishes (matte, glossy, metallic).
- Chalk Paint: Gives you a matte, velvety finish… perfect for that vintage or shabby chic style we love so much! It adheres to almost anything without needing a primer.
- Fabric Paint: If you’re working with fabrics, this is your go-to; it withstands washing!
- Mix and Match!: Don’t be afraid to play with colors. Gradients, contrasts, harmonious combinations… they can completely transform what you’re creating!
- Stenciling: Use stencils to add repeating patterns, letters, or designs. You can buy them or, go for it!, make your own with cardboard.
2. Cutting and Shaping
Shaping your materials is a fundamental step in many projects.
- Basic Tools You’ll Need:
- Scissors: For paper, fabric, thin cardboard.
- Utility Knife (X-Acto): For super-precise cuts in cardboard, plastic, or for making holes! Always use it on a cutting mat and with extreme caution.
- Saw (for wood): With safety first, for cutting pallets, boards, or thicker branches.
- Draw Before You Cut!: Always sketch your designs on the material before using scissors or a utility knife. Use rulers and compasses to ensure everything is straight and precise.
3. Joining and Fixing
The key to making your creations last is how you hold them together.
- Friendly Glues:
- Hot Glue (Hot Glue Gun): Dries in a flash and is great for bonding everything: fabric, wood, plastic, paper. But be careful, it’s not for things that will bear a lot of weight.
- White Glue (PVA): The old reliable. Excellent for paper, cardboard, and wood. Takes a little longer to dry, but once it does, it holds strong!
- Universal/Specialized Glue: For glass, metal, specific plastics. Always read the manufacturer’s instructions to avoid surprises.
- Time to Sew!:
- By Hand: For those small fabric projects, for mending something, or for adding small details.
- By Machine: If you have one, it’s wonderful! You’ll make cushions, curtains, or patchwork blankets in no time.
- Tying and Knotting: Use ropes, threads, or yarn to join things, make decorative knots, or hang your works.
- Nails and Screws: For more robust wooden projects, like side tables.
4. Texturizing and Finishing
These final touches give depth to your creations and protect them.
- Sanding: Smooths rough edges on wood, plastic, or metal. It also prepares the surface for better paint adhesion.
- Decoupage: A beautiful technique! It involves gluing paper cutouts (from magazines, napkins, printouts) onto a surface and sealing everything with varnish or decoupage glue.
- Distressing Effect: To give it that vintage or worn look we love so much. You can achieve this by gently sanding dry paint on the edges, or by applying layers of paint and then letting the bottom layer show through.
- Varnishes and Sealers: These are your best friends for protecting paint and surfaces from moisture, dust, and wear. They come in matte, satin, or glossy finishes. Essential for making your pieces last!
5. Lighting
Adding lights can completely change an object, giving it a magical touch!
- LED Lights: LED strip lights or ‘fairy lights’ are safe, energy-efficient, and super flexible to put in jars, bottles, or around structures.
- Candles: Small candles (tea lights or votives) in recycled holders can create a super cozy atmosphere. But always prioritize fire safety!
With all these basic techniques in your toolkit, most of your everyday materials have the potential to become jaw-dropping decor pieces! The key, as you know, is experimentation and, above all, a lot of patience!
Specific DIY Projects for Every Corner of the Home
Now, let’s see how you can put these ideas into practice in every corner of your home.
1. Living Room: Hub of Togetherness and Style
Your living room, that’s the heart of your home! The place where you relax, where you entertain friends, and where you can fully showcase your style.
- Pictures and Wall Art:
- Collages with Magazines/Newspapers: Unleash the artist! Create abstract or shaped works by gluing cutouts by color, texture, or theme onto thick cardboard or an old board. A good varnish at the end, and voilà!
- Abstract Painting with Acrylics on Cardboard: Those large cardboard boxes… they can be your canvases! Play with splatters, textures made with improvised spatulas, or color gradients. There are no rules!
- Decorated Photo Frames: Do you have boring old frames? Give them a second life. Glue half-cut wine corks, buttons of all sizes, tiny pebbles, or pieces of branches onto the frame. Paint everything the same color if you want to unify the look.
- Fabric or Paper Garlands: Cut fun shapes from fabric or magazines, string them together, and hang them to add a pop of color and cheer to that dull wall.
- Accent Furniture:
- Pallet Coffee Tables: If you get 2 or 3 pallets, sand them, paint or varnish them, and stack them. You can add wheels for easy movement or a glass top for a smooth, elegant surface!
- Ottomans from Old Tires: Yes, with tires! Clean it well, cover both sides with sturdy wood or cardboard circles, add good padding, and upholster it with recycled fabric (old jeans can be perfect!).
- Shelving with Fruit Crates: Sand and paint those wooden fruit crates. Stack them in a thousand creative ways or mount them on the wall. You’ll have super original modular shelves!
- Lighting:
- Lamps with Glass Bottles: Put battery-operated LED fairy lights into empty wine or liquor bottles. Several bottles of different shapes and colors together will create a magical atmosphere in that forgotten corner.
- Lamp Shades with Fabric or Perforated Paper: Disassemble an old lampshade and cover its frame with a fabric from a shirt you love (sew or glue it) or with paper with pretty cutouts to create plays of light and shadow.
- Textiles:
- Cushion Covers from Old Clothes: Transform those jeans you no longer wear, those plaid shirts, or scarves into unique cushion covers! Combine textures and prints; they look great!
- Patchwork Blankets: Join fabric scraps from old clothes or sheets to create a super cozy blanket full of stories!
- Curtains from Dyed or Stamped Sheets: Old sheets? Don’t throw them away! Dye them with natural dyes (tea, coffee, turmeric) or stencil them with fabric paint. You’ll see what a difference it makes!
2. Bedroom: A Personalized Sanctuary
Your bedroom should be your sanctuary, that place where you disconnect and where every detail screams ‘Welcome home!’
- Bed Headboards:
- From Old Doors, Pallets, or Covered Cardboard: Join and paint several old doors or pallets for a rustic, characterful headboard. Something lighter? Cut a large piece of cardboard and cover it with fabric, wallpaper, or even newspapers. A great idea!
- Macrame with Recycled Rope: Use packing rope or recycled fabric strips to weave a macrame headboard. It will give your room a bohemian and very chic touch.
- Storage:
- Baskets from Rolled Newspapers: Roll strips of newspaper and join them with white glue to make decorative baskets. Perfect for laundry, blankets, or magazines. A varnish will give them more life!
- Wall Organizers with Fabric and Embroidery Hoops: Sew pockets of different sizes onto a piece of fabric. Hang it on the wall using embroidery hoops to keep it taut. Ideal for your jewelry, accessories, or stationery!
- Jewelry Holders with Branches or Small Boards: A beautiful, sanded, and varnished branch can be a lovely hanger for your necklaces. And small boards with screwed-in hooks are ideal for earrings and bracelets.
- Wall Decoration:
- Mirrors with Decorated Frames: Glue seashells, small stones, broken CD pieces, or even bottle caps around the frame of a simple mirror. You’ll see the transformation!
- Tapestries with Recycled Fabrics: Hang pieces of fabric of different textures and colors on a branch. You’ll create a beautiful bohemian tapestry. You can add pompoms or tassels made with old yarn!
- Dreamcatchers with Hoops and Yarn/Thread: Use an embroidery hoop or bent wire as a base. Weave a web with thread and decorate with feathers, beads, or fabric scraps. For sweet dreams!
- Nightstands:
- Renovation of Old Nightstands: That boring nightstand can come back to life with a coat of chalk paint, a vibrant color, and pulls made from corks, large buttons, or polished stones. A total makeover!
- Small Floating Shelves with Wooden Boards: Use pieces of wood from boxes or pallets. Sand, paint, and mount them on the wall with hidden brackets for a minimalist and functional style.
3. Kitchen and Dining Room: Functionality with Personal Flavor
The kitchen and dining room are those spaces where we gather, where functionality and the warmth of home go hand in hand.
- Storage:
- Decorated Glass Jars and Containers: Transform those jam or coffee jars into containers for your spices, cereals, or pasta! Paint them, decorate them with decoupage, or tie fabric labels with string. So cute!
- Transformed Food Cans: Clean and paint cans of different sizes. They’re perfect as utensil holders on the counter, pots for your aromatic herbs, or even for your pencils in a little corner.
- Newspaper Baskets for Fruits or Bread: Like the bedroom baskets, but with a more resistant finish (perhaps several coats of varnish) to withstand daily kitchen wear and tear.
- Table Decoration:
- Coasters from Wine Corks, Old CDs, or Fabric: Glue thin slices of corks to make coasters. Paint old CDs or cut them into geometric shapes. Sew squares of sturdy fabric. Protect your table with style!
- Centerpieces with Branches, Pinecones, and Candles: Use a tray or a large plate as a base. Arrange dry branches, pinecones, autumn leaves, and small candles in decorated jars. A natural and cozy touch!
- Table Runners from Scraps or Old Clothes: Sew long strips of fabric from old shirts, sheets, or even towels to create a table runner with lots of personality.
- Wall Art:
- Signs with Messages: Use bottle caps, buttons, or small pieces of wood glued to cardboard or a board to form letters and create inspiring phrases or your home’s name. It will be unique!
- Memo Boards with Old Frames: Remove the glass from an old picture frame. Replace it with a piece of fabric (for pins) or a metal sheet (for magnets). A super chic memo board!
4. Bathroom: An Oasis of Relaxation and Order
Even the bathroom can become your personal oasis, full of order and style, thanks to recycled items!
- Organization:
- Small Shelves with Wooden Boxes: Those wine or tea boxes can be transformed into ideal floating shelves for your towels, hygiene products, or those small details you love.
- Toothbrush Holders with Glass Jars or Cans: Decorate small glass jars or clean cans and use them to organize your toothbrushes, toothpaste, or combs. Everything in its place and with style!
- Wall Organizers with Fabric Pockets: Sew pockets of different sizes onto a piece of waterproof fabric (or one you’ve treated for it) to store your makeup, hair accessories, or soaps.
- Decoration:
- Mirrors with Shell or Stone Frames: Like those in the bedroom, but giving it a more aquatic or natural touch that matches the bathroom’s vibe.
- Bath Mats from Braided Old Towels: Cut old towels into long strips. Braid them and sew them in a spiral to create an absorbent and durable rug. Super original and functional!
- Soap Dispensers with Glass Bottles: Use a pretty glass bottle and the pump mechanism from an old soap dispenser. You’ll have a new, elegant, and reused dispenser!
5. Outdoor Spaces (Balconies, Small Terraces): Outdoor Living
Even that small balcony or your terrace can become a dream corner with your own creations!
- Planters:
- From Cans, Cut Plastic Bottles, Old Tires: Paint cans of different sizes, cut plastic bottles in half to hang them, or use old painted tires as large, colorful planters. Of course, don’t forget to make drainage holes!
- Vertical Gardens with Plastic Bottles: Cut plastic bottles horizontally, leaving one part uncut for hanging, and create an economical and beautiful vertical garden. The envy of your neighbors!
- Furniture:
- Seating from Pallets and Cushions: Stack two or three pallets, sand them well, and paint them. Add cushions made with weather-resistant fabrics or old clothes. You’ll have comfortable and stylish seating!
- Side Tables from Wooden Spools or Tires: Have you seen those wooden cable spools? With a little paint, they make perfect side tables! An old painted tire with a round board on top also looks great.
- Lighting:
- Fairy Light Garlands with Glass Jars: Put solar-powered fairy lights inside decorated glass jars and hang them from a string. They will create a magical atmosphere at night!
- Candles in Perforated Cans: Make holes in clean cans with a nail and hammer to create pretty patterns. Place tea lights inside for a warm light effect and dancing shadows.
Key Tips for a Successful Project
Starting to add your personal touch to your decor can be an incredible experience! But, as with everything, there are tricks that will help you enjoy the process even more and achieve results you’ll love.
- Start Small: If DIY is new to you, don’t try to transform your entire house at once! Choose a simple project, like decorating a jar or a photo frame. The confidence you gain will be the engine for increasingly larger projects. Step by step!
- Plan Before Acting: Before cutting or gluing, visualize how you want it to look! Make a sketch, measure twice (this is key!), and make sure you have everything you need on hand. A clear plan will save you headaches and mistakes.
- Safety First: Always, always, use the correct tools and exercise caution. Wear gloves to protect your hands, safety glasses when cutting or sanding, and work in well-ventilated areas if using aerosols or strong glues. If something feels off, look for a tutorial or ask for help. Your safety is paramount!
- Don’t Fear Experimentation: The most beautiful thing about creativity is that there are no limits. Dare to try! Different colors, textures, combinations… Sometimes, those ‘mistakes’ turn into the most original and special parts of your creations. Let your imagination fly!
- Seek Inspiration: Platforms like Pinterest, Instagram, or DIY and design blogs are packed with ideas. Save what inspires you, but don’t try to copy it exactly; use it as a starting point for your own style to flourish.
- Be Patient and Enjoy the Process: DIY projects aren’t usually a one-day affair. Take your time, savor each step, and don’t get stressed if it’s not perfect the first time. The true value of what you create is not just in the final result, but in the love and time you put into it.
- Imperfection is Part of the Charm: Handmade objects have a very particular beauty in their small imperfections. These are what give them character, what remind us that they were created with love and dedication, not by a machine. Embrace them; they are part of their story!
Conclusion
Look, this business of decorating your home with everyday items is much more than a simple trend; it’s a way of living. It’s embracing creativity, caring for our planet, and, above all, expressing yourself. When you turn the ordinary into something extraordinary, you not only create a beautiful and unique home, but you also contribute to a greener world and cultivate that sense of well-being and connection with everything around you. Every little thing you make or transform becomes a guardian of stories, a mirror of your soul, and a celebration of how ingenious we can be.
From the living room to your balcony, every nook of your house is a blank canvas waiting for you to add your magical touch. When you see the potential in an empty can, in old jeans, or in a fallen branch, you’re not just recycling; you’re injecting life, personality, and meaning into your space! This adventure doesn’t ask you to be an expert, only to have an open mind, curiosity, and a strong desire to create.
So, the next time you come across something that seems ready for the trash, pause. Look at it and ask yourself: ‘How could this tell a new story here, in my home?’ Your imagination is the only limit. Go ahead and experiment, explore, and make your house a vibrant reflection of the incredible person you are! Your home is your great canvas; it’s time to start painting!