Your Friendly Guide to DIY Car Brake Replacement: Stop Safely!
Imagine driving down the road and suddenly needing to brake! Is there anything more important than your brakes in that moment? Not really. They are the silent heroes of your car, keeping you, your loved ones, and everyone else on the road safe. But, like any hard-working hero, with time and use, brake pads and rotors get tired and lose their strength. If you ignore those little SOS signals they send, you risk not just a big scare or an unexpected failure, but also a much more painful bill at the repair shop!
Don’t panic. This article is your friend, your step-by-step guide to becoming the guardian of your own brakes. We’ll explore together everything from how to ‘listen’ for signs that something isn’t right, to how to install those new brakes and get your car ready to roll with complete confidence. We’ll focus on disc brakes, which are what most cars use today, but we’ll also give you a few safety tricks that apply to any system.
I. Why Are My Brakes So Important? Let’s Discover Together!
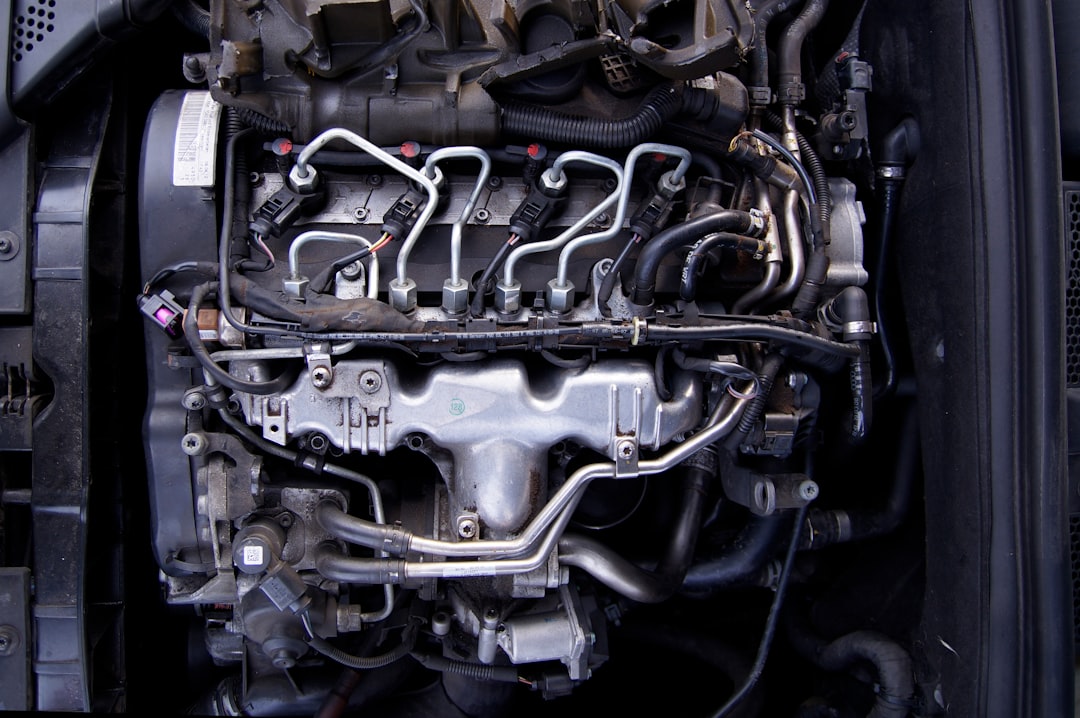
Think of your brakes as the “superheroes” of your car. When you press the pedal, they work magic: they transform all that kinetic energy (the force that moves you forward) into heat, thus bringing you to a stop or slowing you down. It’s not a simple task; it’s a whole team of parts working perfectly!
The Main Components of Your Disc Brakes:
- Master Cylinder: The orchestra conductor, the Master Cylinder. When you press the brake, it takes that foot pressure and converts it into hydraulic pressure, pushing that special fluid towards the calipers.
- Brake Fluid: The Brake Fluid, the blood of the system. It’s an incompressible fluid, meaning it’s perfect for transmitting force from the Master Cylinder to the calipers, like your veins.
- Brake Hoses: The Brake Hoses, our strong and flexible ‘pipes’ that carry the brake fluid to each wheel.
- Brake Calipers: Brake Calipers are like strong hands that, upon receiving fluid pressure, squeeze the brake pads against the rotor.
- Brake Pads: Brake Pads, the heart of friction. They are the special material that rubs directly against the rotor. They wear down with each brake application, like the soles of your shoes!
- Brake Discs (Rotors): Brake Discs (also called Rotors) are those metal plates that spin with your wheel. The pads ‘squeeze’ them to create that necessary friction and stop the car. They are also responsible for dissipating all the heat generated.
- Caliper Bracket: The Caliper Bracket, a robust piece that serves as an anchor for the entire caliper to the wheel hub, providing stability to the whole assembly.
Attention! Clear Signs Your Brakes Are Asking for Help: Don’t Ignore Them, For Your Safety and Everyone Else’s!
Being proactive with brake maintenance can save your life. Pay attention to these warning signs:
- Strange Noises:
- That sharp, annoying squeal: This is the most common alarm signal! Generally, a small metal tab on the pad rubs the rotor to tell you that the friction material is very low. It’s like an hourglass warning you that time is running out.
- A metallic grinding or scraping sound (like metal on metal): Uh oh, bad sign! This means the pads are so worn that the metal backing is rubbing directly against the rotor. This is very dangerous, will seriously damage the rotor, and can lead to critical failure!
- A clunking sound: Could be something as simple as a slightly loose caliper or an issue with its hardware, but it could also indicate something more serious in the suspension.
- Vibrations:
- If you feel the **brake pedal or steering wheel vibrate** when braking: It’s very likely that one of your brake rotors has warped, almost always due to excessive overheating.
- Pedal Feel:
- A **’spongy’ or soft pedal**: Like stepping on a sponge. This usually indicates air trapped in the system, low brake fluid, a leak, or a failing master cylinder.
- The **pedal goes very far down**: Similar to ‘spongy,’ but more extreme. Could be a significant leak or your master cylinder giving up.
- A **hard pedal**, difficult to press: Could indicate a problem with the brake booster or an obstruction in the system.
- Warning Lights:
- The **warning lights**! If the ABS or parking brake light illuminates on the dashboard, your car is screaming that there’s a serious problem that needs attention.
- Burning smell: Imagine a strong, chemical smell, like burning rubber, after intense braking or going down a hill. It means the brakes are overheating!
- Visible Wear: If you look through your wheel spokes, do the pads look very thin (less than 3-4 mm)? Do the rotors have deep grooves or a very pronounced lip? It’s time for a change.
II. Let’s Get to Work! The Tools and Bits You’ll Need: The Key to a Job Well Done.
Before starting any work on your vehicle, proper preparation is key. Make sure you have all the necessary tools and supplies on hand.
For Lifting Your Car and Staying Safe:
- A robust **Hydraulic Jack**: Your best friend for lifting the car.
- **Jack Stands**: ESSENTIAL! NEVER, under any circumstances, work under your car if it’s only supported by the jack. Jack stands are your life insurance.
- **Wheel Chocks**: To ensure the car doesn’t move an inch, block the wheels on the opposite side you’re working on.
For Disassembly and Assembly Like a Pro:
- A good **Lug Wrench** or, if you have one, an **Impact Wrench**: To remove and install wheel nuts more easily.
- A good **Socket Wrench Set with Ratchet**: With extensions and sockets of the correct sizes for your car.
- A **Torque Wrench**: This is CRITICAL! You’ll need it to tighten nuts and bolts to the manufacturer’s specified torque. Not too loose (dangerous), nor too tight (also dangerous and can break something).
- A **Set of Allen and/or Torx Keys**: Some bolts get ‘exclusive’ and only yield to these wrenches.
- **Screwdrivers** (flathead and Phillips): For those small clips or screws.
- A **Rubber Mallet or Hammer**: If the rotors are a bit stubborn and don’t want to come off.
- A **Wire Brush**: To thoroughly clean the surfaces where the new parts will seat.
‘Pro’ Brake Tools:
- A **Caliper Piston Compressor Tool**: There are several types, because pistons don’t always push back the same way:
- **Cube/multi-directional cube type:** For more ‘dancing’ pistons that need to be rotated and pushed simultaneously (common on rear electronic parking brakes).
- **Screw/C-clamp type:** For simpler ones that just need to be pushed directly.
- **Lever type:** Another option for those that are only pushed.
- Brake bleeding tools (if needed):
- A bottle with a clear hose.
- A vacuum pump (if working alone).
- A pressure bleeding kit (another option for solo work).
- A **Brake Bleeder Wrench**: Usually 8mm, 10mm, or 11mm. Make sure you have the correct one.

Essential Consumables (and some extras for protection!):
- **New Brake Pads**: Obvious! Make sure they are the exact ones for your car (make, model, year).
- **New Brake Rotors**: Although sometimes people try to save money, I strongly recommend changing them along with the pads. This ensures optimal braking and avoids future vibrations.
- **Caliper Lubricant (Brake Grease)**: Be careful! Not just any grease will do. It must be specific for brakes, heat-resistant, and won’t damage rubber components. Dielectric silicone or molybdenum grease is ideal.
- **Aerosol Brake Cleaner**: To remove all brake dust and any grease or oil residue.
- **Clean Rags or Paper Towels**: Lots of them, to keep everything spotless.
- **New Brake Fluid**: THE EXACT TYPE AND SPECIFICATION recommended by the manufacturer (DOT 3, DOT 4, DOT 5.1). Never mix different types, especially with DOT 5!
- **Safety Gloves**: Your hands will thank you! Brake dust is nasty, and brake fluid is corrosive.
- **Safety Glasses**: Essential! A splash in the eye can be very painful and dangerous.
III. Safety First! Don’t Take Chances: Tips You Can’t Skip.
Safety is paramount when working on any vehicle. An error here can have serious consequences.
- **Where to park:** On a flat, hard, and safe surface.
- **Parking brake and gear:** Engage the parking brake. If automatic, in ‘P’. If manual, in first or reverse gear.
- **Wheel chocks:** Remember! Chock the wheels on the opposite axle to the one you’re working on. Maximum safety.
- **Jack and jack stands: use them correctly!**
- Check your car’s manual to find the exact lifting and support points.
- Never, I repeat, NEVER lift the car by suspension arms or sway bars.
- Once lifted, firmly place the jack stands under the chassis support points and slowly lower the jack until the car rests securely on them. The jack can remain as a backup, but it should not be the primary support.
- Shake the car slightly to ensure it’s stable before getting underneath.
- **Good ventilation:** If using aerosol brake cleaners, ensure good airflow. Vapors are not good for your health.
- **Protect yourself:** Always wear gloves and safety glasses! Brake dust contains things you don’t want in your eyes or on your skin, and brake fluid can damage paint.
- **Don’t let the caliper hang!** The brake hose is delicate like a thread. If you damage it, goodbye brakes and hello problems. Use a hook, a piece of wire, or a rope to secure the caliper to a safe point on the suspension once you remove it.
IV. The Moment of Truth! Your Step-by-Step Guide to Changing Those Disc Brakes
This guide covers the most common process for most vehicles with disc brakes.
Step 1: Prepare Your Car and Lift It Safely
- **Loosen the lug nuts:** With the car still on the ground and the parking brake engaged, use your wrench to loosen (only loosen, do not remove) the wheel lug nuts. It’s much easier with the car’s weight on the tire.
- **Lift the car:** Place the jack at its point and raise the vehicle.
- **Place the jack stands:** Slide the jack stands under the chassis support points and lower the car until it rests FIRMLY on them. You can leave the jack slightly touching, as an extra safety measure.
- **Remove the lug nuts and wheel:** Now, completely remove the lug nuts and the wheel. A safety tip: place the wheel under the car’s chassis, near the rocker panel. This way, if something fails, the wheel will act as a stop.
Step 2: Take a Look and Remove the Brake Caliper
- **Visual inspection:** Before touching anything, take a breath and observe. How do the old pads look? The rotor? Is there any leakage around? Carefully examine the general condition of nearby components.
- **Remove the caliper bolts:** The caliper is usually held by two bolts that allow it to move (guide pins). With your wrench, loosen and remove them. Some cars have retaining clips that you’ll need to remove first.
- **Disassemble the caliper:** Once the bolts are out, the caliper should slide off easily. If it’s a bit stuck, gently pry it with a large screwdriver.
- **Support the caliper:** REMEMBER! Do not let the caliper hang from the brake hose. Use your hook or wire to secure it to a firm point on the suspension (a spring, for example).
- **Remove the old pads:** The old pads usually slide out of the bracket on their own. Pay close attention to how they were installed, if they had any clips or wear indicators.
Step 3: Off with the Old Disc (Rotor)
- **Remove the caliper bracket:** This robust piece that holds the pads and to which the sliding caliper is bolted is usually attached to the hub with two larger bolts from behind. Use your socket wrench and, if necessary, a breaker bar, as they are usually very tight.
- **Remove the rotor:** The old rotor may be loose or held by a small screw. If there’s a screw, remove it. If it’s stuck due to rust, give it a few gentle taps with a rubber mallet or hammer on the face of the rotor (never near the studs!). Tap evenly until it loosens.
- **Clean the hub surface:** Once the rotor is off, grab your wire brush and thoroughly clean the surface where it rested. Remove rust, dirt… whatever! A spotless surface is crucial for the new rotor to seat perfectly and avoid future vibrations. You can apply a thin layer of dielectric or copper grease (never on the rotor face!) to prevent it from sticking next time.
Step 4: Time to Install the New Rotor!
- **Clean the new rotor:** New rotors come with an oil coating to protect them from rust. You must remove it! Use aerosol brake cleaner and a clean rag. Spray both sides until the rag shows no residue. A dirty rotor can brake poorly and make noise.
- **Install the new rotor:** Slide the clean rotor onto the hub studs. Make sure it seats flat. If it had a retaining screw, put it back. You can even put one or two lug nuts (hand-tightened) to keep it in place while you continue working.
Step 5: Give Love to the Caliper Bracket and Reinstall It
- **Clean the bracket:** Use your wire brush and brake cleaner to make it spotless.
- **Inspect and lubricate the guide pins:** Those sliding pins you removed earlier have rubber boots. Check them for tears. Remove the old pins and clean their housings thoroughly. Apply a good coat of specific caliper lubricant (silicone grease) to the pins. They must move freely. If they are stuck, the caliper won’t work correctly, leading to uneven wear or sticking brakes.
- **Reinstall the bracket:** Place the caliper bracket over the rotor and hub. Install the two large bolts and tighten them with your torque wrench to the manufacturer’s specified torque. Don’t forget this detail!
Step 6: Prepare and Install the New Pads
- **Compress the caliper piston:** New pads are thicker, so the caliper piston needs to go back into its housing.
- **Loosen the brake fluid reservoir cap:** This allows the fluid to rise as you push the piston. Have rags handy in case of overflow.
- **Use the piston compression tool:** With the appropriate tool (clamp, screw, or cube type), push the piston slowly and steadily until it’s fully retracted. If you’re working on a rear caliper with an electronic parking brake, you’ll need a special tool that rotates and pushes simultaneously. Never force a rotating piston without the correct tool, you could damage the motor!
- **Install new hardware (if included):** New pads often come with anti-rattle clips or metal hardware. Replace the old ones with the new! And lubricate the contact areas between the hardware and the pads with a thin layer of brake grease.
- **Install the new pads:** Slide the new pads into the bracket. Make sure they fit well and that the pad with the wear indicator goes in its place (usually the inner one, facing the piston). Lightly lubricate the metal edges where the pads slide, but NEVER the friction surface!
Step 7: Everything Back in Place: Caliper and Wheel
- **Install the caliper:** Unhook the caliper and carefully place it over the pads and rotor. Make sure the brake hose is not twisted.
- **Install the guide pins:** Insert the lubricated guide pins through the caliper and into the bracket. Tighten them to the manufacturer’s torque with the torque wrench.
- **Reinstall the wheel:** Place the wheel on the hub, ensuring it fits properly. Hand-thread the lug nuts until snug.
- **Lower the car:** Remove the jack stands and lower the car with the jack.
- **Tighten the lug nuts:** With the car now on the ground, tighten the wheel lug nuts in a star or crisscross pattern with the torque wrench to the specified torque. Never one after another!
Step 8: Do You Need to Bleed the Brakes? (If you opened the system, this is important)
Bleeding the brakes is necessary if you opened the system, if you see air in the brake lines, or if the pedal feels spongy after all the work. It’s always good practice, although not always strictly necessary if you only changed pads and rotors without touching the hydraulic system.
- **Check brake fluid level:** Ensure the reservoir is at the ‘MAX’ mark.
- **How to bleed (two-person method):**
- Start with the wheel farthest from the master cylinder (usually the rear right on left-hand drive cars).
- One person sits in the car and the other handles the bleeder valve at the wheel.
- The person in the car pumps the pedal several times until it feels firm and HOLDS it down.
- The person at the wheel slightly opens the bleeder valve. Fluid and perhaps bubbles will come out through the hose.
- The bleeder valve is closed BEFORE the driver releases the pedal.
- Repeat until you see no bubbles and the fluid comes out clear.
- CAUTION! The fluid level in the reservoir should NEVER drop too low, or you’ll introduce more air!
- Do the same for the other wheels, following the order: rear left, front right, front left.
- **Other ways to bleed:** If you’re alone, you can use a vacuum pump or a pressure bleeding kit.
Step 9: The Grand Finale: Final Checks and ‘Educating’ Your New Pads
- **’Seat’ the piston (very important!):** Before starting the car, pump the brake pedal several times, slowly and firmly, until you feel resistance. This pushes the pistons against the new pads and eliminates play. Initially, the pedal will feel a bit soft.
- **Check brake fluid level:** After seating the piston, the level may have dropped. Refill to the ‘MAX’ mark if necessary and close the cap.
- **Look for leaks:** With the engine running and the pedal depressed, check all connections and hoses. Are there any drops of fluid?
- **Brake pad and rotor ‘bedding-in’ procedure:** This step is CRITICAL! It’s like ‘educating’ your brakes so they work perfectly, don’t make noise, and last much longer.
- Find a safe place with little traffic.
- Make 8 to 10 medium-to-high intensity stops (about 80% of your maximum braking force), slowing from 60-70 km/h (40-45 mph) to 10-15 km/h (5-10 mph). IMPORTANT! DO NOT brake to a complete stop during these first few stops.
- Between each brake application, drive for a minute or two at a constant speed without braking, allowing the brakes to cool down a bit.
- After the last brake application, drive for at least 10-15 minutes at a moderate speed, without sudden braking, to allow everything to cool down gradually.
- This process transfers an even layer of pad material to the rotor, improving friction and preventing annoying vibrations.
V. Things to Consider and Quick Solutions to Typical Problems
Drum Brakes (a world apart!)
If your car has drum brakes on the rear wheels, the process is VERY different and considerably more complex, involving many springs, shoes, and wheel cylinders. If you don’t have much experience, it’s best to leave this to a professional.
Electronic Parking Brakes (technology rules!)
Many modern cars with electronic parking brakes require a diagnostic tool (an advanced OBD-II scanner) to electronically ‘tell’ the rear calipers to retract before you can manually push the pistons. If you try to force it without this step, you could seriously damage the EPB motor.
Noises After Changing Brakes: What Do They Mean?
- **Squealing:** Very common right after installation. Often disappears on its own with time and bedding-in. Make sure you lubricated the caliper and hardware well.
- A **persistent grinding or scraping sound:** Could be that something wasn’t installed correctly (a pad, a clip) or that the bracket didn’t seat properly. Stop the car and check!
- A **clunking sound:** Could be a loose caliper bolt, loose hardware, or even a suspension issue.
- **Vibrations:** A defective new rotor (rare, but happens), the hub wasn’t cleaned properly, or the pad bedding-in wasn’t done correctly.
Brake Fluid: The Great Forgotten
- **Types:** ALWAYS use the DOT type recommended by your manufacturer. DOT 3 and DOT 4 are the most common. DOT 5.1 is compatible with 3/4, but DOT 5 (silicone-based) is NOT compatible with any of them! Be careful!
- **When to change it:** Brake fluid is like a sponge; it absorbs moisture from the air over time, which lowers its boiling point and causes internal rust. Changing it every 2-3 years or as per your car’s manual is a good idea.
- **Precautions:** It’s corrosive! If it spills on car paint, clean it immediately, or it will leave an unsightly stain.
If You Feel a Bit Lost… When to Call an Expert?
If at any point you feel insecure, believe the task is beyond you, or don’t have the right tools, or if the problem persists after changing the brakes, don’t hesitate! Call a professional mechanic. The safety of your brakes is not something to gamble with.
VI. After the Change, Keep Them Maintained! The Secret to Long-Lasting Brakes
Once your brakes are new, preventive maintenance can extend their lifespan and performance:
- **Check them often:** Give your pads and rotors a visual inspection every 10,000-15,000 km (6,000-9,000 miles), or every time you change your oil.
- **Clean the dust:** Brake dust accumulates. Occasional washing with a pressure washer on the calipers and rotors can help keep them clean.
- **Listen for noises:** Any new or strange sound when braking is a signal. Investigate it immediately!
Congratulations! You’ve reached the end. Changing your car’s brakes is one of those maintenance tasks that gives you immense peace of mind. Not only do you save good money, but you also gain a super valuable skill and, most importantly, you know your car is safe. Now, enjoy the road with the confidence that your brakes are in top condition! Drive smart and enjoy!