DIY Centerpieces: The Magic in Every Detail That Will Make Everyone Sigh!
Have you ever dreamed of creating that “wow” atmosphere for your gatherings? Whether it’s an intimate dinner with friends or that big party you’ve been planning for months, the truth is, the magic is in those small touches, right? Those details that steal your gaze and make you feel special. And among all those treasures, centerpieces are the real stars! They don’t just adorn the space; they tell a story about you, about what you love, and about the soul of your event. Of course, you can buy one ready-made; there are thousands of options out there. But what if I told you that the real spark, the authentically “you,” lies in “Do It Yourself” (DIY) centerpieces? They are unique, reflect your personality, and believe me, they can be surprisingly budget-friendly!
This is your journey into the fascinating universe of creating handmade pieces for your table. It’s not just about making it look pretty, but about leaving every guest with a smile and a lasting memory! We’ll dive in from the moment of the initial idea to those design tricks that will make you feel like a true artist. Together, we’ll explore a multitude of styles, materials, and special moments, giving you a complete guide to make that vision in your head come true and dazzle everyone!
The DIY Philosophy: Beyond Saving a Few Bucks
Choosing to make your own centerpieces isn’t just a matter of money, although saving a little bit feels great! It’s much deeper. It’s a declaration of your creativity, your affection, that personal touch that no store-bought item can ever match. When you put your time and effort into every detail, each centerpiece becomes imbued with a story, a feeling, an authenticity that your guests will perceive and appreciate from the heart.

Why you’ll love creating your own centerpieces? Here are the reasons!
- It’s 100% You: Every little flower, every color, every texture… you choose everything to reflect your theme, your colors, your personality, or the exact reason for your celebration!
- Quality to Your Liking: You decide the materials. This ensures everything is beautiful and durable, just the way you like it.
- Your Creativity to Shine: It’s the perfect opportunity to play! Experiment with different textures, colors, objects… discover the artist within you!
- A Small Gesture for the Planet: Reuse, recycle, look for local materials. Your event can also be greener!
- The Satisfaction That Hooks You: Seeing your idea take shape and how your guests admire it… that reward is priceless!
- The Perfect Icebreaker!: An original centerpiece is often the start of a good conversation. It helps people relax and fills the atmosphere with laughter!
Design Secrets to Make Your Centerpieces Impactful (and Not Block Conversation!)
Before you embark on the adventure of choosing materials and assembling, it’s a good idea to know some basic design principles. Think of them as your creative superpowers, which will help your centerpiece be not only beautiful but also practical.
1. For Whom and For What? Consider the Occasion and Theme
The type of event (a dream wedding, a festive dinner, a relaxed brunch, your little one’s birthday?) will give you key clues about the style, formality, and colors of your centerpiece. A wedding will call for something more elegant, while a summer party will allow you to be more spontaneous and vibrant.
- If it’s Formal: Think spectacular fresh flowers, tall dancing candles, fine glassware, and a metallic touch.
- If it’s Casual: Potted plants, recycled glass jars, rustic elements, and colors that invite joy.
- If it’s Thematic: Have fun! Incorporate elements that scream the theme (shells if it’s beachy, mini pumpkins if it’s autumn…).
2. Watch the Height! No One Should Have to Play Hide-and-Seek to Talk
This is, perhaps, the golden rule. A centerpiece can be wonderful, but if people can’t see or talk to each other, it loses all its charm.
- The Golden Rule: Your centerpiece should be low enough (less than 30 cm, more or less) for everyone to see over it, or so tall (more than 60 cm) that the view passes comfortably underneath! This way, conversation will flow smoothly.
- On Long Tables: Instead of a single behemoth, try a series of smaller centers, or a garland of flowers and leaves that runs the length of the table. It looks beautiful!
- On Round Tables: Here, a unique and well-proportioned centerpiece is usually the best option.
3. Play with Colors and Textures!
The color palette you choose must go hand in hand with the overall decoration of your event and the venue.
- Harmony: Use colors that are close on the color wheel or different shades of the same color.
- Contrast: A pop of color that “jumps out” can add that point of interest that makes it special.
- Textures: Mix them! The softness of petals, the rusticity of wood, the sparkle of glass… this will give depth and richness to your design!
4. Balance and Proportion: Not Too Big, Not Too Small
Make sure your centerpiece is neither a giant nor a dwarf for the table, and that all its elements are well distributed.
- Symmetrical or Asymmetrical? A symmetrical design is elegant and orderly; an asymmetrical one can be more dynamic and modern. You choose!
- The Focal Point: Every centerpiece benefits from having a focal point, an element that captures the eye first.
5. Light is Everything: Create Atmosphere with Lighting
Light has incredible power to transform a space.
- Candles: Pure warmth, romance, and an enchanting glow! Play with candles of different heights and types (short, pillar, taper) to create movement.
- LED Fairy Lights: If you want a magical touch, especially in glass vases or among floral arrangements, these little lights are perfect!
- Accent Lighting: Small lights at the base or on pedestals can further enhance the beauty of your creation.
6. Your Budget and Where to Find Those Treasures
Before you start, decide how much you want to spend. And then, be a creative detective to find materials!
- Discount Stores: They are a goldmine for vases, candles, and basic accessories.
- Second-hand/Vintage Stores: This is where unique treasures hide at bargain prices.
- Nature: Leaves, branches, pinecones, stones… free and beautiful!
- Recycled Materials: Glass jars, cans, bottles… give them a second life!
- Farmers’ Markets: Fresh flowers, and often, much more economical.
Get Started! Discover DIY Centerpieces That Enthrall
Now that you have the fundamentals clear, it’s time to immerse ourselves in the endless possibilities that the DIY world offers!
1. Flowers and Plants: Nature’s Gift of Beauty
Flowers and greenery are a classic that never fails. They bring life, color, and a delightful aroma to any table!
- Fresh Seasonal Flowers: They are the most popular, and there’s a reason why!
- Choose Wisely: Opt for seasonal flowers; they will be cheaper and fresher. Local markets and florists are your best friends. Combine large flowers (roses, peonies) with smaller ones (ranunculus, carnations) and some filler (eucalyptus, baby’s breath).
- Design: For a relaxed, abundant style, go for that “freshly picked from the garden” look with different heights and textures. If you prefer something more structured, use floral foam or wire supports.
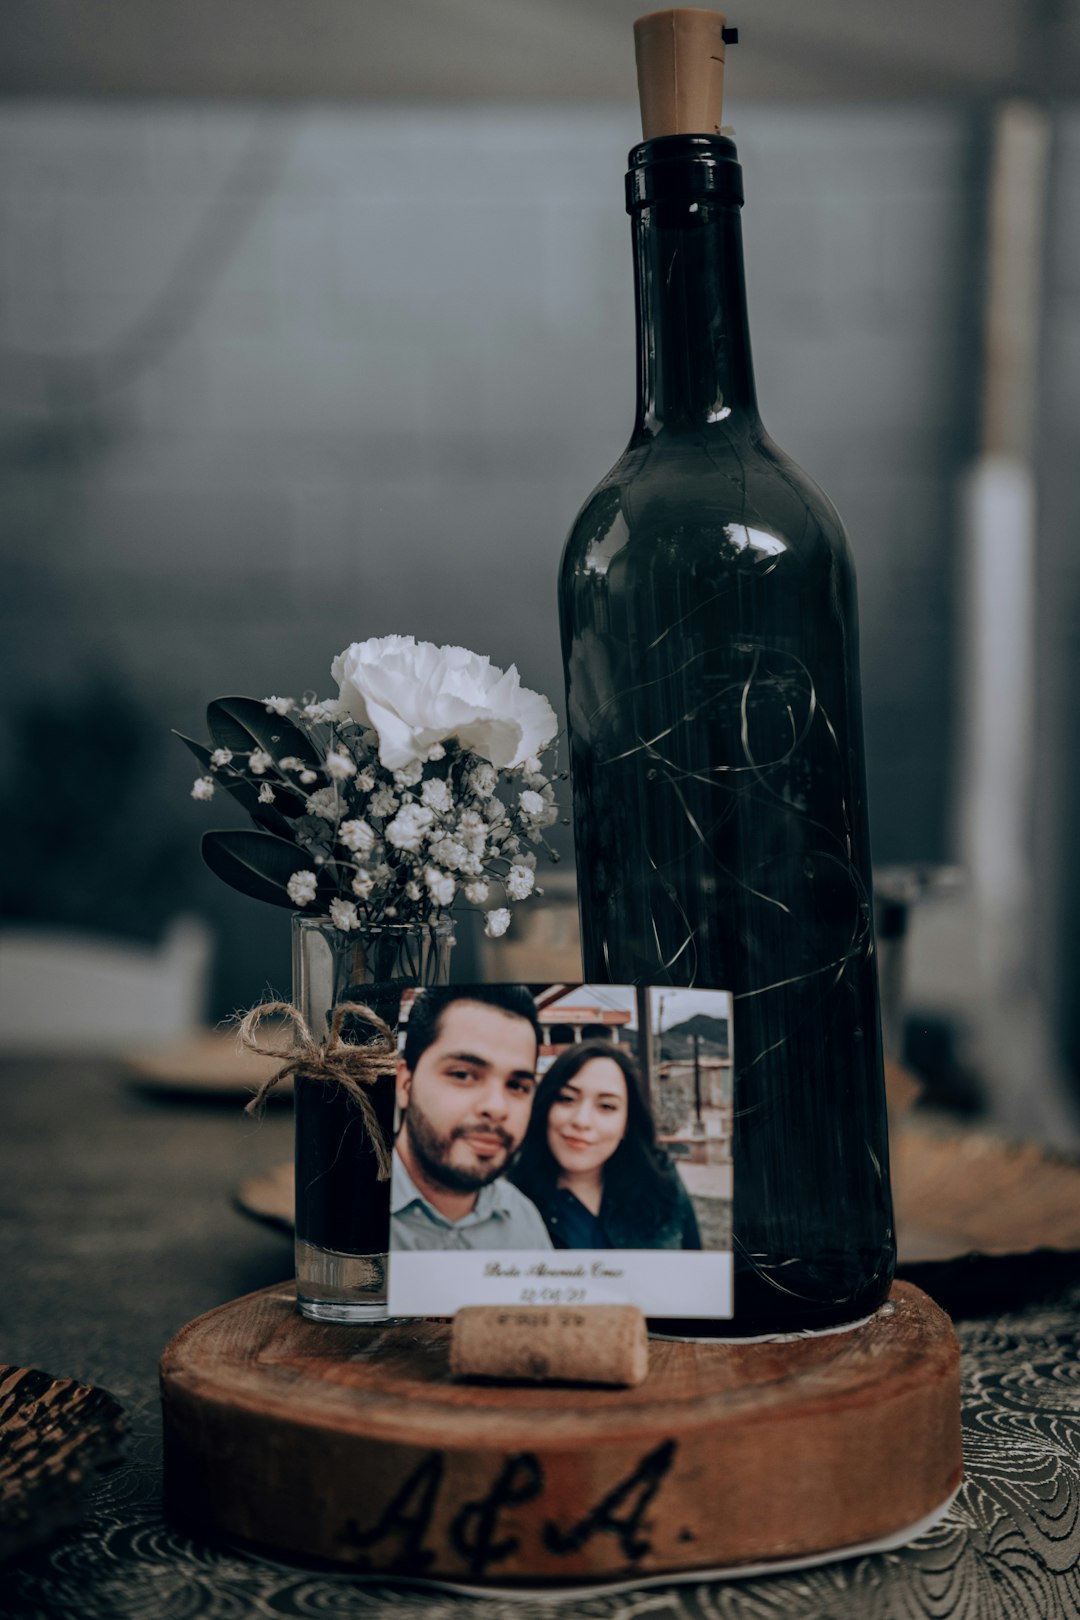
- Creative Vases: Recycle wine bottles, jam jars, or painted cans. Group several small vases with one or two flowers in each for a scattered, charming effect!
- A Trick: Cut stems at an angle and change the water daily to make them last longer.
- Only Foliage and Greens: We often underestimate them, but foliage can be surprisingly beautiful on its own!
- Types: Eucalyptus, olive branches, ferns, ivy, monstera leaves.
- Design: Create garlands that run the length of the table, place loose branches in minimalist vases, or use large leaves as a base for other elements.
- Advantage: They last longer and are usually more economical than flowers.
- Potted Plants and Succulents: A lasting and beautiful option!
- Types: Small succulents, cacti, aromatic herbs (rosemary, lavender), mini orchids, air plants.
- Design: Place a potted plant at each setting, or group several in a pretty tray. Succulents are perfect for a modern or desert-inspired touch.
- Double Benefit!: Your guests can take the plants home as a keepsake. An ecological and charming favor!
- Terrariums and Cloches: Small enchanted worlds that add a touch of fantasy.
- Materials: Glass containers (bells, large jars, fishbowls), small plants (moss, succulents), stones, sand, tiny figurines.
- Time to Create!: Layer soil, moss, and plants, decorating with the elements you like best.
2. Candles: Light That Enthralls and Transforms
Candles are the soul of warmth and romance. With their soft glow, they transform any table!
- Pillar and Taper Candles:
- Design: Group candles of different heights on mirrored trays or wooden bases. Add some foliage, flowers, or stones for a perfect finish.
- Safety First!: Make sure they are in stable holders and away from anything that could catch fire.
- Votive and Small Candles:
- Design: Place them in small glass votive holders, painted jars, or inside decorative lanterns.
- Quantity: To truly make an impact, use several votives scattered across the table.
- Floating Candles:
- Materials: Glass containers (bowls, wide vases), water, floating candles.
- Magical Touches: Flower petals, citrus slices, small glass beads in the water.
- Decorative Lanterns:
- Styles: From rustic wooden ones to elegant metal designs.
- Contents: Besides candles, they can hold flowers, LED fairy lights, or small figurines.
- Vital Safety Tip: Always use appropriate containers, keep candles away from curtains, and never leave them unattended! If there are children, flameless LED candles are your best option!
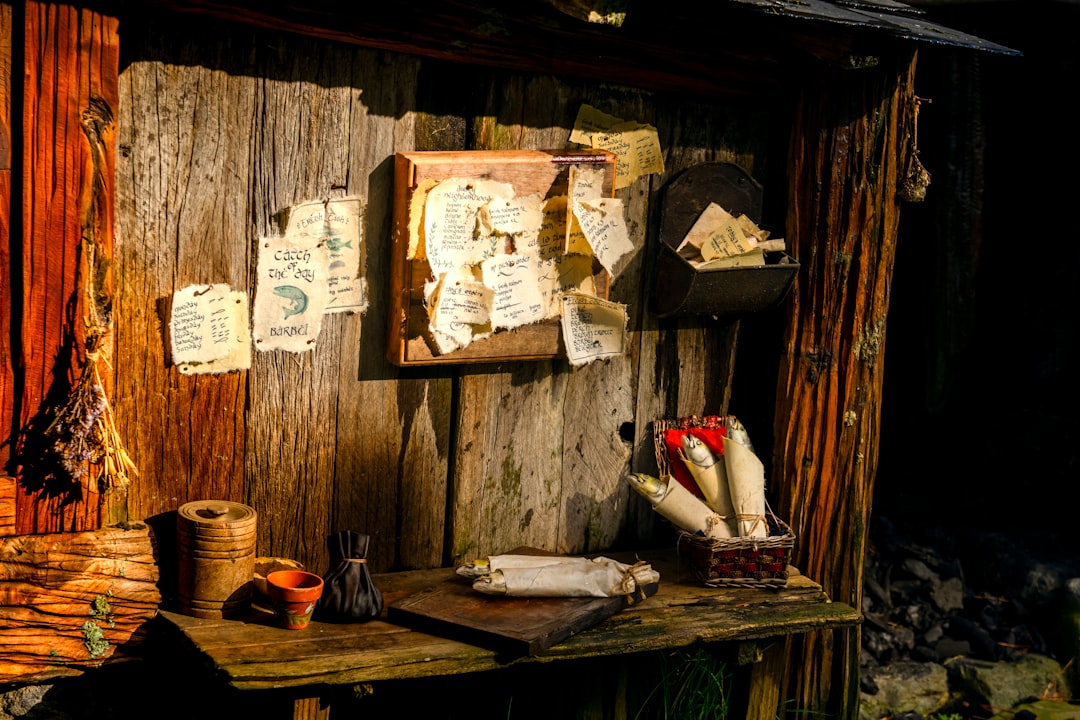
3. Rustic and Natural: The Beauty of Authenticity and Sincerity
If you love organic beauty, what is unpolished, then rustic centerpieces are your ideal match!
- Wood Slices and Logs:
- Base: A large tree trunk slice can be the most charming base for an arrangement of candles, small vases, or moss.
- Elements: Small logs or branches can be the centerpiece, decorated with fairy lights or natural elements.
- Pinecones, Branches, and Berries:
- For Each Season: Ideal for autumn and winter. You can spray pinecones with gold or silver paint.
- Composition: Combine them with evergreen foliage, candles, and jute or burlap bows.
- Fruits and Vegetables: Fresh, Colorful, and Delicious!
- Types: Citrus (lemons, oranges), apples, pears, pomegranates, artichokes, small pumpkins (in autumn).
- Design: Place them in wooden bowls, wicker baskets, or directly on a table runner.
- A Trick: Spray a little hairspray for extra shine and to protect the fruits.
- Stones, Pebbles, and Sand:
- Use: They can fill vases, serve as a base for candles, or create minimalist landscapes.
- Themes: Perfect for beachy or zen environments.
- Natural Textiles: Burlap, jute, linen, or raw cotton as table runners or to wrap vases.
4. Thematic and Festive: Celebrate Every Moment to the Fullest!
Adapt your centerpiece to the time of year or the special reason for your party. Let every detail speak of your celebration!
- Christmas:
- Elements: Pine branches, pinecones, red berries, Christmas ornaments, fairy lights, red or gold candles.
- Ideas: Advent wreaths with candles, poinsettia arrangements, decorated mini Christmas trees.
- Halloween:
- Elements: Mini pumpkins (paint or carve them!), dried leaves, plastic spiders, cobwebs, black or orange candles, dry branches.
- Ideas: Pumpkins with funny or spooky faces, vases filled with thematic candies.
- Thanksgiving/Autumn:
- Elements: Pumpkins, ornamental corn, colorful leaves, berries, wheat stalks, candles in earth tones.
- Ideas: A overflowing bowl of the “harvest,” a table runner with dried leaves and small candles.
- Spring/Easter:
- Elements: Fresh flowers (tulips, daffodils), Easter eggs (paint and decorate them!), decorative bunnies or chicks, artificial grass.
- Ideas: A bird’s nest with eggs, a miniature flower garden.
- Birthdays/Baby Showers:
- Elements: Small balloons, toys, photos, sweets, elements that scream the theme (teddy bears for a baby shower, superheroes for a children’s birthday).
- Ideas: A “wish tree” with messages for the birthday person, a decorative diaper cake.
5. Upcycled and Reused: Give New Life to Objects!
Transform those everyday objects you were going to discard into decorative pieces that will leave everyone amazed!
- Glass Jars and Bottles:
- Get to Work!: Paint them (with spray, acrylics, or even chalkboard paint), wrap them with string or lace, or leave them transparent to show sand, water, and flowers.
- Use: Beautiful vases, charming candle holders, containers for LED lights.
- Metal Cans:
- The Transformation!: Remove labels, clean them well, and paint them. You can even perforate them with a nail to create patterns that let candlelight through!
- Use: Rustic vases, cutlery holders.
- Old Books:
- Design: Stack vintage-looking books, tie them with string or ribbon, and place a small flower vase or a candle on top.
- Themes: Ideal for literary events or vintage-themed weddings.
- Vintage Tableware and Utensils:
- Types: Teacups, teapots, sugar bowls, silver trays.
- Use: Original vases, succulent containers, bases for small arrangements.
6. Edibles: A Centerpiece for Sight and Taste!
Why not make your centerpiece doubly functional, serving as decoration and a delicious surprise for your guests?
- Cupcake or Macaron Towers:
- Design: Use a multi-tiered stand and decorate the sweets to match your event’s theme.
- The Best Part!: It also serves as dessert.
- Cheese and Charcuterie Boards (Miniature):
- Design: Small individual boards or a long, narrow central board with a selection of cheeses, cold cuts, fruits, nuts, and crackers.
- Occasion: Perfect for informal gatherings or wine tastings!
- Fresh Fruit Arrangements:
- Design: Baskets or bowls filled with beautifully arranged seasonal fruits.
- Advantage: Healthy and refreshing.
- Candy Jars or Dessert Tables:
- Design: Several glass jars of different sizes filled with color-coordinated sweets.
- Occasion: Ideal for children’s parties or festive events!
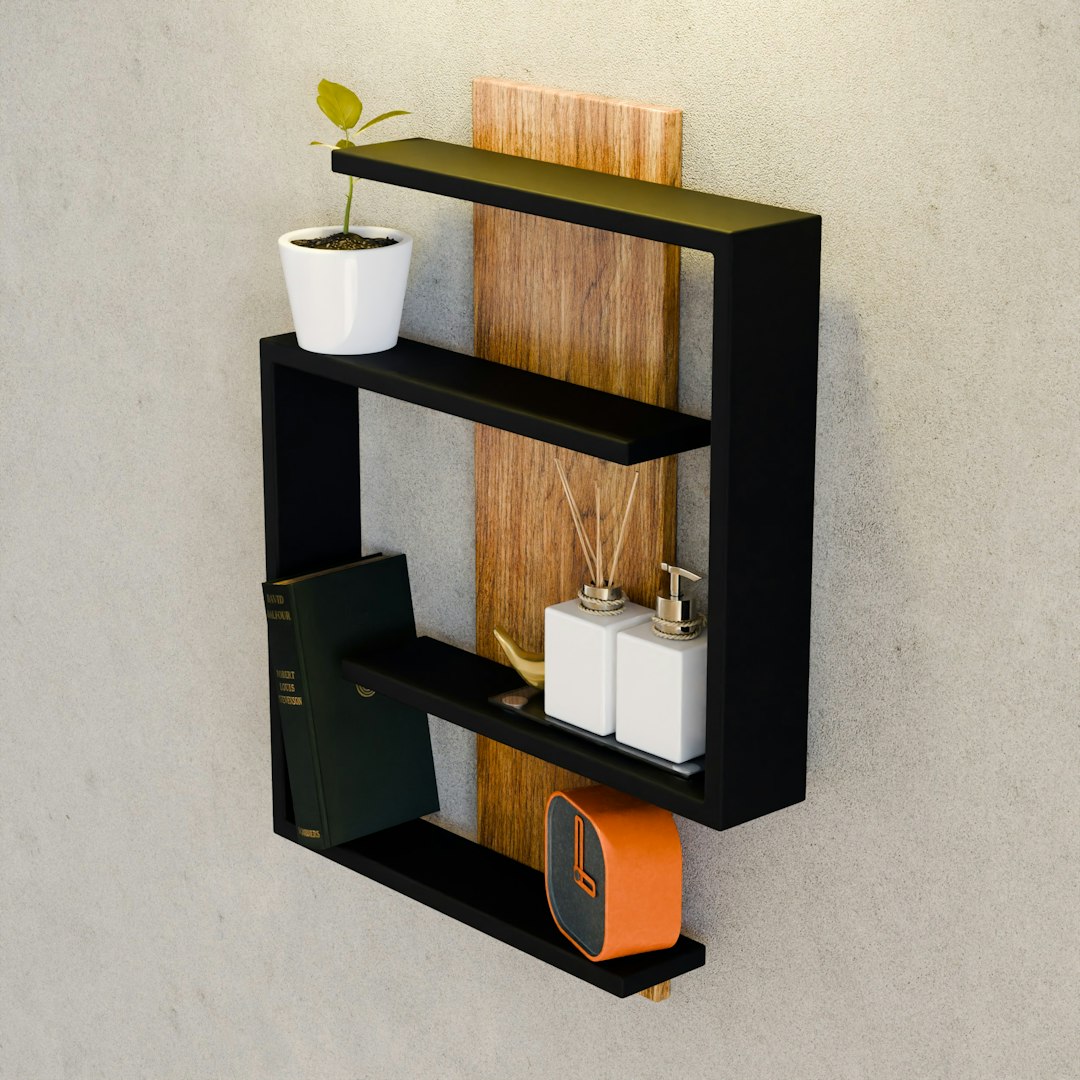
7. Minimalist and Modern: When Less is More (and More Impactful!)
If you prefer the elegance of simplicity, minimalist designs can be incredibly powerful!
- Geometric Shapes:
- Elements: Metal or wooden structures (cubes, pyramids, spheres) that can hold a single flower, a succulent, or a small candle.
- Style: Clean, contemporary.
- A Single Flower, The Protagonist!:
- Design: A single spectacular flower (e.g., an orchid, a long-stemmed rose, a calla lily) in a simple, elegant designer vase.
- Impact: Pure sophistication.
- Industrial Touches:
- Materials: Cement (small planters or bases), metal (copper pipes, steel).
- Style: Urban, chic, with character.
- Monochromatic:
- Design: Use different textures and shades of the same color to create interest without adding complexity.
- Example: An arrangement of white and green flowers in white vases. Very elegant!
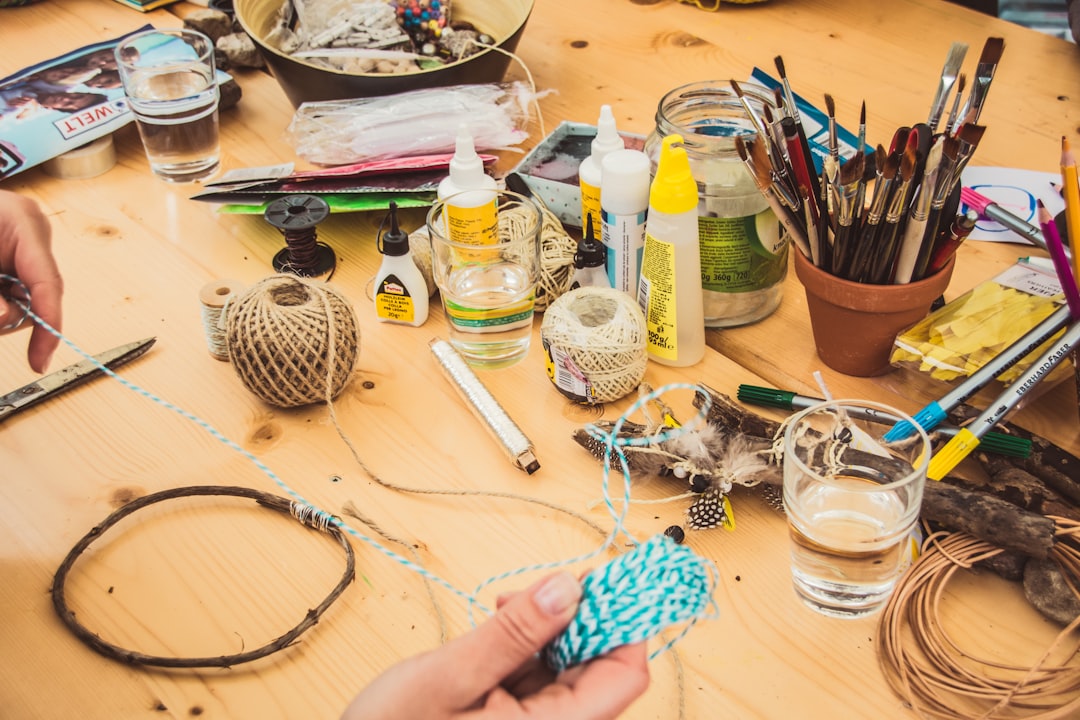
Your Essential DIY Tools and Tricks (Don’t Be Scared, It’s Easier Than It Looks!)
Even the simplest projects benefit from having some basic tools and knowing a couple of tricks. Let’s get to it!
Basic Tools That Will Get You Out of Trouble:
- Pruning/Floral Shears: To cut stems without damaging them.
- Hot Glue Gun: Your best friend for joining elements and securing embellishments!
- Floral Wire and Tape: Essential for floral arrangements and for securing things.
- Utility Knife: For cutting floral foam or more resistant materials.
- Brushes and Paints: To add your personal touch to vases, cans, or wooden pieces.
- Measuring Tape/Ruler: To ensure everything has the perfect proportion and height.
Key Techniques for Success:
- Prepare Your Flowers: Remove any leaves below the waterline, cut stems at an angle, and change the water often. This will make them last much longer!
- Use Floral Foam: Soak it well in water before using it for your arrangements, and cut it to the size of the container.
- Painting and Finishing: Always do a small paint test on a hidden section. Consider using primer for metal or glass. And don’t forget a sealant for durability.
- Layers, Layers, and More Layers: Think about creating layers of elements (a base, a center, something with height) to give depth and volume to your design.
- Hide Wires: If you use LED fairy lights, conceal the battery compartment among the arrangement or under the container.
Tips for Lasting Success (and for Enjoying the Process!)
To ensure your DIY centerpieces not only impress but also contribute to a smooth and fun event, keep these friendly tips in mind:
- Do a Test Run Before the Big Day! If you can, assemble a trial centerpiece. This way you’ll see how it looks on your actual table and can correct anything (height, stability, etc.) before making all the others.
- Start Simple: If you’re new to DIY, choose an easy design for your first project. Confidence and experience will grow with each creation!
- Think About Durability: How long do you need them to last? Fresh flowers need water, candles burn… For long events, potted plants or non-perishable elements are wonderful.
- How Will You Transport Them? If the party isn’t at home, plan how you’ll safely transport your creations. Can they be assembled on site? Do you need special boxes?
- Overall Harmony: Make sure your centerpieces match the rest of the decor, tableware, and cutlery. They shouldn’t compete, but enhance the atmosphere!
- The “Surprise Factor”: An unexpected element, like a small personalized note for each guest, a curious object, or a fun detail, can turn a good centerpiece into an unforgettable one!
- What Do We Do Afterward? (Post-Event Sustainability): What will happen to your centerpieces when the party ends? Can your guests take them? Can the elements be reused? Thinking ahead helps reduce waste.
- Support Lighting: Sometimes, the centerpiece shines brighter if you accompany it with other soft light sources in the room, creating a cozy and enveloping atmosphere.
- Don’t Be Afraid of Asymmetry! Not everything has to be perfectly symmetrical. Often, a slightly asymmetrical design can add an artistic and modern touch.
- Add a Subtle Aroma: In addition to sight, think about scent! Use aromatic herbs, candles with a soft fragrance, or discreet diffusers for a multi-sensory experience. But be careful not to overwhelm!
Let’s Get Started! Step-by-Step Example: Your Rustic-Chic Centerpiece with Flowers and Candles
So you can see that this is easier than it looks, here’s a simple guide to creating a centerpiece that everyone will love!
Title: Rustic-Chic Charm: Eucalyptus Garland with Scattered Candles and Flowers
The Idea: Imagine a natural garland of fresh foliage running down your table, dotted with the soft light of candles and the elegance of a few flowers. Perfect for rustic-themed weddings, special dinners, or autumn/winter gatherings!
What You Need:
- Foliage: 2-3 large bunches of eucalyptus (there are many beautiful varieties like baby blue or silver dollar!) or olive branches.
- Flowers: 10-15 stems of your favorite flowers (e.g., white or cream roses, dahlias, ranunculus, chrysanthemums). Choose ones that hold up well out of water, or have floral water tubes handy if the event will be long.
- Candles: 6-8 pillar candles of various heights (e.g., 10 cm, 15 cm, 20 cm) in neutral tones (white, ivory) or that match your flowers.
- Candle Holders: 6-8 secure bases for your pillar candles, such as small wood slices or low metal pedestals.
- LED Fairy Lights (optional): 2-3 strands of battery-operated lights, in warm white.
- Tools: Your pruning shears, thin floral wire, wire cutters, and your hot glue gun (optional, for securing lights or elements).
Step-by-Step Instructions (as if you were doing it with me!):
- Prepare Your Foliage:
- Remove the eucalyptus from its packaging and strip any leaves from the lower part of the stems to keep them clean.
- Cut the larger branches into manageable sections, about 30-40 cm long.
- If the event is in a few hours, submerge the stems in water for a while to hydrate them well.
- Assemble the Garland Base:
- Place the first eucalyptus branch in the center of the table, facing one direction.
- Now, place the next branch, slightly overlapping the cut end of the previous one, but oriented in the opposite direction, like forming a “Y” in the center of the table!
- Continue placing branches along the table, always overlapping the stems to create a continuous, leafy garland. Try to hide the stems under the leaves.
- Let the ends of the garland hang slightly over the edges of the table, if you like the effect, it looks very natural!
- Add the Candles (and the Romance!):
- Distribute the candle holders and pillar candles along your eucalyptus garland.
- Place candles of different heights strategically so the eye enjoys looking at them. An alternating pattern (tall, medium, short) works wonderfully.
- Ensure the candles are firmly seated in their bases and that there is enough space between them and the foliage to avoid accidents. If you wish, you can use the hot glue gun to secure the bases to the table or a tray.
- The Finishing Touches: Your Flowers!:
- Cut the stems of your flowers to different lengths.
- Insert the flowers individually into the eucalyptus garland. Distribute them evenly or in small clusters to create eye-catching focal points.
- If your flowers need water and the party will be long, use small floral water tubes on the stems to keep them fresh.
- Integrate LED Fairy Lights (if you fancy a magical touch!):
- Weave the LED fairy light strands through the eucalyptus garland, making sure the battery packs are hidden under the foliage or at the ends of the table.
- These lights will add a magical glow when night falls!
- Final Adjustments (Your Master Touch!):
- Stand back and observe the centerpiece from different angles. Adjust branches, flowers, and candles so everything is balanced and harmonious.
- Ensure the height does not obstruct your guests’ view.
- Light the candles (or turn on the LED lights) just before guests arrive for maximum impact!
Want Variations? Here are some ideas!
- For a more dramatic touch: Add some berries (e.g., holly or ruscus berries) or small branches with pinecones for the winter season.
- Color change: Use vibrant colored flowers for a bold contrast with the green eucalyptus.
- Minimalist: If you like simplicity, omit the flowers and just use eucalyptus and candles for a cleaner, simpler look.
- With aroma: Insert fresh rosemary or lavender sprigs among the eucalyptus for a delicate scent.
This detailed process will not only give you a beautiful centerpiece but also the satisfaction of having created it with your own hands. You will leave a lasting impression of your style and great hospitality in the mind of every guest!
The Great Secret: The Magic of What is Made with the Heart
You see, your DIY centerpieces are much more than simple decorations. They are small works of art that express your creativity, your hospitality, and the love you put into every detail. By embarking on this crafting adventure, you will not only transform your tables but also infuse your events with a warmth and authenticity that no one will forget. From the freshness of flowers to the flicker of candles, from rustic austerity to modern boldness, the possibilities are as limitless as your own imagination.
With the right design tricks, a dash of inspiration, and a desire to experiment, you can create centerpieces that not only complement your event but become memorable conversation starters! You will leave every guest with a lasting impression of your ingenuity and good taste. So, dare to be creative, personalize every detail, and watch as your tables transform into scenes of beauty and charm, inviting celebration and moments that will be etched in memory!