10 Brilliant DIY Upcycling Ideas to Revitalize Household Items
In the hustle and bustle of our daily lives, with so many things we buy and then discard, we sometimes forget that we possess a superpower: creativity! We can transform what we call “trash” into authentic treasures. Recycling materials for our crafts is not just a fun way to spend time and learn new things; it’s a significant gesture we make to our planet, a seed we plant to care for our shared home, and incidentally, a boost of imagination for ourselves! Think of those plastic bottles, milk cartons, cans, or paper rolls: if we give them a second chance, we are not only helping to reduce our footprint on Earth but also opening up a world of possibilities to express ourselves and develop our skills.
So, ready for the adventure? Here are ten super easy craft ideas designed for anyone, regardless of age or whether you think you’re not very “handy.” The best part is that you’ll use things you surely already have at home, proving that you don’t need to spend a fortune to create something beautiful and useful! Beyond the fun of getting creative, these activities are a great way to learn (or teach the little ones) the importance of recycling, reusing, and reducing. Thus, every time you create something, you’ll be giving a vital lesson on how to cherish our planet. Get ready to unleash your inner creativity and turn the ordinary into something extraordinary with these inspiring ideas!

Creative Upcycling: Transforming Everyday Items
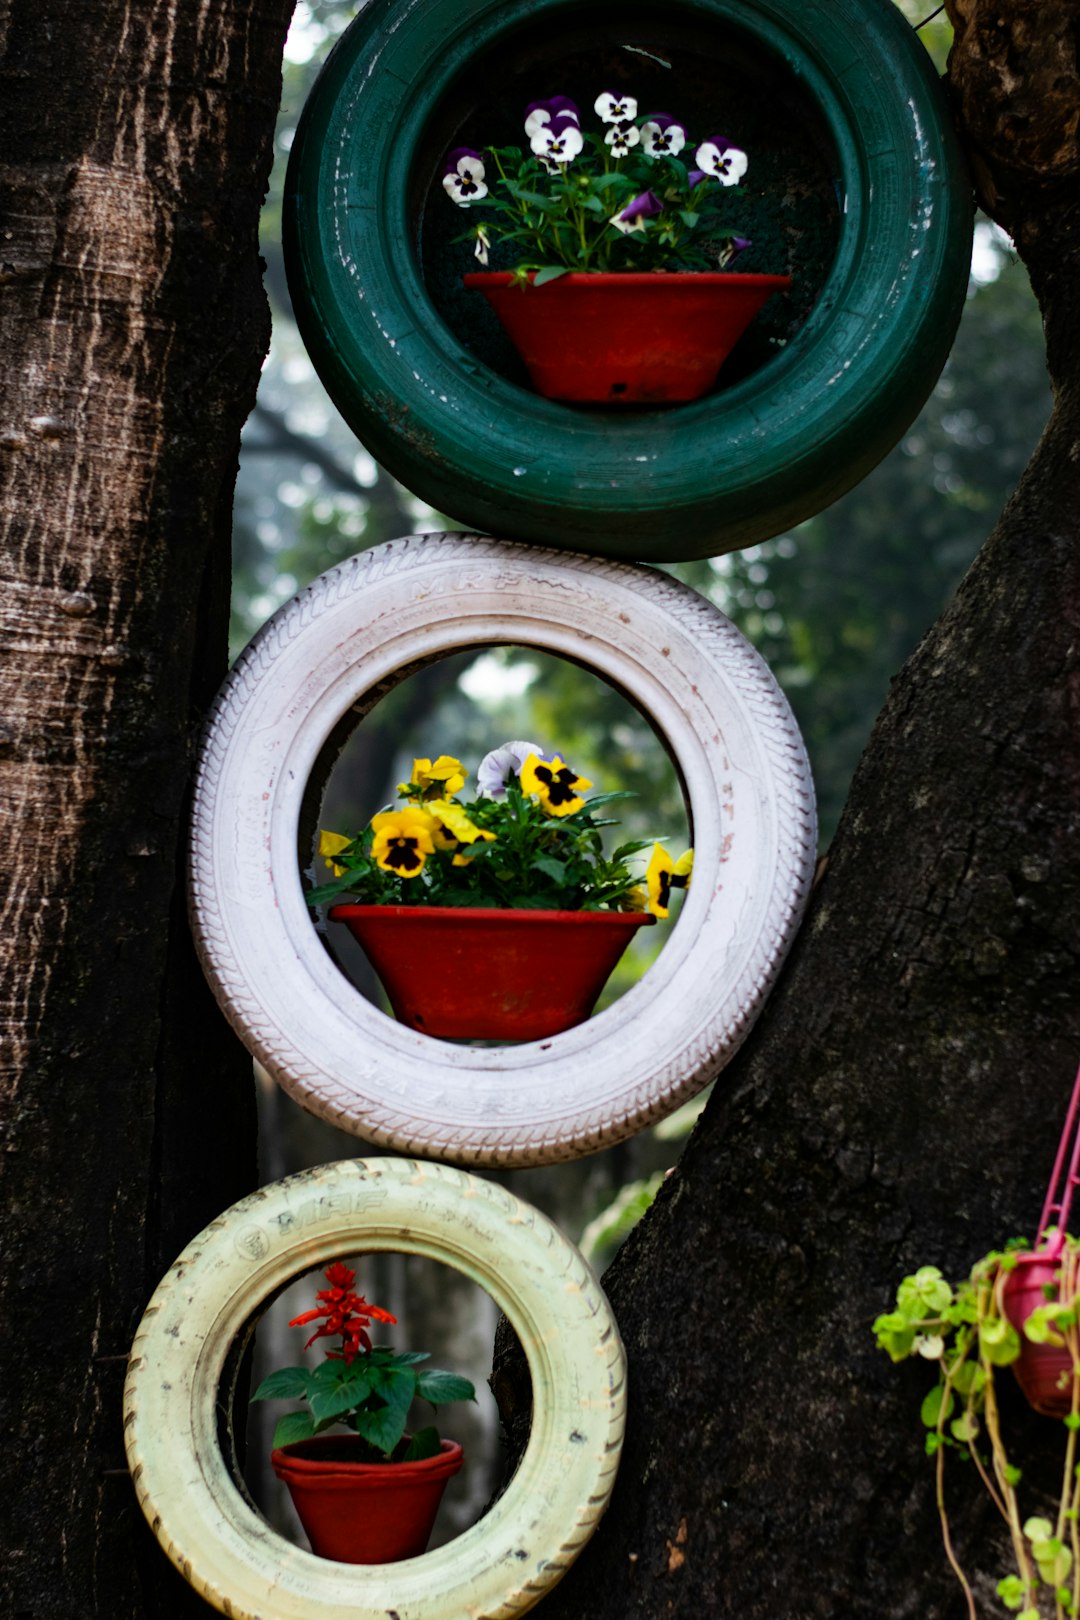
1. Give Life to Your Plastic Bottles with Awesome Planters!
Plastic bottles are everywhere in our homes, and they are significant contributors to pollution. Their resistance and ease of handling make them perfect for many projects. Among these, creating decorative planters is one of the coolest and most practical options. By transforming a simple bottle into a pot, you’re not only giving it a second chance but also creating original and personalized containers for small plants or your favorite herbs.
What You’ll Need:
- Plastic bottles (water, soda, milk), in various sizes for variety.
- Scissors or a utility knife (always with adult supervision if children are present!).
- Acrylic or spray paints in your preferred colors.
- Paintbrushes.
- Permanent markers.
- Optional extras: glue, glitter, sticker eyes, buttons, fabric scraps, or string.
- Of course! Potting soil and small seeds or plants.
How-To Steps:
- Prepare Your Bottle: Wash it thoroughly and dry it completely. Ensure no drops remain! Remove all labels.
- Cut the Bottle: Using scissors or a utility knife, cut the bottle. You can cut it in half to get two planters (one with the base and another with the inverted top part, which could be for self-watering). Or, if you want a taller planter, cut only the top part. Here’s the fun part! If you cut the top, shape it like cat ears, crowns, or whatever you can imagine to make it more original. If the edges are a bit rough, sand them with fine sandpaper or cover them with decorative tape for safety.
- Drainage Holes (Very Important!): If you plan to plant directly, make a few small holes in the base with a hot awl (adults only!) or a small drill. This will allow water to drain and prevent roots from rotting.
- Decorate (Your Favorite Part!): This is the moment to unleash your inner artist! Paint the bottle with your favorite acrylics. You can create geometric patterns, landscapes, animals, or whatever your imagination desires. With permanent markers, add fine details, faces, or phrases.
- Small Details: Once the paint is dry, you can glue on sticker eyes to give it a “face,” add buttons, fabric scraps, or wrap the top with string for a rustic touch. A little glitter never hurts for a sparkling accent!
- Plant: Fill your decorated planter with soil and plant your seeds or small plant. And don’t forget to water!
Ideas for Personalization and Variations:
- Hanging Planters: Make a couple of extra holes at the top and thread a sturdy string through them to hang your planters on the wall or from the ceiling.
- Self-Watering Planters: Use the top part of the bottle upside down as a funnel and the base as a water reservoir, connecting both parts with a strip of fabric acting as a “wick.”
- Animal Planters: Cut the bottle to resemble an animal’s head (a pig, a cat, a bear) and then paint on the facial details.
Helpful Tips:
- If using spray paint, do so in a well-ventilated area.
- Always supervise children if they are using scissors or utility knives.
- Ensure the paint is completely dry before handling the planter or adding more items.
- These planters are perfect for succulents, small cacti, aromatic plants, or for starting your seedlings.
The Best Part!
This project not only helps you to be more creative and improve your painting skills but also teaches you to value what you recycle and how to give it a new life. Additionally, it connects you with nature and the plant cycle. It’s a great way to teach children to care for our planet!
2. Build Your Own Cardboard Mansion for Endless Play!
Those big cardboard boxes are a treasure trove for imagination, especially for children! A simple box can become a house, a magical castle, a spaceship flying to the moon, a race car, or whatever they can imagine. This project will not only provide hours of fun but also stimulates imagination, spatial design, and teamwork! It’s the perfect way to recycle those huge appliance or moving boxes, turning something that was headed for the trash into a personalized and eco-friendly toy.
What You’ll Need:
- One (or several, if you dare!) large and sturdy cardboard boxes (think refrigerator, washing machine, or TV boxes).
- Utility knife or strong, large scissors (adults only, please!).
- Packing tape or masking tape.
- Strong glue for cardboard.
- Paints (acrylics, tempera, spray paint) and paintbrushes.
- Permanent markers in all colors.
- Decorative items: fabric scraps, wrapping paper, buttons, leaves, twigs, colored cardstock… anything goes!
How-To Steps:
- Plan the Design! First, think: what do you want to build? A house with doors and windows? A castle with battlements? A spaceship with control buttons? Draw a quick sketch on paper or directly on the cardboard.
- Prepare the Box: If the box is folded, open it. Make sure all flaps are securely attached or remove them if not needed. If the box isn’t very strong, reinforce the joints with packing tape.
- Cut Openings: Using the utility knife (an adult with great care!), cut out doors, windows, skylights, or whatever you can imagine. Ensure the edges are smooth to prevent cuts. You can leave a door flap to open and close.
- Assemble! (If using multiple boxes): If you’re making something bigger with several boxes, join them with packing tape or strong glue. You can stack them to create multiple floors or add “wings” or extensions.
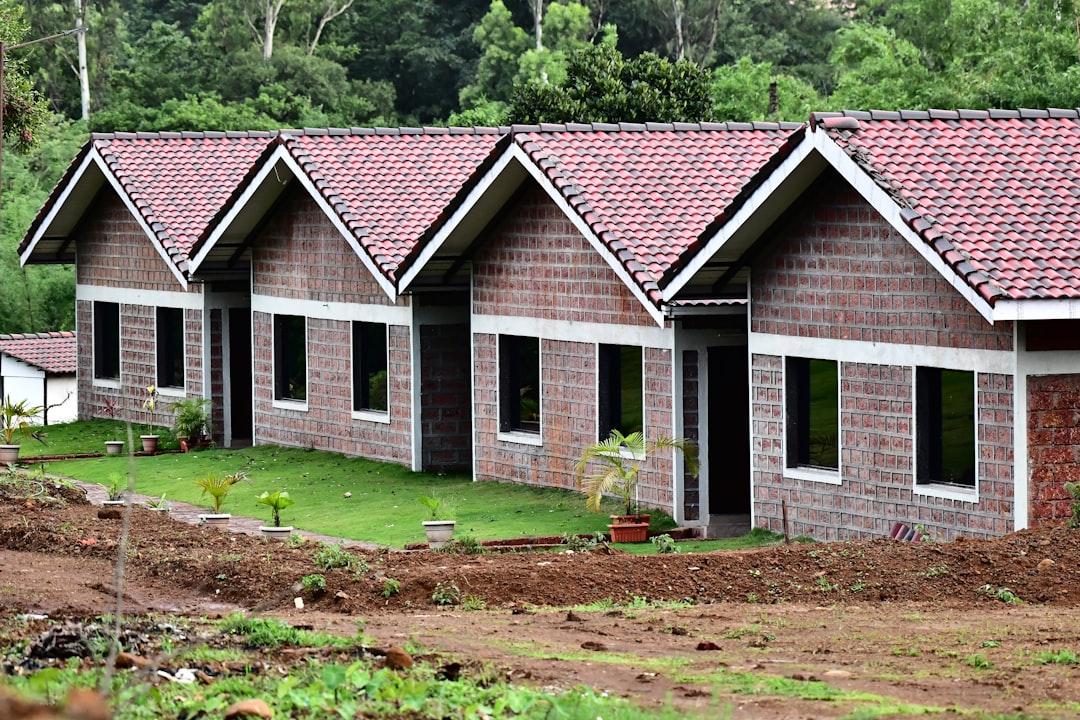
- Decorate the Exterior: Time to paint! For a house, you can make bricks, a tiled roof, and a garden around it. If it’s a spaceship, use metallic colors and paint control panels. Let the paint dry completely.
- Final Details: With markers, draw details like window frames, door handles, gauges, buttons, or patterns on the roof. Glue on fabric scraps for curtains, wrapping paper to wallpaper an interior wall, or colored cardstock to create decorative elements.
- Decorate the Interior (If it fits!): If the structure is large enough, children can decorate the inside with their drawings, blankets, cushions, or even small furniture made from lighter cardboard.
Ideas for Personalization and Variations:
- Camping Tent: Cut the top of the box into an inverted “V” shape and cover it with fabric to simulate a tent.
- Crazy Vehicles: Transform the box into a race car, a fire truck, a train, or a bus. Add cardboard wheels and a steering wheel!
- Puppet Theater: Cut a large rectangular opening in the front and decorate it as a stage.
- Fun Maze: If you have many boxes, join them to create a small interactive maze.
Helpful Tips:
- Always cut with the utility knife on a protected surface and, please, ensure it’s an adult doing it!
- Make sure everything is stable and safe for children to play.
- Encourage children to participate in everything, from design to decoration! This fosters their autonomy.
- Use non-toxic paints, especially if children will be inside the box.
The Best Part!
This big project is not only fantastic for team play but also sparks imagination and helps problem-solve. Children learn about structures, design, and how to transform simple materials into fantastic worlds. Plus, we’re reusing a lot of cardboard and preventing it from ending up in landfills!
3. Create a Zoo of Characters with Toilet Paper Rolls!
Those cardboard rolls left when toilet paper or kitchen towels run out are incredibly versatile and abundant! Their cylindrical shape is the perfect base for creating countless animals, characters, miniature cars, or anything you can imagine. This craft is great for little ones, as it doesn’t require complicated cuts and provides an excellent surface for painting and decorating. You’ll see their creativity blossom and their painting skills improve! It’s a very inexpensive and accessible activity that turns something destined for the trash into a source of play and learning.
What You’ll Need:
- Cardboard rolls from toilet paper or kitchen towels.
- Paints (tempera, acrylics) and paintbrushes.
- Markers, colored pencils, or crayons.
- Scissors.
- White glue or glue stick.
- Colored cardstock, EVA foam, felt, yarn, cotton… whatever you have!
- Optional extras: sticker eyes, small pom-poms, glitter, feathers.
How-To Steps:
- Prepare the Roll: Ensure the rolls are clean and dry.
- Add a Touch of Color: Paint the roll with the base color of your character or animal. Green for a frog? Brown for a bear? White for a rabbit? You choose! Let it dry thoroughly.
- Cuts and Shapes (If you dare): To make ears, legs, or wings, you can make small cuts in the roll or cut shapes from cardstock and glue them on. For example, for cat ears, fold one end of the roll inward at two points to form triangular tips. For an owl, fold the top toward the center to create “eyes.”
- Add a Face! Once the paint is dry, use markers or a fine paintbrush to draw eyes, a nose, a mouth, stripes, spots, or any detail that makes your animal or character unique. If using sticker eyes, glue them on now!
- Small But Mighty Details: This is where your creativity will shine brightly!
- Ears/Legs/Wings: Cut shapes from cardstock, felt, or EVA foam and glue them to the roll.
- Hair/Feathers: Use yarn, cotton, or paper strips to simulate hair, a mane, or feathers.
- Fun Accessories: Add small hats, paper bow ties, yarn tails, or any other accessory that completes your creation.
- Texture: You can glue crumpled tissue paper, sequins, or glitter to give it a different touch.
- Join Pieces! (If necessary): If you are creating a more complex character that needs multiple parts (e.g., articulated arms), use glue and small strips of cardboard to join them.
Ideas for Personalization and Variations:
- Storybook Characters: Create the three little pigs, the big bad wolf, princesses, or knights!
- Miniature Vehicles: Cut out a space for the cabin, add cardboard wheels, and you’ll have a car or a train!
- Decorative Garlands: Make several themed characters and string them together to create a garland.
- Bowling Game: Decorate several rolls with numbers and use them as bowling pins with a small ball.
- Finger Puppets: Cut the rolls in half and decorate them as puppets that slide onto your fingers.
Helpful Tips:
- Don’t use too much glue; you don’t want the cardboard to get soaked and deform!
- Let each layer of paint or glue dry before adding the next, so nothing gets smudged or falls off.
- Encourage children to invent their own characters and tell stories with them.
- This craft is perfect for group activities; everyone can create a different character!
The Best Part!
This project sparks imagination, storytelling ability, and artistic expression. It helps improve fine motor skills when using scissors (if age-appropriate), paintbrushes, and glue. Most importantly, it teaches how to transform objects destined for the trash into durable and meaningful toys. It’s the perfect example of how recycling can fuel your creativity!
4. Say Goodbye to Clutter! Cool Organizers with Tin Cans
Empty tin cans usually end up in the recycling bin, right? But wait! Their strength and cylindrical shape make them perfect for reuse as super practical and pretty organizers for your desk, workshop, or any little corner of the house crying out for some order. Transforming these cans is a simple and very rewarding project that not only helps the environment but also allows you to personalize your spaces and keep your pens, pencils, brushes, or small tools always at hand and organized!
What You’ll Need:
- Empty and clean tin cans (different sizes are useful for different things!).
- A safety can opener that doesn’t leave sharp edges, or a metal file (if the edge is a bit dangerous).
- Acrylic or spray paints, or decorative paper (wrapping paper, old magazines, rice paper, fabric…).
- Strong glue (if using paper or fabric).
- Paintbrushes.
- Optional extras: ribbons, buttons, string, pom-poms, glitter, lace, clear varnish.
How-To Steps:
- Clean and Secure (First things first!): Wash the cans thoroughly with soap and water, and dry them very well to prevent rust. It’s super important that the top edges are not sharp. If you used a regular can opener, carefully sand the edge with a metal file or cover it with wide, sturdy adhesive tape to prevent cuts. Safety can openers that cut from the side are the best, leaving nothing sharp!
- Base for Painting (Optional, but highly recommended): If you’re going to paint, giving it a coat of metal primer helps the paint adhere better and last longer. Let it dry.
- Decorate – Option 1 (With a Brush!): Paint the outside of the cans with your favorite colors. You can create patterns, stripes, dots, or simply a solid color that matches your decor. Acrylic paints dry quickly, making them a good option! For a shinier and more durable finish, you can apply a coat of clear varnish when the paint is dry.
- Decorate – Option 2 (With Paper or Fabric!): Measure the circumference and height of the can. Cut decorative paper (wrapping paper, magazine pages, cool patterned fabric scraps) to size. Apply strong glue to the outside of the can and carefully wrap the paper or fabric, smoothing out any bubbles. Trim any excess.
- Small But Mighty Details: Once the paint or glue is dry, it’s time for the finishing touches! Glue ribbons around the top or bottom, colorful buttons, rustic string, lace for a vintage feel, or small pom-poms. You can also use permanent markers to draw more intricate designs.
- Organize! Once all your cans are decorated and dry, use them to hold your pens, pencils, rulers, scissors, makeup brushes, or craft tools. If you wish, you can glue several cans together or onto a cardboard base to create a modular organizer, just as you like!
Ideas for Personalization and Variations:
- Themed Pen Holders: Decorate the cans according to a theme you love (space, animals, flowers, superheroes…).
- Herb Planter: If you make some drainage holes in the base (with a drill or hammer and nail), the cans can be small pots for your kitchen herbs.
- Magical Candle Holders: For a cozy ambiance, you can make small holes with a nail and hammer (very carefully!) and place an LED candle inside. It will create beautiful reflections!
- Storage Containers: Larger cans are perfect for storing sewing accessories, small toys, or office supplies.
Helpful Tips:
- Safety first! Be very careful when handling cans, especially the edges.
- If spray painting, do so in a well-ventilated area and protect the surface with newspaper or cardboard.
- Make sure the cans are completely dry before painting or gluing to prevent rust.
- This project is great for using up those scraps of wrapping paper, fabric, or magazines you save “just in case.”
The Best Part!
Besides being a super practical way to recycle metal, this craft improves your design and decorating skills. It helps you be more organized and create functional and beautiful spaces. For children, it’s a good way to practice hand-eye coordination and understand how to reuse everyday items. A simple and sustainable way to beautify and organize your surroundings!
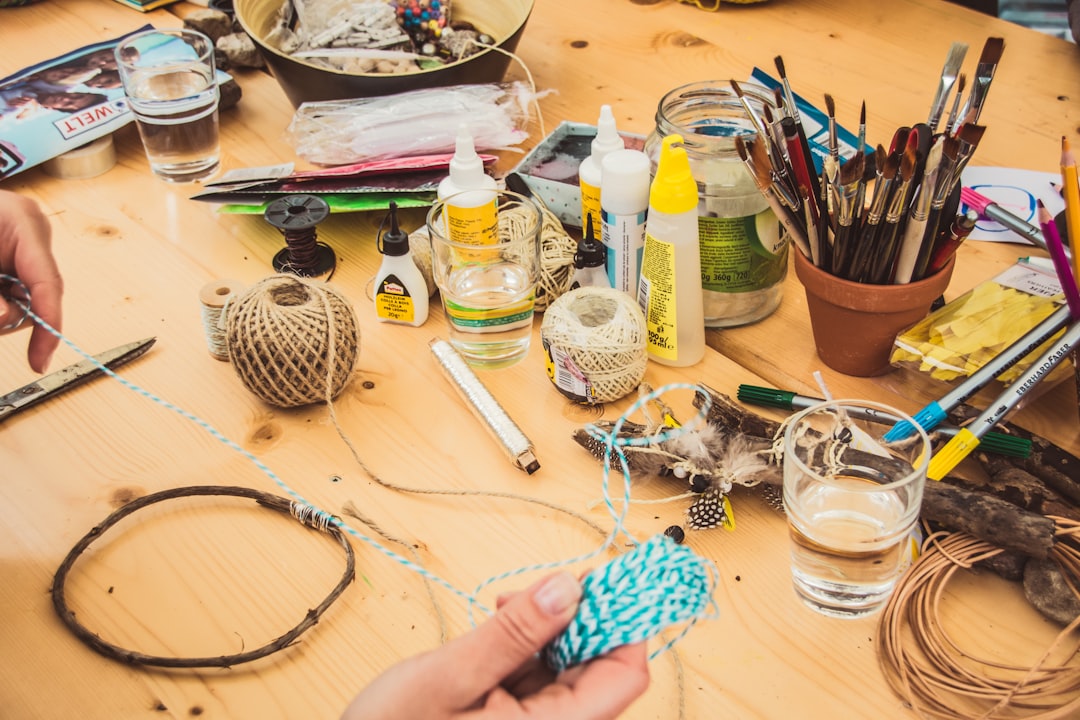
5. Turn Old Magazines into Jewelry with Paper Beads!
Transforming old paper from magazines and newspapers into beads for jewelry or decoration is one of the most ingenious and sustainable crafts out there! This project not only recycles a lot of paper that would otherwise end up in the trash but also produces unique and personalized pieces with surprising textures and patterns. It’s an activity that requires a bit of patience and precision, but the final result is beautiful and completely original accessories, perfect for necklaces, bracelets, or any ornament you can think of.
What You’ll Need:
- Old magazines (the more colorful and shiny the pages, the better!), newspapers, or advertising brochures.
- Scissors or a utility knife.
- A ruler.
- A pencil.
- White glue (school glue or PVA glue, ideally transparent when dry!).
- Toothpicks, thin wooden skewers, or thin knitting needles (for rolling the paper).
- Clear glossy varnish (to protect them and make them shiny) or clear nail polish.
- Thread, string, or wire for stringing your beads.
How-To Steps:
- Prepare Your Paper: Choose magazine or newspaper pages with your favorite colors and patterns. The more colorful, the more vibrant your beads will be!
- Cut the Strips: Using the ruler and pencil, mark strips on the paper. For round beads, the strips should be wide at one end and narrow at the other (think of an elongated isosceles triangle). For more cylindrical beads, the strips can be more rectangular but always slightly wider on one side to give them shape. Measurements vary; for example, a strip 2-3 cm at the base narrowing to 0.5 cm at the tip, with about 20-30 cm in length, will give you good-sized beads.
- Roll! Place the wider end of the paper strip over the toothpick (or whatever you’re using to roll). Roll the paper firmly and evenly around the toothpick, keeping the strip taut so the beads are compact.
- Glue! When you reach the narrower end of the strip, put a small drop of white glue on the tip and press it firmly to the paper roll to secure the bead. Carefully slide the bead off the toothpick.
- Dry: Place the beads on a non-stick surface or stick the toothpicks with the beads into a piece of cork to dry completely.
- Varnish! Once dry, apply one or two coats of clear glossy varnish to each bead. This will make them durable, moisture-resistant, and give them a professional finish. Let them dry very well between coats. Clear nail polish also works great for small beads.
- Thread! When the varnish is completely dry, your beads are ready! You can string them on thread, string, or wire to make necklaces, bracelets, earrings, or any other ornament you can think of.
Ideas for Personalization and Variations:
- Different Shapes: Experiment by cutting paper strips into different shapes to get rounder, oval, cylindrical, or even disc-shaped beads.
- Mix Colors and Textures: Combine different types of paper to mix colors and textures. Pages with small text can give a more subtle look, while large, colorful images will create bolder patterns.
- Home Ornaments: Use larger beads for door curtains, decorative mobiles, or to adorn lamps.
- Combine with Other Beads: Mix your paper beads with wood, glass, or metal beads to create more complex and varied designs.
Helpful Tips:
- Make sure the paper is very flat before cutting the strips to ensure uniform beads.
- The secret to beautiful beads is to roll the paper very tightly and evenly.
- If the beads feel a bit soft, you can briefly dip them in a diluted mixture of white glue and water, let them dry, and then varnish.
- This project requires patience, ideal for improving concentration and manual dexterity!
The Best Part!
This craft is not only a fantastic way to recycle paper and reduce waste but also fosters attention to detail, patience, and manual skill. It allows you to create unique jewelry and accessories with minimal environmental impact, offering a sustainable alternative to purchased items and teaching you to appreciate reused materials.
6. Give Birds a Home! Feeders from Milk or Juice Cartons
Milk or juice cartons, with their impermeability and resistance, are perfect materials to transform into bird feeders. This project is not only a great way to reuse these containers but also offers a wonderful opportunity to connect with nature, observe the birds in your area, and teach children the importance of caring for the environment and all its inhabitants. Building a bird feeder is a very rewarding activity that directly contributes to the well-being of the birds in your garden or balcony.
What You’ll Need:
- An empty and clean milk or juice carton (1 liter or larger).
- Scissors or a utility knife (always with adult supervision!).
- Sturdy string or wire (for hanging).
- Non-toxic acrylic paints or tempera paints (if you want to decorate it).
- Paintbrushes (if you want to paint).
- Permanent markers (if you want to add details).
- A small stick or wooden skewer (for the bird to perch on).
- And of course! Bird seeds.
How-To Steps:
- Clean the Carton: Wash the milk or juice carton very well with soap and water; ensure no residue remains! Let it dry completely, ideally outdoors or upside down so no moisture remains.
- Cut the Opening: With a pencil, draw one or two rectangular openings (or your preferred shape) at the bottom of the carton’s sides. These openings should be large enough for birds to access the seeds but not so large that wind easily empties them. With a utility knife (handled by an adult!), carefully cut out these openings.
- A Perch for the Birds: About 1-2 cm below each opening, make a small hole in the carton with an awl or the tip of scissors. Insert a small stick or wooden skewer through these holes, so it protrudes from both sides of the opening. This will be the bird perch! If necessary, secure it with a little glue.
- Drainage Holes! (Very Important!): Make 2 or 3 small holes in the feeder’s base with an awl or a thin drill. This is crucial for rainwater to drain and prevent seeds from getting wet and spoiling.
- Decorate (If you wish): If you want, you can decorate the outside of the feeder. Use non-toxic acrylic paints or tempera paints (make sure they are safe for the environment and animals!) to paint the carton. You can draw designs, paint leaves, flowers, or simply give it a cheerful color. Let it dry completely. You can also glue on natural elements like dried leaves or small twigs (make sure they don’t have chemicals!).
- String for Hanging: Make two small holes at the top of the carton (or in the top flaps) and thread a sturdy string or wire through them. Tie a secure knot at both ends to create a handle for hanging the feeder.
- Fill and Hang! Fill the feeder with bird seeds. Hang it on a tree branch, on a hook on the balcony, or in a place where birds feel safe and you can observe them.
Ideas for Personalization and Variations:
- Feeder with Roof: You can cut the top of the carton to have a pointed roof shape, which will give it a nicer touch and offer more rain protection!
- Multiple Entrances: If you use a large carton, you can make openings on all sides so more birds can eat at once.
- Window Feeder: Adapt a design to attach the feeder with suction cups to the window and observe birds up close!
Helpful Tips:
- Ensure the paints you use are non-toxic and do not emit strong odors once dry, to avoid scaring or harming the birds.
- Clean the feeder regularly (every 2-4 weeks) to prevent mold or bacteria buildup that could be harmful to birds.
- Place the feeder in a location protected from wind and predators (like cats!).
- Change the seeds often to keep them fresh and appealing to birds.
The Best Part!
This project is a fantastic way to teach children about wildlife, ecology, and environmental responsibility. It fosters nature observation, patience, and animal care. Besides recycling, it provides food for local birds, helping your area’s biodiversity!
7. Dazzle with Shiny Mosaics Made from Old CDs and DVDs!
Those old CDs and DVDs… what a shame when they no longer work or are scratched! But don’t throw them away! They have a spectacular second life in the world of crafts. Their iridescent and reflective surface makes them perfect materials for creating sparkling mosaics and decorations that will catch everyone’s eye! This project is a super ingenious and attractive way to recycle our old discs, transforming a technological object into a true visual work of art that plays with light.
What You’ll Need:
- Old and scratched CDs or DVDs.
- Sturdy scissors or CD/DVD cutters (always with an adult if scissors are very difficult to use!).
- A surface to decorate: photo frames, wooden boxes, coasters, glass vases, mirrors, trays…
- Strong glue (school white glue or universal glue, ideally transparent when dry!).
- A pencil.
- Mosaic grout or filler (optional, for a more professional finish).
- Safety gloves (optional, to protect your hands when cutting discs).
- Newspapers or cardboard to protect your work area.
How-To Steps:
- Prepare the Discs: Make sure the CDs/DVDs are clean. To make them easier to cut and prevent breakage, you can soak them in warm (not boiling!) water for a few minutes. This sometimes helps separate the layers and makes cutting easier.
- Cut the Pieces: This is the most delicate step. Using sturdy scissors or a CD/DVD cutter, cut the discs into small pieces of various shapes (squares, triangles, rectangles, irregular shapes). Be very careful; the edges can be sharp! It’s a good idea to wear gloves. Don’t worry if they’re not uniform; the beauty of mosaic lies in the variety of pieces!
- Prepare the Surface: Clean and prepare the surface you’re going to decorate. If it’s porous (wood, cardboard), you can paint it with a dark base color to make the CD’s shine stand out even more.
- Design and Glue: Think about your design. You can draw a pattern on the surface or simply start gluing the CD/DVD pieces randomly. Apply glue to the back of each piece (the non-shiny side) and press it firmly onto the surface. Leave a small space between the pieces to resemble a traditional mosaic. Continue gluing until you cover the entire surface or the area you want.
- Dry: Let the glue dry completely. This can take several hours or even a day, depending on the type of glue!
- Apply Grout (Optional): If you want a more polished mosaic finish, once the glue is dry, you can apply mosaic grout (like that used for tiles) in the spaces between the pieces. Use a rubber spatula to spread it and then remove excess with a damp sponge, cleaning the surface of the CD pieces. This step is a bit more advanced, and you can skip it if you prefer a more rustic or direct mosaic.
- Clean and Shine: Once the grout or glue is completely dry, clean and polish the CD pieces to ensure they shine their brightest.
Ideas for Personalization and Variations:
- Sparkling Coasters: Decorate cardboard or wooden coasters with CD pieces for a modern touch.
- Mirror Frame: Transform a boring mirror into the focal point of any room.
- Vase or Flower Pot: Glue CD pieces around a glass vase or metal pot for an iridescent effect.
- Mobile Sculpture: Create a flat cardboard figure and cover it with mosaics. Then hang it to spin and reflect light.
- Wall Art: Glue CD pieces onto a canvas or wooden board to create abstract, sparkling wall art.
Helpful Tips:
- Work in a well-lit area so you can appreciate the CDs’ shine as you work.
- Protect your work table with newspapers or cardboard to prevent glue or scratches.
- If the CD edges are very sharp, you can use a fine file to smooth them, although for small mosaics, this is usually not necessary.
- Experiment with different colored or types of discs (recordable CDs, DVDs, etc.) to see how the reflections change.
The Best Part!
This craft is a fantastic way to recycle electronic waste, reducing the amount of tech junk! It fosters visual creativity, patience, and precision. The result is a decorative and functional object that adds a touch of modern and sustainable art to any space, showing that even the most obsolete can have a new life full of light.
8. Weave Your World with “Plarn”: Plastic Bag Yarn!
Plastic bags… an environmental headache! They take centuries to disappear and wreak havoc on our ecosystems. But here’s a super creative solution to reuse them! We can turn them into “plarn” (plastic yarn), a surprisingly strong and versatile material you can knit, crochet, or braid to create many useful and decorative items. This project not only drastically reduces plastic waste but also gives you the opportunity to learn or practice weaving techniques with a very unconventional material!
What You’ll Need:
- Plastic grocery bags (as many as you can find, and in different colors for variety!).
- Scissors.
- A crochet hook or knitting needles (the appropriate size for the thickness of your “plarn”).
- Optional: fabric or mesh bases for weaving rugs, or a wire structure for baskets.
How-To Steps to Create Plarn:
- Prepare the Bags: Lay a clean, flat plastic bag out smoothly. Fold it lengthwise several times to form a long, narrow strip.
- Cut Rings: Cut off the top and bottom parts of the bag (where the handles and sealed base are). Then, cut the bag into rings or loops about 2-3 cm wide.
- Join the Rings: Take one ring and join it to another. Pass the second ring through the first, and then pass one end of the second ring through its own loop, gently pulling to create a slip knot. Repeat this process with all the rings, joining them one after another to form a long chain of “plarn.”
- Roll It Up! When you have a good amount of plarn, roll it into a ball like regular yarn. This will make it much easier to handle for your weaving projects!
Projects with Plarn (General Ideas and Steps):
Project 1: Plarn Rugs
- Materials: Plarn, a large crochet hook (10-15 mm), non-slip base (optional).
- Steps: Use the crochet technique to weave the plarn in circles or rows to create a rug. Single crochet is usually the strongest stitch. You can make it as large as you want by joining more plarn! Plarn rugs are durable, waterproof, and very easy to clean, ideal for entryways, bathrooms, or outdoors.
Project 2: Plarn Bags and Baskets
- Materials: Plarn, crochet hook, scissors.
- Steps: With crochet, you can weave a reusable shopping bag or a basket for storage. Start with a round or oval base and then weave upwards in a spiral or in rounds to form the sides of the bag or basket. Add handles by crocheting chains or using recycled plastic/metal handles.
Project 3: Coasters or Placemats
- Materials: Plarn of various colors, crochet hook.
- Steps: Crochet small circles or squares of plarn to create individual coasters. They are water-resistant and will protect your surfaces!
Ideas for Personalization and Variations:
- Play with Colors: Use bags of different colors to create patterns, stripes, or “marbled” effects in your projects.
- Garden Accessories: Plarn baskets are great for picking fruits or vegetables because they are waterproof and easy to clean! You can also weave plant protectors.
- Home Decor: Create baskets for storing toys, magazine holders, or pot covers.
- Pet Toys: You can braid plarn to make a durable toy for dogs, though always under supervision to prevent plastic ingestion.
Helpful Tips:
- Plarn is stronger than it looks but can be a bit harder to weave than normal yarn. Be patient and adjust your hook size!
- If your fingers get tired, take breaks. Plastic can be a bit rough at first.
- Thicker plastic bags (like trash bags or some shopping bags) will make stronger plarn.
- Make sure the bags are very clean before turning them into plarn.
The Best Part!
This is one of the most impactful recycling projects, as it directly reduces the number of plastic bags ending up in landfills or polluting our environment. It fosters your creativity, weaving (crochet/knitting) skills, and patience. It offers a practical and durable solution for everyday items, promoting a circular economy and a more sustainable lifestyle!
9. Let Your Imagination Bloom with Flowers and Decorations from Egg Cartons!
Egg cartons, made from recycled paper, are a surprisingly versatile and super easy-to-handle material for creating delicate and beautiful decorations! Their natural shape, with those cups and points, is perfect for transforming into flowers, garlands, Christmas ornaments, or small figurines, adding a rustic and charming touch to any corner. This project is ideal for all ages and is a fantastic way to reuse these common containers before they end up in the recycling bin.
What You’ll Need:
- Cardboard egg cartons (paper ones, not polystyrene!).
- Scissors.
- Paints (acrylics, tempera, watercolors) and paintbrushes.
- White glue or hot glue (always with adult supervision!).
- Optional extras: buttons, pearls, glitter, pipe cleaners, wooden skewers, floral wire, spray paint.
How-To Steps to Create Flowers:
- Prepare the Carton: Make sure the egg carton is clean and dry.
- Cut the Cups: With scissors, cut out each individual “cup” from the egg carton. These cups will be the base of your flowers. You can also cut out the pointed sections that separate the eggs; they can serve as small buds or flower centers!
- Shape the Petals: Trim the edges of each cup to shape them into petals. You can make round, pointed, heart-shaped, or irregular petals to mimic different types of flowers (roses, daisies, tulips, bellflowers). Experiment with 4, 5, or 6 petals per cup!
- Color Them! Paint the flowers with your favorite colors. You can use different shades for the inside and outside of the petals, or add dots and stripes. Spray paint can give a more uniform and vibrant finish. Let it dry completely.
- Assembly (If necessary): For more voluminous flowers, you can glue several layers of cups with cut petals, stacking and rotating them slightly to create a fuller flower.
- Flower Centers: Glue a button, a pearl, a small pom-pom, or a coiled piece of pipe cleaner into the center of each flower for the finishing touch. Glitter can also add a special sparkle.
- Assemble! (Optional):
- With Stem: Glue a skewer stick (painted green) or floral wire to the back of the flower to create a stem.
- Garland: String several flowers onto a sturdy thread to create a decorative garland.
- Ornament: Simply use the individual flowers to decorate gifts, cards, mirrors, or pictures.
Ideas for Personalization and Variations:
- Fairy Lights Garlands: Make small flowers and glue them around a string of LED lights for cozy, luminous decor.
- Christmas Ornaments: Paint the flowers red, green, or white and decorate them with glitter to hang on the Christmas tree.
- Butterflies or Bees: Cut the cups into different shapes and add cardboard wings or pipe cleaners to create flying insects.
- Fantasy Jewelry: Make very small flowers and glue them to a ring or brooch base (with very strong glue) for costume jewelry.
- 3D Paintings: Glue several flowers of different sizes and colors onto a canvas to create a textured floral painting.
Helpful Tips:
- Egg cartons are porous, so they can absorb a lot of paint. Keep this in mind and apply thin coats or use a primer if you want very vibrant colors.
- Hot glue dries quickly and is very effective for joining pieces, but use it with caution and adult supervision!
- Make sure the egg carton has not been in contact with broken or dirty eggs to avoid bad odors or bacteria.
The Best Part!
This project is a delightful way to reuse egg cartons, reducing household waste! It fosters creativity, fine motor skills, and an appreciation for natural materials. It’s an inexpensive and accessible activity that demonstrates how, with a little imagination, the simplest objects can become art and decoration, promoting a sustainable approach to our crafts.
10. Transform Your Glass Jars into Vases and Magical Lanterns!
Those empty glass jars left from jam, pickles, sauces… they are the king of recyclable materials! Their transparency and resistance make them the perfect base for countless decorative and functional projects. Transforming them into elegant vases or lanterns that create a magical atmosphere is a simple and beautiful way to give them a second life, adding a personal and sustainable touch to your home decor or any special event! This project is super customizable and allows you to explore many decoration techniques.
What You’ll Need:
- Empty and clean glass jars (in different sizes and shapes!).
- White glue (diluted with water for decoupage) or strong craft glue.
- Glass paints, acrylic paints, or spray paint (for glass).
- Paintbrushes, sponges, or applicators.
- Decorative items: tissue paper, decorated napkins, fabric (lace, jute), string, ribbons, beads, glitter, twigs, dried leaves, dried flowers… whatever you fancy!
- Small candles (LED or tea lights) for lanterns.
- Optional: wire for making handles.
How-To Steps for Vases:
- Clean the Jar: Wash the glass jar thoroughly with hot water and soap. Remove all labels by soaking it in hot water with a little detergent and scraping off any residue. Dry it completely.
- Base Decoration (With Paint!):
- Acrylic Paint: You can paint the outside of the jar with acrylic paints, applying several coats for good coverage. For a translucent effect, mix the paint with a little diluted white glue.
- Glass Paint: For a professional and durable finish, use specific glass paints that are baked or air-dried.
- Spray Paint: For a solid, uniform color, use spray paint for glass, applying thin coats in a well-ventilated area.
- Base Decoration (Decoupage/Fabric):
- Decoupage: Cut out shapes or patterns from tissue paper, magazines, or decorated napkins. Apply a layer of diluted white glue to the jar, place the paper, and then apply another layer of glue over it to seal.
- Fabric/String: Wrap the jar with strips of fabric (jute, lace) or string, gluing them firmly. You can create patterns with the string or combine different textures.
- Small But Mighty Details: Once the base is dry, you can add more items. Glue beads, buttons, shells, dried twigs, or wrap the top with ribbons and bows. Use glass markers to draw fine details.
- The Finishing Touch: If you used acrylic paint or decoupage, you can apply a layer of sealant or clear varnish to protect the decoration and add shine.
How-To Steps for Lanterns (in addition to or instead of vases):
- Decoration: Follow the base decoration steps, but consider that lanterns will look best with translucent or perforated materials that let light pass through. Tissue paper, lace, thin dried leaves, or cutout patterns with paint are ideal! You can apply glitter inside or out for a sparkling effect with light.
- Handle for Hanging (Optional): If you want to hang the lantern, wrap a piece of sturdy wire around the neck of the jar and form a handle at the top. Make sure the wire is securely fastened and safe.
- Enjoy! Place a small candle (LED candles are the safest for indoors and to prevent the glass from getting too hot) or a tea light inside. Light it and enjoy the ambient light.
Ideas for Personalization and Variations:
- Themed: Create themed vases or lanterns for each season (Christmas, Halloween, Easter), events (weddings, parties), or styles (rustic, bohemian, modern).
- Frosted Glass: Spray the inside of the jar with frosted finish spray paint for a diffused glass effect, ideal for lanterns!
- Storage Containers: Decorate the jars and use them to store dry foods, kitchen utensils, office supplies, or cosmetics.
- Personalized Gifts: Fill them with candies, homemade bath salts, or personalized messages for a unique gift.
Helpful Tips:
- Ensure the glass is impeccably clean and dry so paints and glues adhere correctly.
- If using hot glue, exercise caution as the glass can heat up.
- For a cleaner finish with spray paint, protect areas you don’t want to paint with painter’s tape.
- Always use LED candles in indoor lanterns or at events for greater safety, especially if decorative materials are flammable!
The Best Part!
Recycling glass jars reduces the need to manufacture new glass, a process that consumes a lot of energy. This craft fosters your creativity, design skills, and sustainable home decor. It allows you to create functional and beautiful pieces at a low cost, while promoting reuse and environmental awareness in your daily life!
The Magic of Creating: Your Personal Touch for a Better World
How amazing, right! Creativity has no limits, and when we combine it with love for our planet, the result is a powerful tool for change. These ten crafts we’ve explored together demonstrate that those things we often throw “to waste” have incredible potential to become something new, useful, and beautiful. From plastic bottles reborn as vibrant planters to old CDs shining as artistic mosaics, each project is a small miracle that shows how ingenious humans are and the positive impact we can generate with our own hands.
But beyond the personal satisfaction of creating something unique with your own hands, crafting with recycled materials has a myriad of incredible benefits. It directly contributes to less waste in landfills, reduces the need to extract new resources from the planet and the energy that implies, and minimizes our carbon footprint. And on a personal level, it’s wonderful! These activities ignite imagination, improve coordination, help us problem-solve, and teach us patience and attention to detail. For children, it’s the most fun way to learn the “3 R’s”: Reduce, Reuse, and Recycle, instilling values of sustainability from a young age!
So, we invite you to take these ideas as a starting point, but above all, to experiment and adapt them to your own style and what you have around the house! Look around you with new eyes; that cardboard box, that empty can, or that old newspaper are not just things to throw away—they are blank canvases awaiting your magical touch! By joining creative recycling, you’re not just doing crafts; you’re actively participating in building a more sustainable and conscious future. Let your imagination fly and discover the pleasure of giving a second life to what others discard, transforming the world, one project at a time.