Your DIY Raised Garden Bed: Ready for the Weekend!
Have you ever dreamed of growing your own fresh vegetables, adding a special touch to your patio, or simply enjoying gardening without that constant back pain? Well, you’re in the right place! Raised garden beds are the magical solution many gardeners have discovered, and I promise you that if you follow these tips, you can have yours ready and gleaming in just one weekend. It’s a DIY project that anyone can tackle, and I’m here to guide you step-by-step, from the initial idea to seeing it filled with that fertile soil your plants will love.
The Big Question: Why Does Everyone Love Raised Beds So Much?
Before we roll up our sleeves, let’s talk a little about why these beds are so great. It’s not a passing fad; there are strong reasons why so many gardeners adore them:
- You choose your own soil, and that’s wonderful! Tired of clay soil that feels like cement, or rocky ground where nothing grows? With a raised bed, say goodbye to problems! You create the perfect soil for your crops: rich in nutrients, fluffy, and with impeccable drainage. It’s like giving your plants the best luxury restaurant, without worrying about what’s ‘underground’ in your garden.
- Fewer weeds and annoying pests: The height of these beds is often a natural barrier, making it harder for weeds to invade. Plus, the soil you add is new, free from invasive weed seeds! And yes, some crawling critters think twice before climbing up to your precious tomatoes. If they do appear, it’s much easier to spot them and take action!
- Extra-long growing season! Here’s the good news: the soil in a raised bed warms up earlier in spring than ground soil, so you can start planting your seeds or seedlings sooner. And in autumn, it retains heat longer, giving you a few extra weeks of harvest. More vegetables for you!
- Your back will thank you (and your knees too!): For many, this is the number one benefit. By not having to bend down as much or kneel, planting, weeding, and harvesting become a pleasure, not a torture session for your body. If you have any mobility limitations, this is a game-changer!
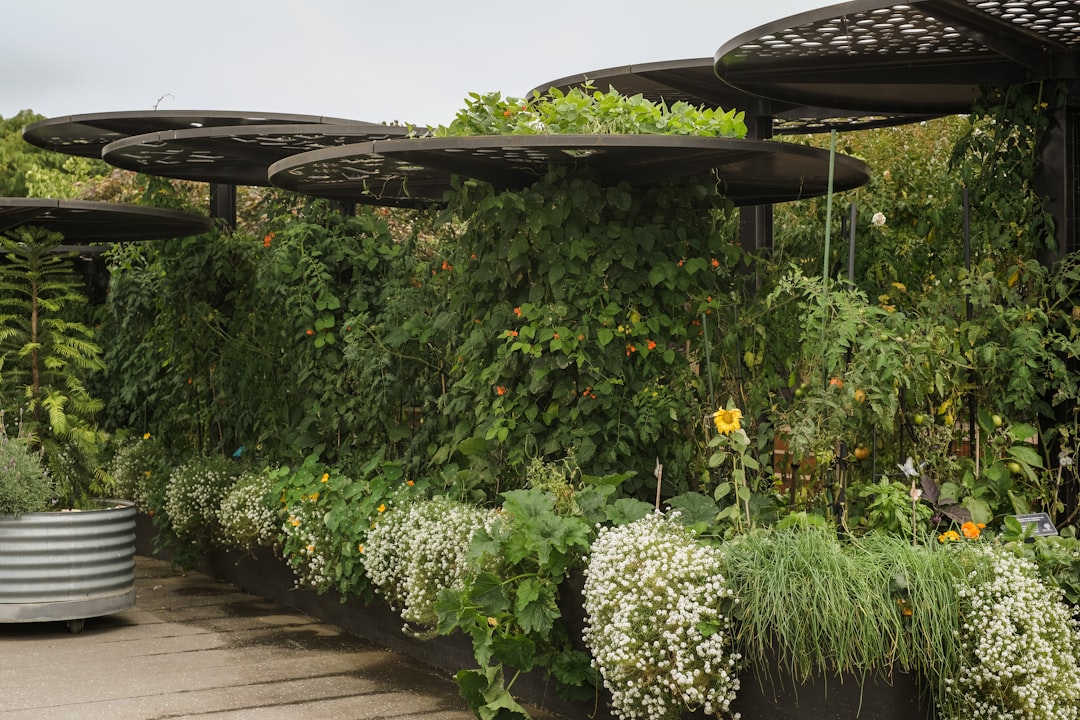
- A beautiful and tidy garden: Raised beds give your garden a magazine-worthy look. They create clean lines, define spaces, and transform a chaotic corner into an organized and very attractive growing area. Your neighbors will ask for your secret!
- Bigger harvests in less space: Because you have total control over soil quality and drainage, your plants grow stronger and healthier. This means you can plant a little closer together and get incredible production in a small space.
With all these advantages, it’s no wonder that building a raised bed is one of the best decisions you can make for your garden.
Detailed Planning: The Secret to Raving Success!
Good construction isn’t magic; it’s pure planning. Before you grab the saw, grab a coffee and think about these key points.
Location, Location, Location
Choosing the site is probably the most important step. Don’t skip it!
- Sunlight: Most vegetables are sun-lovers. They need 6 to 8 hours of direct sunlight a day to be happy. Observe your garden at different times of the day. Where does it get the most sun? That’s your spot!
- Water Access: Believe me, you don’t want to drag a mile-long hose every time you water. Near a faucet, please.
- Terrain: Although raised beds are very versatile, it’s ideal to build them on ground that is as level as possible. This will prevent them from wobbling and water from pooling on one side. If you have a slope, you might be able to step multiple beds or level the base a bit.
- Accessibility: Make sure you can move around comfortably. Think about 60-90 cm (2-3 feet) of space to walk, work, and pass with your wheelbarrow.
Dimensions: Not Too Wide, Not Too Shallow!
Size matters here, and a lot.
- Width: This is crucial. If you can access the bed from both sides, don’t make it more than 1.2 meters (4 feet). This way, you can reach the center without having to stretch like chewing gum. If you only access from one side (perhaps against a wall), 60 cm (2 feet) will be enough.
- Length: Here you have more freedom. 1.2, 1.8, or 2.4 meters (4, 6, or 8 feet) are common lengths. If you make it very, very long (more than 2.4 m), consider adding some reinforcement in the middle so the soil doesn’t bulge the sides.
- Height:
- 15-30 cm (6-12 inches): Great for lettuce, spinach, and other shallow-rooted plants. It’s the most economical option in terms of materials and soil.
- 30-45 cm (12-18 inches): My favorite! Versatile for almost everything (carrots, potatoes, tomatoes). Plus, it already saves you a lot of bending effort.
- 45-60 cm (18-24 inches or more): If you have back or mobility issues, this is your height. Almost waist-high! Of course, you’ll need more wood and a lot more soil.
Material Selection: Think Long-Term and Safety!
Your choice of material will determine how long your bed lasts and whether it’s safe for your plants.
- Wood (the popularity champion!):
- Western Red Cedar or Redwood: If your budget allows, these are the queens! They resist rot and pests without the need for chemicals. A worthwhile investment for their durability.
- Cypress: Another good durable option, often more affordable than cedar if you can find it in your area.
- Untreated Pine/Fir: These are the most economical and easy-to-find options. Be aware, they will rot faster (3-5 years untreated, maybe 5-7 with a good non-toxic sealant on the outside). If you use them, line the inside with thick food-grade plastic to extend their lifespan. And please, NEVER use old pressure-treated wood (CCA) if you’re growing food! It leaches toxic chemicals into the soil! If you find wood treated with more modern alternatives, research carefully whether they are food-safe or, to be safe, avoid them.
- Other Materials (the tough alternatives!):
- Stone, Brick, or Concrete Blocks: These beds are for life! They are more expensive and construction is more laborious (sometimes with mortar), but they are incredibly strong and aesthetic. Concrete blocks are an easier and more economical option than stone.
- Corrugated Metal: A modern and very durable look. They are rot-resistant. Sometimes they can get very hot in the sun, but it’s usually not a serious problem for roots.
- Recycled Plastic/Composite: Immune to rot, require no maintenance, and are safe. However, they tend to be the most expensive.
Tools and Materials: Your Shopping List for Success!
Before you get started, make sure you have everything at hand.
Necessary Tools (you probably have most of these already):
- Tape measure and carpenter’s pencil
- Saw (circular, miter, or a good hand saw)
- Cordless drill/driver (your best friend in this project!)
- Spirit level (a long one, 60 cm, is ideal)
- Framing square (to ensure everything is perfectly straight)
- Shovel and rake
- Wheelbarrow (for moving soil, essential!)
- Safety glasses and gloves (always protected!)
- Clamps (optional, but help hold wood while screwing)
- Hammer (if using nails, though screws are much better)
Materials (Example for a 1.2m x 2.4m x 30cm high bed, adjust to your measurements!):
- Wood boards:
- Eight 2x6x4 foot boards (or the length you choose for the long sides)
- Eight 2x6x2 foot boards (or the length you choose for the short sides)
- Note: “2×6” refers to nominal thickness and width; they actually measure approx. 1.5 x 5.5 inches (3.8 x 14 cm). For 30 cm height, you’ll need two layers of 2×6.
- Corner posts (recommended for extra strength!): Four pieces of 2x4x12 inches (or the height of your bed).
- Exterior screws:
- Box of 7.5 cm (3-inch) screws (about 50-70 screws, look for corrosion-resistant ones, like deck screws!).
- Shorter 3.8 cm (1.5-inch) screws if joining layers of boards.
- Hardware cloth/wire mesh (optional, but essential if you have gophers!): A roll of 0.6 to 1.2 cm (1/4 to 1/2 inch) opening mesh, enough to cover the base.
- Weed control fabric (optional): For the bottom of the bed, if you want an extra barrier against weeds from below. (Many prefer not to use it so plant roots can interact with native soil).
- Soil for filling! Calculate the volume of your bed (Length x Width x Height) to know how much you’ll need. For the example of 1.2m x 2.4m x 30cm, that’s almost 0.9 cubic meters of soil! The ideal mix: 60% good quality topsoil, 30% organic compost, and 10% perlite or vermiculite.

Step-by-Step Construction Guide: Your Weekend Project!
Now it’s time! With everything planned and at hand, it’s time to turn your dream into reality. Here’s a weekend plan for you.
Day 1: Preparing the Site and Materials!
The first day is for laying the foundation, ensuring everything is ready for quick, stress-free assembly tomorrow.
Step 1: Prepare the Site Like a Pro! (Morning)
- Thorough cleaning: Remove large stones, debris, or weeds from where your bed will go. Clear the area!
- Time to level! Use a shovel to make the ground as flat as possible. A good level is key for a stable bed and even water distribution. Use a long level on a straight board to check.
- Mark the perimeter: Use the boards themselves or stakes with a string to draw the rectangle of your bed. Don’t forget the framing square to ensure the corners are perfectly 90 degrees! You can measure the diagonals: if they are equal, the corners are square.
- Anti-rodent barrier! (If you have gopher problems): If those little diggers are giving you headaches, now’s the time.
- Dig a trench about 15 cm (6 inches) deep just inside the perimeter you marked.
- Spread the wire mesh, covering the entire bottom of the bed and letting it extend about 15 cm (6 inches) above the trench.
- Secure the mesh to the ground with staples or bury it in the trench to create an impenetrable “bottom.”
Step 2: Time to Cut the Wood! (Afternoon)
- Gather everything: Have your wood, screws, and tools handy. If you bought uncut wood, this is your moment of glory!
- Measure and cut the side boards: With your tape measure and pencil, mark the lengths. For our example bed (1.2m x 2.4m and 30cm high):
- Two 2.4-meter (8-foot) boards for the long sides of the first layer.
- Two 1.2-meter (4-foot) boards for the short sides of the first layer.
- Repeat this for the second layer.
- Make your cuts as straight as possible, please!
- Cut the corner posts (if using them): If you chose the sturdy option, cut four 2×4 pieces to the total height of your bed (e.g., 30 cm).
Day 2: Assemble and Fill Your Masterpiece!
This is the big day! Today you’ll see your raised bed take shape and come to life.
Step 3: Assemble the First Layer! (Morning)
- Place the boards: Put the four boards of the first layer in the prepared spot. Check with the framing square that the corners are perfect!
- Secure the corners:
- Method with internal posts (the most resistant!): Place a 2×4 corner post in each inner corner, flush with the top of the boards. With your drill and 7.5 cm (3-inch) screws, screw each side board to the post. Two screws per board at each post, and pre-drill to prevent the wood from splitting!
- Butt joint method (faster): Screw the ends of the short boards to the ends of the long boards. Use 3-4 7.5 cm (3-inch) screws in each corner. It’s faster, but internal posts give it extra life.
Step 4: Add Layers and Height! (Afternoon)
If your bed will be taller than a single board (like our 30 cm one, which uses two layers of 2×6):
- Stack the second layer: Place the boards of the second layer directly on top of the first. If you used internal posts, align the boards well. If not, you can try to ensure the joints are not directly above the lower ones for added solidity.
- Secure the layers:
- With internal posts: Screw each board of the second layer to the corner posts, just like the first. And to prevent them from separating, screw the second layer to the first with 3.8 cm (1.5-inch) screws.
- Without internal posts: Simply stack and screw the top layer to the bottom layer with 3.8 cm (1.5-inch) screws.
- Reinforcements (for very long beds): If your bed exceeds 2.4 meters (8 feet), add some internal cross braces. Cut pieces of wood and screw them horizontally between the long sides, right in the center, to prevent bulging.
Step 5: The Finishing Touches!
- Check everything: Make sure all screws are tightened and the structure feels solid.
- Level again: Use the level to confirm that the top of the bed is perfectly horizontal. If not, adjust the ground underneath.
- Stylish trim! (Optional): If you want a cooler and more practical finish, you can add a wide board to the top. It serves for sitting, resting tools, and gives it a very polished look. Cut thinner boards (e.g., 1×4 or 1×6) the length of your sides and screw them from above.
Step 6: Time to Fill! (Afternoon)
This is the most exciting moment. Your bed comes to life!
- The “Lasagna” Method (my favorite for saving soil and nourishing!): If your bed is very deep, you can use layers of organic materials that will decompose, providing nutrients and improving soil structure.
- Bottom layer (optional): Thick branches, small logs, or old firewood. Helps with drainage and will decompose slowly.
- Intermediate layers: Smaller branches, dry leaves, grass clippings (chemical-free!), non-greasy kitchen scraps, straw, dull cardboard. Moisten each layer!
- Top layers: Partially finished compost, aged animal manure.
- Final layer (the most important!): At least 15-20 cm (6-8 inches) of your high-quality soil mix.
- Your Quality Soil Mix: Don’t skimp here! Soil is the foundation of everything. Avoid using only soil from your garden; it can be very compact or poor. The secret recipe:
- 60% Good quality topsoil: Not just filler dirt, look for one with organic matter.
- 30% Organic compost: The gardener’s black gold! Full of nutrients, improves structure, retains moisture, and attracts good bugs.
- 10% Drainage/aeration material: Perlite, vermiculite, or coarse sand. It will keep the soil loose.
- You can buy the ingredients and mix them, or look for “raised bed soil” already prepared.
- Calculate the Volume: Multiply the interior length, width, and height of your bed.
- Example: 1.2 m x 2.4 m x 0.3 m = 0.864 cubic meters.
- This is about 864 liters or 30.5 cubic feet!
- Time to fill! Pour in the soil mix, leaving about 5-10 cm (2-4 inches) from the top edge. This way, it won’t overflow when watering.
- A good drink of water! After filling, water thoroughly. This will settle the soil and show you if you need to add a little more at any point. Wait a day and refill if necessary.
Congratulations! Your raised garden bed is built, ready to receive your plants and bring you much joy.
Caring for Your Treasure: Maintenance for a Happy Bed
Your new bed is a living organism that will reward you if you care for it. Here are some tips to keep it happy and productive.
- Consistent Watering: Raised beds, being more exposed to the air, tend to dry out faster. Check moisture daily! Ideally, water in the morning. A drip irrigation system is wonderful for these beds.
- Mulching: A 5-10 cm (2-4 inch) layer of organic mulch (straw, shredded leaves, compost) is a lifesaver. It helps retain moisture, smothers weeds, and keeps soil temperature stable.
- Annual Soil Vitamins! Each season, your plants consume nutrients. Every spring, before planting, add a 2-5 cm (1-2 inch) layer of fresh compost or aged manure. It’s like a multivitamin for your soil!
- Crop Rotation: Try not to plant the same thing in the same spot year after year. Rotating crops helps prevent the buildup of specific pests and diseases and balances nutrient usage.
- Pest and Disease Monitoring: Being closer to your plants, it’s easier to spot any problems early. Inspect regularly and act quickly if you see anything unusual.
Customization and Upgrades: Take Your Bed to the Next Level!
Once you get familiar with your basic bed, creativity knows no bounds.
- Trellises and Supports: Cucumbers, peas, beans, tomatoes? Install trellises or cages directly in the bed to take advantage of vertical space.
- Mini-Greenhouses/Hoop Houses: With PVC or metal hoops and a plastic or shade cloth cover, you can create a microclimate. Ideal for extending the season or protecting from extreme heat!
- Self-Watering Planters (SIPs): If you want maximum water efficiency and low maintenance, research SIP designs that store water below the soil.
- Integrated Seating: If the edge is wide enough, turn it into a seat. What a pleasure to rest while you work!
- Decorative Elements: Why not paint or stain the wood with plant-safe products? Give it your personal touch and make it match your garden.
Common Mistakes to Avoid (So They Don’t Happen to You!)
Although building a raised bed is simple, some mistakes can be frustrating. Learn from the experience of others!
- Old Chemically Treated Wood: I repeat! DO NOT use CCA-treated wood for growing food! Always verify that the wood is safe.
- Not Leveling the Ground: A crooked base means a bed that twists, breaks, and waters poorly. Take your time to level!
- Making It Too Wide: If you make it wider than 1.2 meters (4 feet), it will be impossible to reach the center. Your back will remind you!
- Poor Quality Soil: Filling it with poor soil is like putting cheap gas in a luxury car. Invest in good soil and compost.
- Forgetting the Anti-Rodent Barrier: If you have gophers or voles, skipping the wire mesh is inviting them to a feast on your crops.
- Skimping on Fasteners: Use good exterior screws, corrosion-resistant, and don’t skimp. Nails can loosen over time.
Get Started and Enjoy!
Building your own raised garden bed in a weekend is a project that will fill you with pride and joy. It’s much more than a simple structure; it’s an invitation to enjoy gardening in a more comfortable, efficient, and above all, productive way. From total control over your soil to the comfort of working without bending, the benefits are immense. With this guide, good planning, and the enthusiasm of a true gardener, you’ll be on your way to harvesting your own delights in your brand-new growing space. It’s an investment in your well-being, your table, and the beauty of your home! The satisfaction of seeing your plants grow in something you created yourself is simply incomparable. Happy planting!