How to Start Your Small Space Balcony or Patio Herb Garden from Scratch
Can you imagine having that fresh touch of basil for your pasta, a few sprigs of rosemary for Sunday roast, or a handful of mint for a relaxing tea, all just steps from your kitchen? It’s a dream, right?! And the best part is, you don’t need a huge garden to make it a reality. Your balcony or patio, no matter how small, can become your own green and aromatic oasis. Get ready, because this is your complete guide to setting up, caring for, and harvesting your herb garden in the space you have, from the very first seed to the most abundant harvest. We promise that even the most novice gardeners will succeed!
Starting an herb garden on your balcony or patio is much more than a hobby; it’s a great investment in yourself. Think of the freshness in your meals, the beauty you’ll bring to your space, and how good you’ll feel. Herbs not only add a magical touch to your dishes, but many also have medicinal properties and mood-boosting aromas! And, let’s be honest, the simple act of watching something you’ve nurtured grow is incredibly therapeutic and rewarding. This manual is designed to guide you step-by-step, ensuring your project is not only a resounding success but an inexhaustible source of joy and abundant herbs!
I. Know Your Space: The Foundation of Your Small Green Paradise
Before you dive into choosing those delicious herbs, it’s crucial to take a good look at your balcony or patio. Every corner is unique, and its peculiarities will tell you which herbs will feel right at home. Ignoring this can lead to frustration, and we don’t want that! Understanding your space well will allow you to make smart and strategic decisions.
A. How Much Sun Does Your Balcony Get? It’s the Most Important!
The sun’s light is, without a doubt, the most critical factor for your garden’s success. Most herbs are sun-lovers and need at least six hours of direct sunlight a day—but beware, there are exceptions!
- Observe with a detective’s eye: Don’t just rely on a quick glance. Dedicate a full day, or even several over a week, to observe and note the exact hours your balcony receives direct sun. Is it the softer morning sun or the scorching afternoon sun? Consider how shadows from nearby buildings or trees change throughout the day and, yes, also with the seasons. A spot that’s in full sun in spring might be shady in summer when trees are full of leaves.
- Types of Solar “Tan”:
- Full Sun (more than 6 hours): Perfect! Most Mediterranean herbs like rosemary, thyme, oregano, sage, and lavender, as well as basil and chives, will be happy here.
- Partial Sun (4-6 hours): Good for mint, parsley, cilantro, and lemon balm. They prefer some shade when the afternoon sun gets intense.
- Partial Shade (2-4 hours): Very few herbs thrive here; perhaps some varieties of mint or parsley, but don’t expect very lush growth.
- Does Heat Reflect? Light or metallic surfaces on your balcony can reflect heat, raising the temperature and stressing your plants. Keep this in mind! It will help you choose your plants better and know how often to water.
B. The Wind: An Annoying “Tenant”
Balconies, especially on higher floors, can be very windy areas. This dehydrates your plants super fast, damages them, or even knocks them over!
- Wind Shield: Consider adding screens, trellises, or, if possible, some larger, robust plants that can act as a barrier. Grouping your pots also provides mutual protection.
- And Humidity? Constant wind rapidly evaporates water from the soil and leaves, so your plants will need to drink more often.
- Firm Pots: Make sure your pots are heavy enough or stable enough not to fly away in a strong gust.
C. Space: Be Creative!
Balcony space is limited, we know. But creativity can work wonders!
- Think Vertically: Look up! Shelves, vertical gardens, hanging pots, wall planters, or those trellised structures. This way you can have many herbs without occupying valuable floor space.
- Utilize the Floor: Consider the shape of your pots. Rectangular ones fit great along edges, while round ones are perfect for corners. And don’t forget to leave space to move around and reach your plants for watering and harvesting.
- The Weight Factor: If you live in a building, the weight of all your pots, soil, and water is important. It’s better to choose plastic or fiberglass pots instead of heavy ceramic, and if in doubt, ask about weight restrictions!
D. Water and Drainage: Hydration is Key
Watering is vital, and how easy it is for you will influence how well your garden fares.
- Faucet Nearby? Do you have a faucet handy, or will you have to carry water from inside? This might lead you to choose a watering can, an expandable hose, or even a drip system.
- Drainage is Mandatory! All pots *must* have drainage holes. But the water has to go somewhere. Avoid drenching your downstairs neighbor by placing saucers under pots or safely channeling drainage. Self-watering pots are a fantastic solution.
II. Choose Your Herbs: Flavor and Survival
Once you’re clear on what your space offers, it’s time for the fun part: choosing the herbs that will fill your garden with life! The key is to love them for cooking, but also for them to adapt to the unique conditions of your balcony!
A. Favorite and Super Easy Herbs to Start With
If you’re new to gardening, start with herbs that are hardy and easy to care for. This way, you ensure success!
- Mint (Mentha spp.): A champion! It grows with incredible vigor, but be careful, it loves to spread. It is *essential* to plant it alone in its own pot, or it will invade its companions. It likes partial sun and moist soil.
- Basil (Ocimum basilicum): The star of Mediterranean cuisine. It needs lots of sun, warmth, and frequent watering. It doesn’t like cold at all. Pinch off leaves regularly to encourage bushier growth and pinch off flowers to keep it producing leaves longer.
- Chives (Allium schoenoprasum): Simple, perennial (returns every year), and with a mild onion flavor. It grows happily in sun or partial shade and is very hardy.
- Parsley (Petroselinum crispum): Found in flat-leaf or curly varieties. It needs partial sun and consistently moist soil. It’s biennial, meaning it gives leaves the first year and seeds the second, then dies back.
- Rosemary (Rosmarinus officinalis): A very strong Mediterranean herb that loves full sun and prefers well-draining soil that dries out a bit between waterings. It’s perennial and can grow large—ideal for a big pot!
- Thyme (Thymus vulgaris): Small, creeping, and with an enchanting aroma. It needs full sun and very well-draining soil. Also perennial and very drought-tolerant once established.
- Oregano (Origanum vulgare): Similar to thyme in its needs but grows more sprawling. It needs full sun and well-draining soil. Also perennial!
- Cilantro (Coriandrum sativum): Famous for its fresh, zesty flavor. It tends to “bolt” (go to flower and seed) very quickly in heat. Sow a little every few weeks for a continuous supply. Prefers partial sun.
- Sage (Salvia officinalis): Perennial, woody, and with an intense aroma. It needs full sun and very well-draining soil.
B. Give Each Herb Its Moment in the Sun
Now, combine your favorite herbs with the amount of sun you have on your balcony.
- Full Sun (more than 6 hours): Basil, Rosemary, Thyme, Oregano, Sage, Lavender, Chives, Marjoram.
- Partial Sun (4-6 hours): Mint, Parsley, Cilantro, Lemon Balm, Tarragon.
- Partial Shade (2-4 hours): Few herbs are truly comfortable here, but some varieties of Mint or Parsley can survive, though they will grow less vigorously.
C. Understand What Each Herb Needs (They’re Like People!)
Beyond the sun, herbs have their preferences regarding water, soil, and temperature.
- Mediterranean vs. Humidity Lovers:
- Mediterranean Herbs (Rosemary, Thyme, Oregano, Sage): They like drier, well-draining soil and are not very demanding in terms of nutrients.
- Humidity-Loving Herbs (Basil, Mint, Parsley): They need consistently moist soil (but not waterlogged!) and benefit from a little gentle fertilizer now and then.
- Annuals vs. Perennials:
- Annuals (Basil, Cilantro, Dill): Live only one season. You’ll need to re-sow them each year.
- Perennials (Rosemary, Thyme, Oregano, Mint, Sage, Chives): Grow back on their own each year. They just need pruning to maintain their shape and perhaps division or transplanting every few years.
- Cold Sensitivity: Basil and cilantro cannot tolerate frost at all. Rosemary and thyme are hardier, but in very cold winters, they might need some shelter.
D. What Will You Use Them For? Think About Their Destiny!
Consider how you will enjoy your herbs. Primarily for cooking? For infusions or home remedies? Or simply to delight in their aroma? This will help you decide how much variety you will plant.
III. What You Need: Prepare Your Gardener’s Kit
With your plan in mind, it’s time to gather all the tools and materials. Choosing the right ones from the start will save you headaches and frustrations later.
A. Pots: The Home for Your Herbs
Choosing the right pot is crucial, not only for how pretty they look but for the health of your plant.
- Materials:
- Terracotta/Clay: Beautiful, porous (the soil “breathes”), but dry out very quickly and are heavy.
- Plastic: Lightweight, retain moisture well, economical, but can overheat significantly in direct sun and are not as breathable.
- Glazed Ceramic: Very beautiful, retain moisture well, but are heavy and more expensive.
- Fabric Pots (Smart Pots, Felt Grow Bags): Great! They allow roots to breathe and drain wonderfully (it’s like natural root pruning). They are lightweight but can dry out faster.
- Self-Watering Pots: If you’re forgetful or go on vacation, these are perfect for herbs that need consistent moisture.
- Size DOES Matter! Each herb needs its space for roots.
- Small herbs (Chives, Thyme): 15-20 cm (6-8 inches) diameter pots work great for them.
- Medium herbs (Parsley, Oregano, Basil): Need 20-30 cm (8-12 inches) pots.
- Large herbs (Rosemary, Sage, Mint – always alone!): Want pots 30 cm (12 inches) or more, or even barrels for a large rosemary.
- Don’t crowd them: Give each plant enough space to grow and for air to circulate.
- Drainage Holes: ESSENTIAL! If a pot doesn’t have them, make them yourself or don’t use it. Excess water is the leading cause of plant death in pots.
- Saucers or Drainage Trays: To collect extra water and protect your balcony and your downstairs neighbors.
B. Potting Mix or Soil: Forget Garden Soil!
This is a very common beginner’s mistake. Garden soil is too compact for pots; it gets compacted, retains too much water, and doesn’t let roots breathe.
- Quality Mix: Invest in a good potting mix. It’s light, porous, and has the perfect balance between retaining moisture and draining.
- Secret Ingredients: They usually contain peat or coco coir (for moisture), perlite or vermiculite (for aeration and drainage), and sometimes a bit of compost or starter fertilizer.
- pH: Most herbs prefer a slightly acidic to neutral pH (between 6.0 and 7.0), which commercial mixes usually offer.
C. Seeds or Young Plants? You Choose
Both options have their advantages.
- Seeds:
- Pros: Cheaper, much more variety, and the satisfaction of watching something grow from scratch is immense.
- Cons: Requires more time and patience, germination can vary, and some herbs are harder to start from seed.
- Ideal for: Cilantro, Parsley, Basil (if you’re not in a hurry), Dill.
- Young Plants (Seedlings):
- Pros: Instant results, easier for beginners, already grown.
- Cons: More expensive, less variety (whatever the nursery has), can suffer a bit from “transplant shock.”
- Ideal for: Rosemary, Thyme, Sage, Oregano, Mint, Basil (if you want to harvest now).
D. Tools That Will Make Your Life Easier
A few basic utensils and let’s get gardening!
- Hand trowel: For digging, transplanting, and moving soil.
- Small cultivator/hand fork: To loosen soil and help it breathe.
- Pruning shears or sharp kitchen scissors: For precise harvesting and pruning. Clean them well to avoid spreading diseases!
- Small watering can with a gentle rose or hose with adjustable nozzle: For controlled watering, especially for seeds and young plants.
- Gardening gloves: To protect your hands and keep them clean.
- Plant labels and permanent marker: To know what’s what, especially if you sow several varieties!
- Spray bottle: Useful for misting leaves (they love it for humidity or to remove dust) or for applying organic pest solutions.

E. Fertilizers (Not Mandatory, but Highly Recommended)
Herbs in pots quickly deplete the nutrients in the potting mix.
- Organic Liquid Fertilizers: To apply every 2-4 weeks during the growing season. Look for balanced formulas or those with a bit more nitrogen to encourage leafy growth.
- Slow-Release Granular Fertilizers: Mixed with the soil at planting, they release nutrients gradually.
- Compost or Worm Castings: You can add a layer on top of the potting mix occasionally for an organic boost.
- Important! Herbs, in general, are not very “heavy feeders.” Too much fertilizer can make their flavor less intense or burn their roots. Less is more.
F. Vertical Solutions (if your space is tiny)
If your horizontal space is a challenge, consider:
- Stackable or tiered planters.
- Hanging pots.
- Vertical wall pocket systems.
- Sturdy shelving for your pots.
IV. Let’s Get to Work! Planting Your Garden
With all your materials ready and your space well-analyzed, the most exciting moment arrives: getting your hands in the soil and bringing your garden to life!
A. Sowing From Seeds
If you chose to start from scratch with seeds, follow these steps:
- Indoors or Outdoors?
- Indoors: For herbs that need more time to grow or that you want to start before the weather is good outside (e.g., basil). Use seed trays or small containers. Make sure they have enough light (with a grow light if you can) and consistent warmth.
- Directly in the pot: For herbs that germinate and grow quickly, or that really dislike being transplanted (e.g., cilantro, dill).
- Prepare the Soil: Fill your containers with seed-starting mix, leaving a small space at the top. Moisten the soil before sowing.
- Depth and Spacing: Read the seed packet instructions carefully. A general rule is to sow seeds to a depth of two or three times their size.
- First Watering: Water gently after sowing, using a spray bottle or a watering can with a fine rose to avoid displacing the seeds. Keep the soil consistently moist until they germinate.
- Temperature and Light: Some seeds need light to germinate, others darkness. Most require a consistent temperature.
- Thin the Seedlings: Once they have a couple of true leaves, remove the weakest ones so the stronger ones have space to grow. Spacing is key!
- Hardening Off: If you started seeds indoors, don’t just put them outside. Gradually acclimatize them to outdoor conditions (sun, wind, temperatures) over 7-10 days, placing them outside for increasingly longer periods.
B. Planting Young Plants (Seedlings)
This is the fastest way to see your garden take shape.
- Acclimatization: Just like with seeds, if your nursery plants have been in a sheltered spot, gradually acclimatize them to your balcony over a few days.
- Prepare the Pot: Fill the pot with potting mix, leaving a few centimeters from the rim. Make a hole in the center large enough for the plant’s root ball.
- Remove the Plant: Carefully remove the plant from its nursery pot. Gently squeeze the sides and turn it upside down while holding it by the base of the stem.
- Check the Roots: If the roots are very tight and circling (like a ball of yarn), gently loosen them with your fingers. This will encourage them to grow into the new soil.
- Correct Depth: Plant the herb at the same depth it was in its original pot. Make sure the top of the root ball is level with or slightly below the surface of the new soil.
- Immediate Watering: Water thoroughly right after planting to settle the soil around the roots and eliminate air pockets.
C. Prepare the Container Well
This applies to both seeds and seedlings.
- Ensured Drainage! Confirm that your pots have enough drainage holes. There’s no need to put a layer of pebbles or broken pottery at the bottom; that can actually worsen drainage. A good potting mix is sufficient.
- Filling: Fill the container with your potting mix, leaving a space of 2-3 cm (1 inch) from the rim. This prevents water and soil from overflowing when watering.
D. Organize Your Plants: Think About Their Happiness and the View!
Think about both the health of the plants and how beautiful your garden will look.
- One Herb Per Pot vs. Mixed Pots:
- One per pot: Best for most herbs, especially vigorous ones like mint or those with very different watering needs. It allows for total control.
- Mixed pots: Possible if you combine herbs with similar light, water, and nutrient needs (e.g., rosemary, thyme, oregano). But do not mix very aggressive herbs with delicate ones!
- Distribution: Place taller plants at the back or in the center if the pot is viewed from all sides. Shorter or trailing ones can go in front or to the sides.
- Don’t Crowd Them: Give each plant its space so roots and leaves can grow without fighting for light, water, and nutrients.
E. First Watering
After planting, a deep watering is essential. Make sure water comes out of the bottom holes—that means the soil is well soaked!
V. Care and Maintenance: The Art of Being a Good Gardener
Once your herbs are planted, they will need your regular attention to grow strong and happy. Consistent care and careful observation are the secrets to a productive and healthy garden.
A. Watering: The Life of Your Plants!
Proper watering is the foundation of a successful container garden. And be careful, pots dry out much faster than garden soil!
- The Finger Test: This is the best way to know when to water. Stick your index finger about 2-3 cm (1 inch) into the soil. If it feels dry, water! If it’s moist, wait.
- How Often? This varies a lot depending on the herb, pot size, material (terracotta dries faster than plastic), climate (more heat and wind = more watering), and plant size. In summer, some pots may need water daily or even twice a day.
- Deep Watering: When you water, do it thoroughly until you see water coming out of the drainage holes. This ensures all roots receive moisture. Avoid light, shallow waterings that only moisten the top layer.
- Beware of Puddles! Never leave pots sitting in stagnant water. If you use saucers, empty them about 30 minutes after watering to prevent root rot.
- Best Time to Water: Early morning. This allows plants to drink before the sun gets strong and leaves to dry, which helps prevent fungal diseases.
B. Fertilizing: Feed Your Plants
Herbs in pots have limited access to nutrients, which get depleted over time and with watering.
- Less is More: Herbs are not very “heavy feeders.” Too much fertilizer can reduce their flavor or burn their roots.
- Organic Fertilizers: Choose organic liquid fertilizers (like compost tea or diluted fish emulsion) and apply them every 2-4 weeks during their active growing season.
- Slow Release: If you used a slow-release fertilizer when planting, you won’t need to fertilize until its effect wears off.
- Compost: A layer of compost or worm castings on top of the soil once a year can revitalize the potting mix and provide nutrients gradually.
C. Pruning and Harvesting: For Lush and Beautiful Growth
Regular pruning not only gives you fresh herbs but also encourages your plant to grow bushier and healthier.
- Why Prune?
- To encourage bushy growth: Cutting the tips stimulates the plant to produce more branches, meaning more leaves and a denser plant, rather than a long, leggy stem.
- Prevent premature flowering (bolting): In many herbs (like basil and cilantro), flowering indicates the approaching end of their life and a change in leaf flavor (they become bitter). If you remove flower buds as soon as they appear, you’ll extend leaf production!
- Rejuvenation: Woody herbs (rosemary, sage) can benefit from a harder prune at the end of the season to rejuvenate them.
- How to Prune/Harvest?
- Regular Harvesting: The golden rule is to harvest often. But be careful! Never remove more than one-third of the plant at once.
- Cut Above a Node: Always cut just above where a pair of leaves emerges (that’s a “node”). New growth will sprout from there.
- Basil: Pinch off the top leaves and flowering stems.
- Mint and Oregano: They are vigorous growers. Harvest stems often to encourage more lateral growth.
- Parsley and Cilantro: Harvest the outer, older leaves first, working your way towards the center.
D. Pests and Diseases: Keep Them at Bay!
Pests can appear in a balcony garden, but they are easier to control than in a large garden.
- Common Pests:
- Aphids: Small green, black, or yellow insects that cluster on tender shoots and under leaves.
- Spider Mites: Tiny, often invisible, but leave fine webbing and yellow spots on leaves. They love dry environments.
- Whiteflies: Small white flies that fly up when you disturb the plant.
- Prevention is Key:
- Daily Inspection: Check your plants every day. Detecting problems early is everything.
- Fresh Air: Space your plants well and prune dense leaves to prevent fungal growth.
- Healthy Plants: Stressed or weak plants are a magnet for pests.
- Natural Solutions:
- Strong Water Spray: To dislodge aphids and spider mites.
- Insecticidal Soap: A safe and effective solution for many soft-bodied insects. Read the instructions.
- Neem Oil: A natural pesticide and fungicide that disrupts the insect life cycle.
- Manual Removal: If you see few pests, you can remove them with your fingers or a cotton swab dipped in alcohol.
- Fungi:
- Powdery Mildew: A white, powdery coating on leaves. Appears due to high humidity and poor air circulation.
- Root Rot: Caused by overwatering and poor drainage. Leaves wilt, and the plant dies. Make sure your pots drain well and don’t overwater!
E. Transplanting and Dividing
Perennial plants may need a larger pot or to be divided to remain strong.
- Signs of Transplanting: Roots emerging from drainage holes, stunted growth, drying out very quickly.
- When? Generally in spring, before they begin vigorous growth.
- How? Transplant it to a slightly larger pot (not too much) with fresh soil.
- Division: Herbs like mint or chives can be divided in spring to create new plants and rejuvenate the mother plant. Just remove the plant from the pot and divide the root ball into sections, ensuring each has roots and shoots.
F. Winter Care (for your Perennial Herbs)
If you live in a cold place, your perennial herbs will need some protection.
- Bring Them Inside! Many perennial herbs (rosemary, sage, thyme) can overwinter indoors near a sunny window. Inspect them thoroughly for pests before bringing them in. Water less frequently.
- Outdoor Hibernation: Some herbs can stay outside if well protected. Wrap pots with bubble wrap or burlap to insulate the roots. Place them in a sheltered corner away from the wind. Drastically reduce watering.
- Winter Pruning: Cut off dry or damaged branches to prepare the plant for new growth in spring.
VI. Expert-Level Tips and Great Ideas: Take Your Garden to the Next Level
Once you’ve mastered the basics, it’s time to experiment and add your personal touch to your herb garden to make it even more productive and beautiful!
A. Companion Planting in Pots: Friendly Herbs!
Planting herbs together (companion planting) can be great: they deter pests, attract bees and butterflies, or simply help each other grow better.
- What DOES work:
- Rosemary and Sage/Thyme: Share similar preferences: full sun and well-draining soil.
- Basil and Parsley: If they have enough space, they can share a large pot, although basil prefers more sun and warmth.
- What DOES NOT work:
- Mint with NOTHING: It’s so invasive that it doesn’t get along with anyone in the same pot. Always alone in its own pot!
- Herbs with Opposite Preferences: Don’t combine those that love drought with those that need a lot of water.
- Important: In pots, interactions can be different than in the garden. Always prioritize giving each plant the space and conditions it needs.
B. Small Drip Irrigation Systems
Ideal for busy gardeners or to ensure your plants don’t die of thirst if you go on vacation.
- Balcony Drip Kits: Micro-drip systems specifically designed for small spaces are available. They are easy to install and can be connected to a timer for automatic watering.
- Advantages: Efficient watering (goodbye water waste!), consistent and controlled moisture directly to the roots, and less risk of fungal diseases on leaves.
C. Extend the Harvesting Season: Keep the Party Going!
Don’t let changing seasons take away your fresh herbs.
- Staggered Sowing: For fast-growing annual herbs like cilantro and basil, sow a little every 2-3 weeks. This way, you’ll always have fresh herbs while older plants flower or die back.
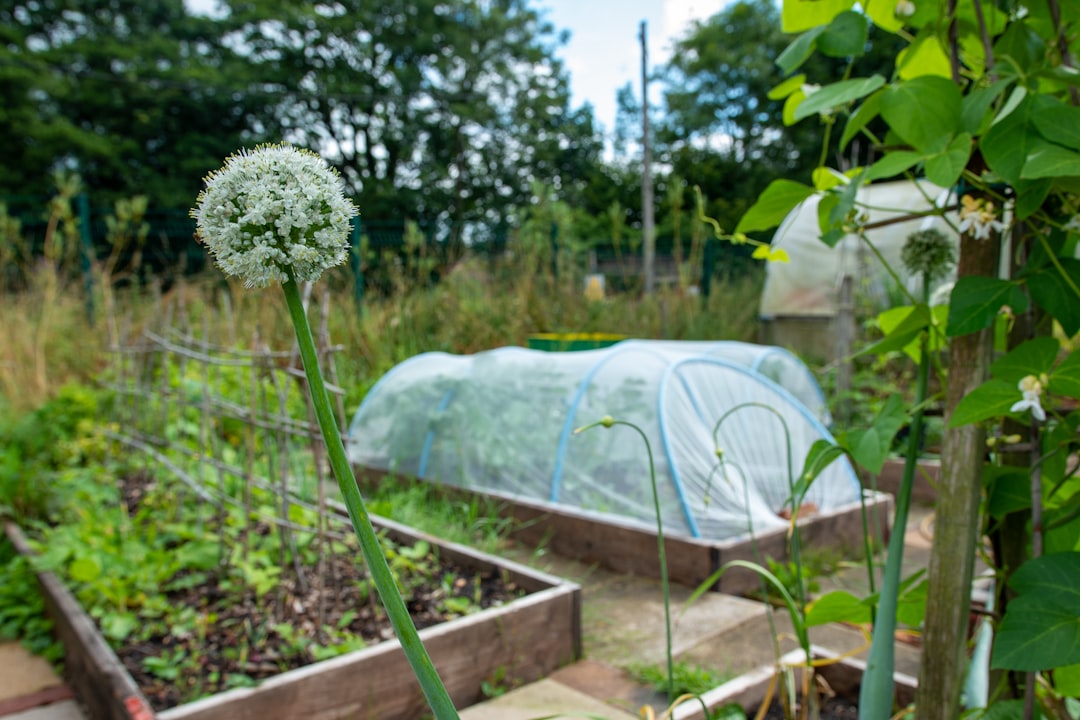
- Mini Greenhouses or Cloches: Small transparent structures placed over pots can protect your plants from early or late cold, extending the season.
- Indoors for Winter! As mentioned earlier, many perennial herbs and some annuals can spend winter indoors near a sunny window, giving you fresh herbs even in the coldest months.
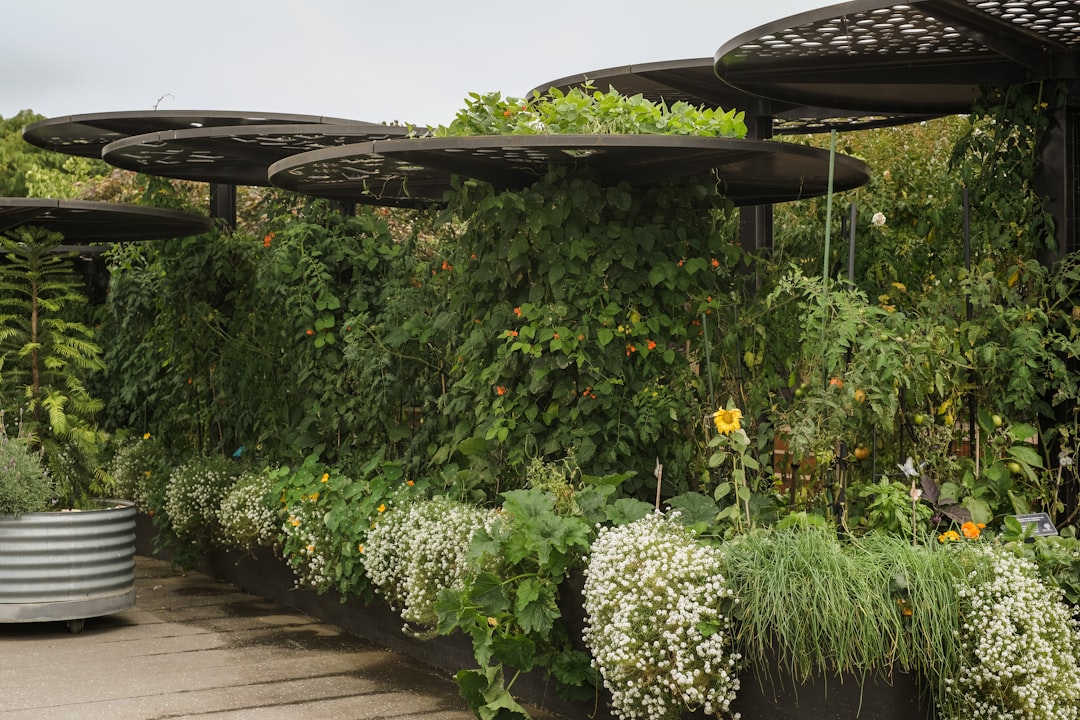
D. An Aesthetic Touch: Make Your Garden Beautiful!
Your herb garden is not just functional; it’s also part of your home decor!
- Variety of Heights and Textures: Combine herbs of different heights (tall rosemary, trailing thyme) and leaf textures to make it visually interesting.
- Color: Some herbs have beautiful flowers (lavender, chives) or variegated foliage (tricolor sage) that will add a special touch.
- Stylish Pots: Choose pots that match the vibe of your balcony or patio. You can paint terracotta pots or look for designer pots.
- Ambient Lighting: Decorative solar lights or string lights can transform your herb garden into a magical place at night.
E. Harvest and Store: Enjoy All Year Round!
Knowing when and how to harvest, and then how to store your herbs, will allow you to enjoy their flavors throughout the year.
- The Best Time: Most herbs are at their most aromatic just before they flower, when their essential oils are most concentrated. Harvest in the morning, after the dew has dried, but before the strong afternoon sun.
- Drying Herbs:
- Air Drying: Bunch stems together and hang them upside down in a cool, dark, well-ventilated place.
- Dehydrator: A quick and efficient option when you have many herbs.
- Freezing Herbs:
- Chopped in Oil/Water: Chop herbs, place them in ice cube trays, cover with a little water or olive oil, and freeze. Once frozen, store the cubes in airtight bags.
- Whole: Freeze whole basil or mint leaves in a single layer and then store them in an airtight container.
- Other Methods: Prepare oils, vinegars, or salts with your fresh herbs. They are great for gifts or for your own pantry!
Conclusion
Starting your own herb garden on the balcony or patio is an incredible experience that connects you with nature and rewards you with fresh flavors and soul-lifting aromas. From thoughtfully evaluating your space to harvesting your own herbs with a smile, every step is an opportunity to learn, grow, and enjoy. With all the information and practical tips provided in this guide, you are more than ready to create a vibrant green oasis, regardless of your previous experience! Dare to take the first step, observe, learn, and delight in the fruits of your labor. Your balcony will not only become a more beautiful place, but your meals and daily life will be enriched with the incomparable freshness of your own homegrown herbs, cultivated with much love!