Hands-On! Build Your Dream Floating Shelf (Step-by-Step and Hassle-Free)
Tired of the same old boring shelves? Do you dream of that perfect corner straight out of a magazine? Well, you’re in the right place! Building your own floating shelf from scratch is not only a super rewarding project, but it also allows you to create something exactly to your specifications: the size, the style, the color… everything! Forget about pre-made shelves that don’t fit or don’t quite convince you. Here, we’ll guide you through each stage, from the first idea to seeing your masterpiece hanging on the wall. Ready to feel like a true DIY pro?
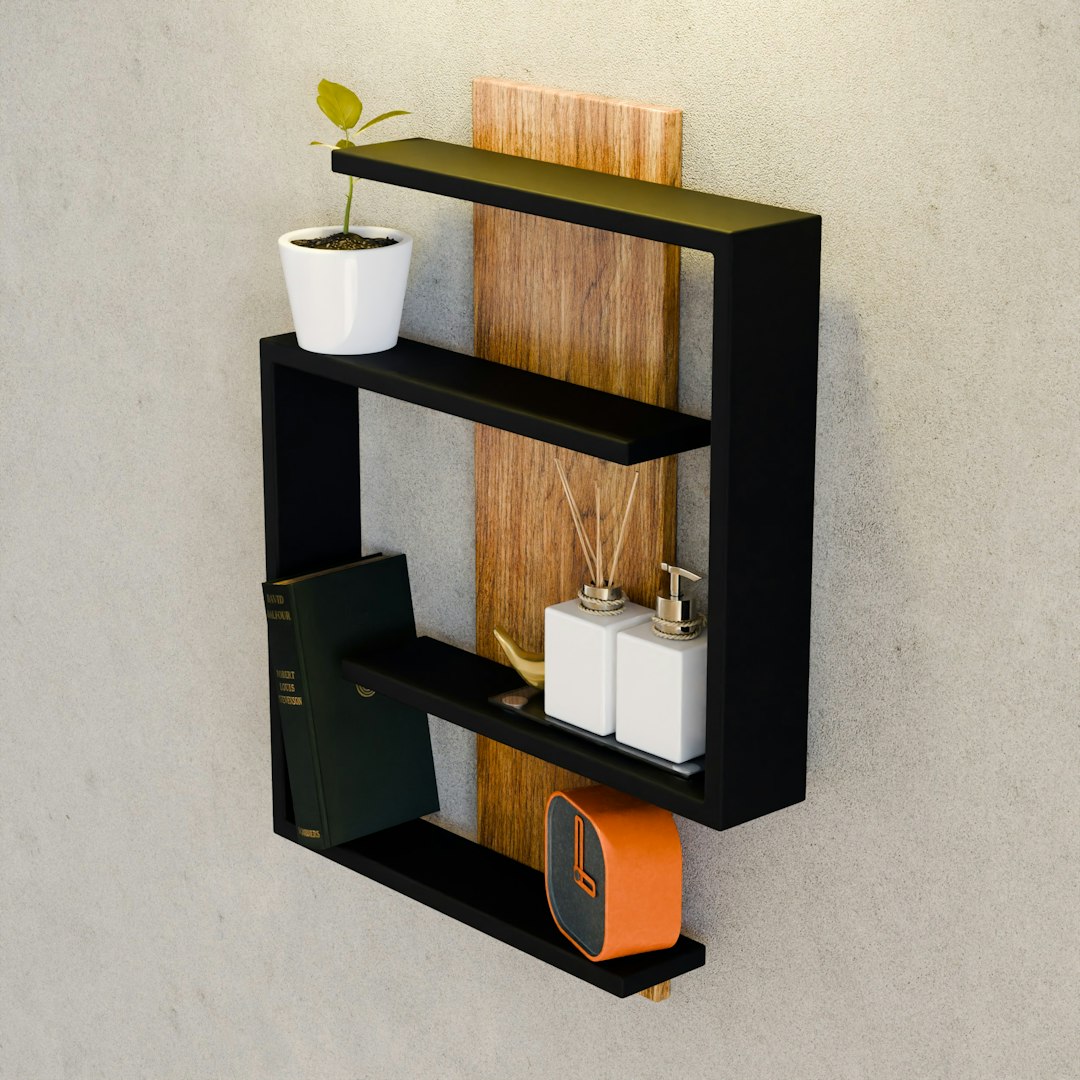
Discover the Magic of Your Custom Floating Shelf
Imagine a shelf that seems to levitate on the wall, with no visible supports. That’s the magic of the floating shelf. Its minimalist and modern design is perfect for displaying your treasures, favorite books, pretty kitchen mugs, or anything you want to highlight without anything else cluttering your view.
But building your own is even better—check out all the advantages!
- Your Unique Touch: You have absolute control. The length, width, thickness, wood type, color… You decide everything so it perfectly matches your style or becomes that eye-catching piece.
- Utilize Every Corner: That awkward gap in the wall? That unused corner? With a custom shelf, no space can resist. Optimize every last centimeter!
- Save a Good Amount of Money: While you might initially need some new tools, the cost of materials is usually much less than buying a high-quality shelf with the same characteristics from a store. Your wallet and you will thank you!
- The Satisfaction of Creating: There’s nothing like saying, “I made this myself!” It’s a feeling of pride that fills your chest every time you look at it.
- Strong as an Oak: By building it yourself, you choose the materials and method to make it robust and able to withstand whatever you put on it, far exceeding the quality of many inexpensive floating shelves on the market.
In this guide, we’ll teach you the “hidden cleat” method, which is the most common and strongest for DIY projects. We’ll discuss what woods to choose, what tools will be useful, how to assemble it, and how to give it that professional finish. And, of course, most importantly: your safety! Always wear your safety glasses, hearing protection, and a dust mask. Your safety comes first!
Part 1: Dream Big! Planning and Design (Your Architect Moment)
This first phase is like drawing a treasure map. If you plan it well, you’ll save yourself headaches (and money!) and your shelf will be exactly what you envisioned.
1.1 Where Will It Go and What Will It Be Used For?
Before you get out the saw, think carefully about this:
- Which room will it be in? The living room for your books? The kitchen for spices? The bathroom for towels? The location will give you clues about the style, material, and if it needs anything special against humidity.
- What will you put on it?
- Heavy books or crockery: You’ll need a sturdier shelf, thicker wood, and it must be very securely anchored to the wall.
- Light decorations or photos: It could be something a bit less robust, but, be careful, strength is always a plus.
- Electronic devices: Consider if you’ll need to hide cables or if it needs to be near an outlet.
Knowing the “what for” is key to the “how.”
1.2 Measuring Tape and Pencil in Hand! Measure and Sketch
With the location and purpose clear, it’s time to take precise measurements. Don’t skip this step!
- The width of your wall: Measure the available space carefully. Consider nearby doors, windows, or furniture.
- The desired length: Do you want it to span the entire wall or just a section for decorative purposes?
- The depth: How much do you need it to protrude? For books, 20-25 cm (8-10 inches) is usually sufficient. For plates or larger items, 30 cm (12 inches) or more. But be careful, if it’s too deep, it can look a bit clunky and will require extra strong support.
- The thickness (height): This will give your shelf its visual character. About 5-10 cm (2-4 inches) usually looks great, but you can make it thinner for a modern touch or thicker for a rustic style. This thickness is key for the internal support.
With all these measurements, get sketching! Make a simple sketch, like a child’s drawing, but with your measurements. Also, draw how the internal pieces will go, so the support remains hidden.
1.3 Choose the “Ingredients”: Material Selection
The wood you choose will not only change the look of your shelf but also its price, how easy it will be to work with, and how long it will last.
1.3.1 Wood for the Shelf (the Visible Box)
- Plywood:
- Pros: Very stable, doesn’t warp easily, comes in large sheets (perfect for painting or veneering!). Birch or maple plywood is premium and looks great if you leave the edges exposed.
- Cons: If the edges are exposed, you might want to apply edge banding.
- Common thickness: 12 mm or 18 mm (1/2″ or 3/4″) for the top and bottom panels.
- MDF (Medium-Density Fiberboard):
- Pros: Its surface is super smooth, ideal for painting! It’s economical and has no knots or grain.
- Cons: Quite heavy, doesn’t get along well with humidity, and the edges can be fragile. Not the best for very heavy items unless it’s very thick.
- Solid Wood: (Pine, Oak, Maple, Walnut, etc.)
- Pros: The natural beauty of the grain is incomparable! It’s very resistant and durable, and allows for more professional woodworking techniques.
- Cons: More expensive, can warp if not properly cured, and is a bit more difficult to work with to make a hollow box. It’s great if you want the shelf to be a solid piece or if you only use solid wood for the fronts.
1.3.2 Wood for the “Bone” of the Shelf (the Internal Support)
- Dimensional lumber (2×3, 2×4, etc.): Here, we recommend pine or fir. The important thing is that it’s a straight piece without large knots that could weaken it. The size (e.g., 2×3 or 2×4) will depend on the depth of your shelf and how much weight it needs to hold, but the key is that it fits perfectly inside the box you will make.
1.3.3 The “Muscles” and “Glue”: Fasteners and Adhesives
- Wood screws: You’ll need various lengths. For joining the shelf box and for attaching the finished shelf to the internal cleat.
- Lag screws or concrete/masonry screws: These are the champions for anchoring the support cleat to the wall’s “bones” (the studs). They should be long enough to penetrate about 3-4 cm (1.5 inches) into the stud.
- Wall anchors: If you cannot screw directly into studs (for example, on a plasterboard wall without studs where you want to), you’ll need super strong anchors like toggle bolts or heavy-duty molly bolts.
- Wood glue: Essential! It’s the magic adhesive that will make all the joints of your shelf box incredibly strong, even more so than just with screws.
1.3.4 The “Beauty Touches”: Finishing Materials
- Wood filler: To fill screw holes, small defects, or joints.
- Sandpaper: Various grits (80, 120, 180, 220) to leave the surface silky smooth.
- Primer: If you’re going to paint the shelf, it’s the perfect base.
- Paint or wood stain: The final color of your creation!
- Varnish, polyurethane, or lacquer: To protect your masterpiece and give it durability.
1.4 The “Magic Trick”: The Internal Cleat Method
The secret to a shelf appearing to float is this method:
- You will build a wooden frame (the cleat) that will be screwed very, very strongly into the wall studs.
- Then, you will make the hollow box of your shelf so that it slides over this frame, like a glove!
- Once slid on, you will secure the box to the internal frame with screws from above and below, which will be hidden or very easy to conceal.
This is the method we will use because it is super solid and holds a lot of weight.
Part 2: Your Indispensable Allies: Necessary Tools
Having the right tools is like having superpowers in your hands. It will make everything easier, more precise, and much safer.
2.1 For Measuring and Marking (Your Eyes with Extra Precision)
- Measuring tape: Your best friend for all measurements.
- Pencil: For marking cuts and locations.
- Carpenter’s square: To ensure your marks and cuts are perfect at 90 degrees.
- Long level (120 cm/4 ft or more): Absolutely key! It will ensure your shelf isn’t crooked. If you have a laser level, even better!
- Stud finder: This gadget is magical. It helps you find the wooden “bones” inside the wall to anchor the main support for superior strength.
2.2 For Cutting (Those That Work Magic with Wood)
- Circular saw, miter saw, or table saw:
- Table saw: If you have one, it’s the king for straight, precise cuts. Perfect for cutting large panels.
- Miter saw: Excellent for precise cuts on internal support wood and for cutting box pieces to size.
- Circular saw: Very versatile for cutting large panels. Be sure to use a guide (like a straightedge or a straight piece of wood) for perfect cuts.
- Jigsaw: Useful for curved cuts or small adjustments, but not for long, straight cuts.
2.3 For Drilling and Fastening (Those That Join Everything)
- Electric drill/Driver: Your right hand for drilling pilot holes and screwing.
- Wood drill bits: Various sizes for your pilot holes.
- Countersink bit: To ensure screw heads sit flush or below the surface.
- Screwdriver bits: To match the screws you choose.
2.4 For Assembling and Clamping (Your Silent Helpers)
- Clamps/Bar clamps: Critical! They will hold pieces together tightly while the glue dries. The more you have, the better!
- Brush or glue spreader: For applying wood glue evenly.
2.5 For a Magazine-Ready Finish (The Finishing Touches)
- Orbital sander or sanding block: To leave the wood smooth and ready for finishing.
- Putty knife: For applying wood filler.
- Rags or cloths: To wipe off excess glue, dust, and apply finishes.
- Brushes/Rollers: For primer, paint, or sealer.
2.6 Your Health First! Safety Equipment
- Safety glasses: ESSENTIAL! Your eyes are valuable, protect them from splinters and dust.
- Hearing protection: Earmuffs or earplugs when using saws and drills.
- Dust mask/Respirator: For your lungs, against wood dust and finishing fumes.
- Work gloves: To protect your hands.

Part 3: The Skeleton of Your Shelf: Building the Internal Support
This support is the heart of your floating shelf. It must be super robust and perfectly anchored to the wall.
3.1 Finding the Wall’s “Bones”! (Studs)
- At what height do you want the shelf? Decide where you want the top of the shelf to be. Mark that point on the wall.
- A perfectly straight line: Using your long level, draw a horizontal line on the wall at the height you marked. This will be your guide for the top edge of the support.
- The stud finder to the rescue: Use your stud finder to locate the centers of the wooden studs (usually 40 or 60 cm / 16 or 24 inches apart) along that line. Mark them clearly. It is vital that the support is attached to as many of these studs as possible.
- Confirmation (optional but good): To be sure, you can drill small pilot holes where you marked (in an area that will be covered by the shelf) to confirm that the stud is there.
3.2 Shaping the Support! Measure and Cut the Pieces
- The long back piece (the “mother cleat”): Measure the length of your shelf and cut a piece of dimensional lumber (e.g., 2×3 or 2×4) to that measurement. Make sure this piece can be screwed into the studs you found. The width of this piece should be slightly less than the final thickness of your shelf, so that the “box” can later fit over and under it.
- The side support “arms”: Measure the depth of your shelf. These arms should be long enough for the shelf box to slide over them, leaving a small margin. If your shelf is 25 cm (10 inches) deep, the arms could be about 20-22 cm (8-8.5 inches) (so the front of the shelf will cover the arms). You’ll need at least two arms (one at each end) and, if the shelf is very long or will carry a lot of weight, add more in the center! Cut these pieces to the same height as the back piece and the length you need.
- Consider the thickness: The thickness of the wood you use for the cleat (e.g., a 2×3 measures approximately 3.8 cm x 6.4 cm / 1.5 inches x 2.5 inches) should be less than the final thickness of the shelf. If your shelf will be 7 cm (2.75 inches) thick, a 2×3 (6.4 cm / 2.5 inches) will fit perfectly and leave space for the box panels.
3.3 Assemble the Support Frame (if needed)
For very deep shelves or to make it even stronger, you can build a kind of “ladder” with the long back piece and several arms joined perpendicularly.
- Join: Attach the arms to the back piece using wood screws. Drill pilot holes to prevent the wood from splitting. Use the carpenter’s square to ensure the arms are at 90 degrees.
- Reinforcement (extra): If you think it will carry a lot of weight, you can add small metal brackets or wooden braces.
3.4 To the Wall, and Don’t Let It Move! Mount the Cleat
This is the most important part for the stability of your shelf!
- Position it: Place the cleat or frame you just assembled on the wall, aligning its top edge with the line you drew with the level.
- Pilot holes in the wall: Through the wood of the cleat, drill holes directly into the center of each wall stud. Make sure the drill bit is slightly smaller than the screw you will use. Remember, it’s always best to fasten to studs!
- Screw it in! Use lag screws or robust screws (7-10 cm / 3-4 inches) to firmly attach the cleat to each stud. Tighten the screws until the cleat is completely flush with the wall and doesn’t move at all.
- Final check: With the cleat already mounted, re-check with the level. It must be perfectly horizontal! If it’s crooked now, your shelf will be too.
Part 4: The Skin of Your Shelf: Building the Outer Box
The shelf box is what you will see. It will be the cover that slides over the support. Here, precision in cutting and assembly is key.
4.1 Time to Cut the Pieces!
Use the wood you chose for the box (plywood, MDF, or solid wood). Remember: measure twice, cut once!
- Top piece (the lid): Shelf length x Shelf depth.
- Bottom piece (the base): Shelf length x Shelf depth.
- Front piece (the face): Shelf length x The desired thickness (height) of your shelf. Note: this height must be the total height you want for the shelf.
- Side pieces (the two ends): Shelf depth x The desired thickness (height) of your shelf.
A tip for assembly (open back box):
- Top cover: Total length x Total depth.
- Bottom base: Total length x Total depth.
- Front: Total length x (Desired shelf thickness – 2x the thickness of the top/bottom wood).
- Sides (2): Total depth x (Desired shelf thickness – 2x the thickness of the top/bottom wood).
- The side pieces will go between the top cover and the bottom base, and between the front and the open back.
The most important thing! The internal space of the box must be slightly larger than the internal support so that it slides in smoothly. For example, if your support is a 2×3 (3.8 cm / 1.5 inches high x 6.4 cm / 2.5 inches deep) and the box panels are 1.8 cm (0.75 inches) thick, the internal height of the box must be at least 3.8 cm, and the internal depth at least 6.4 cm. The total height of your shelf will be (1.8 cm Top + 3.8 cm gap + 1.8 cm Base) = 7.4 cm (approx 3 inches). The front piece must have this total height of 7.4 cm!
4.2 Time to Join! Box Assembly
- The “dry fit”: Join all the box pieces without glue or screws. Make sure everything fits perfectly. This is the time to correct any errors!
- The magic glue: Apply a thin, even layer of wood glue to all surfaces that will be joined. Don’t overdo it, but make sure it covers well.
- Join the front piece: First, glue the front to the edges of the top and bottom panels. Use screws (drill pilot holes and countersink) or a nail gun. For extra strength, a combination of glue and screws is best.
- Join the sides: Now, glue the two side pieces to the structure you already have. Make sure they are well aligned with the edges of the top and bottom.
- The “hugs” of the clamps: Use clamps to keep all joints tightly together while the glue dries. Uniform pressure is key!
- Clean up excess: If any glue squeezes out, wipe it off immediately with a damp rag. Dried glue is a headache to sand and can spoil the finish.
- Let it dry! Allow the glue to dry completely according to the manufacturer’s instructions (usually several hours or overnight).
4.3 The Glove Test: Does It Fit the Internal Cleat?
Once the box is dry and unclamped, slide it over the support you already have on the wall.
- It should slide in smoothly, with a snug fit, without too much play, but without having to force it.
- If it’s too tight, find where it rubs and sand gently (either inside the box or the wall cleat).
- If it’s too loose, there’s not much you can do, but a very loose fit might require you to add something to fill (like thin strips of wood or felt) to make it secure. A slightly snug fit is perfect.
Part 5: Add Your Personal Touch: Finishing the Shelf Box
A good finish not only protects the wood but also gives your shelf that professional look you love so much.
5.1 The Secret to Smoothness: Initial Sanding
- “Coarse” grit sanding (80-120 grit): Start by sanding all surfaces, edges, and corners with a coarser grit sandpaper. This will remove any imperfections, saw marks, glue residue, and prepare the surface. If you used plywood, sand the edges well to smooth them.
- Wood filler: Fill all screw holes, small joints, cracks, or anything you don’t like with wood filler. Let it dry completely.
- Sand the filler: Once dry, sand the filler until it is completely smooth and flush with the wood.
5.2 Baby Skin Smooth! Final Sanding and Preparation
- “Fine” grit sanding (180-220 grit): Now, continue sanding with a finer grit to remove marks from the previous sanding and leave a super smooth surface to the touch. If you’re going to stain, this uniform sanding is key for the stain to absorb evenly.
- Not a speck of dust! After sanding, thoroughly clean all wood dust. You can use a slightly damp cloth, a vacuum cleaner with a brush, or a tack cloth. It’s essential that no particles remain before applying the finish.
5.3 The Master’s Touch: Applying the Finish (Paint or Stain)
Option 1: Time to Paint!
- Primer (the base): Apply one or two coats of good quality primer. This seals the wood, helps the paint adhere better, and provides a uniform base color. If necessary, lightly sand with very fine sandpaper (220-320 grit) between primer coats and clean the dust.
- Paint: Apply two or three thin, even coats of your chosen paint. Allow adequate drying time between coats, according to the manufacturer’s instructions. Very light sanding (with a very fine grit, 320-400) between paint coats can help the finish be even smoother, especially with glossy paints.
Option 2: Time to Stain and Protect!
- Pre-stain conditioner (optional, but recommended): If you used softwoods like pine or woods with uneven grain, apply a pre-stain conditioner. This helps the stain absorb more uniformly and prevents blotchiness. Allow it to dry according to instructions.
- Wood stain: Apply the stain with a rag, brush, or pad, following the wood grain. Allow it to penetrate for the recommended time (usually 5 to 15 minutes, depending on the darkness you want), then wipe off the excess with a clean rag. If you want a darker color, apply more coats. Allow it to dry completely (usually 24 hours or more).
- Protective coat (the shield): Once the stain is completely dry, apply two or three coats of a protective sealer like polyurethane (water-based or oil-based), lacquer, or varnish. This will protect the wood from wear, moisture, and scratches.
- Sand very lightly between coats (with 320-400 grit) for better adhesion and a smoother finish. Clean the dust before each new coat.
- Follow the manufacturer’s instructions for drying times and application. Water-based polyurethane dries faster and has less odor, while oil-based is more durable but takes longer to dry and has a stronger odor.
Part 6: The Grand Reveal! Final Installation of Your Floating Shelf
With the shelf box ready and the support firmly fixed to the wall, it’s time for the final installation!
- The final fit test: Slide the finished shelf onto the wall support one last time. Make sure it fits perfectly and the shelf is level. If it’s too tight, light sanding inside the shelf or on the support can help. If it’s too loose, you can use thin strips of wood or felt to shim it for a firmer fit.
- Fixed forever! Secure the shelf to the cleat:
- Once the shelf box is in place over the support, permanently secure it.
- From the top of the shelf, drill pilot holes (and countersink) that go through the top panel and into the internal support. Use wood screws of adequate length to pass through the shelf top and firmly bite into the support.
- Repeat the process from the bottom of the shelf, if you can access it and if your design or the need for more security requires it.
- Place the screws near the back of the shelf so they are barely visible once you put your items on it.
- The number of screws will depend on the length of the shelf and the weight you expect it to hold. Generally, one every 30-45 cm (12-18 inches) is sufficient.
- The invisible touch (optional):
- If the screw holes on the top of the shelf are visible and you want to hide them, you can fill them with wood filler, sand gently when dry, and then touch up the finish.
- Another option is to use wood plugs of the same wood type, glue them into the holes, then sand them flush and apply the finish.
Part 7: Master Tricks for Success (and Solutions to Small Challenges)
7.1 Precision, Precision, and More Precision!
- The mantra: “Measure twice, cut once.” This old carpenter’s adage is pure gold. An error of a few millimeters can cause the box not to fit the support.
- Straight and square cuts: Use guides for your circular saw or take advantage of a table saw or miter saw to ensure all cuts are perfectly straight and at 90 degrees.
7.2 The Power of Clamps (Your Silent Helpers)
Never underestimate the importance of clamps when gluing. They ensure strong joints and prevent pieces from moving while the glue works its magic. Use as many as you can!
7.3 Safety Always Comes First!
- Personal protection: Glasses, hearing protection, and a mask are mandatory. Don’t take chances!
- Safe tool handling: Read the manuals. Keep hands away from blades. Use push sticks when working with a table saw.
7.4 How Much Weight Will It Hold? (Load Capacity)
- Wall studs: The key to holding maximum weight is anchoring the support directly into the wall studs.
- Wall anchors: If there are no studs, use heavy-duty wall anchors (like toggle bolts) that are rated for the weight you need.
- Support design: For very heavy loads or very deep shelves, consider a more robust support (e.g., a 2×4 instead of a 2×3) and add more internal arms.
- Shelf material: Solid wood or good quality plywood are more resistant than MDF for the shelf box.
7.5 The Small Details That Make a Difference
- Edge banding for plywood: If you don’t want the plywood layers to show, glue on some iron-on edge banding or thin wood strips before sanding and finishing.
- Corners: Slightly round the edges with a router (with a small radius bit) or sandpaper for a softer feel and a less angular look.
- Finish coats: It’s better to apply several thin coats of paint or varnish than one thick coat. Sand lightly between each coat for better adhesion and a smoother finish.
7.6 For When You’re an Expert! Advanced Designs
- Multiple shelves: If you’re making a set, plan the spacing between them carefully for visual balance.
- Corner shelves: A floating corner shelf can maximize space, but the design of the support and box is a bit more complex.
- Integrated lighting: How about some LED lights under the shelf for a warm ambiance? You’ll need to plan a channel in the design and how to hide the cables.
7.7 If Something Goes Wrong: Common Problem Solving
- Tilted shelf: Check the level of the support on the wall. If the support is level, the problem could be the box dimensions or how it slides.
- Wobbly shelf: The support is probably not well anchored to the studs, or you haven’t used enough screws to secure the shelf to the support.
- Blotchy/uneven finish: This usually happens due to uneven sanding, not cleaning dust before applying the finish, or not using a pre-stain conditioner on porous woods.
And There You Have It… Your Masterpiece!
Building a custom floating shelf from scratch is a woodworking project that, if done with care and precision, will reward you with a beautiful, super useful piece of furniture that will fit perfectly in your home. From the first idea and material selection, through the robust construction of the support and box, to the perfect finish and final installation, each step brings you closer to success.
This process not only gives you a high-quality, custom-made shelf but also helps you improve your DIY skills for future projects. The satisfaction of seeing your vision materialized into a functional and beautiful piece is the greatest reward. Enjoy the process of creating your own floating shelf and show off your creation!